


Carel srl: pCO Stage Controller
page 8
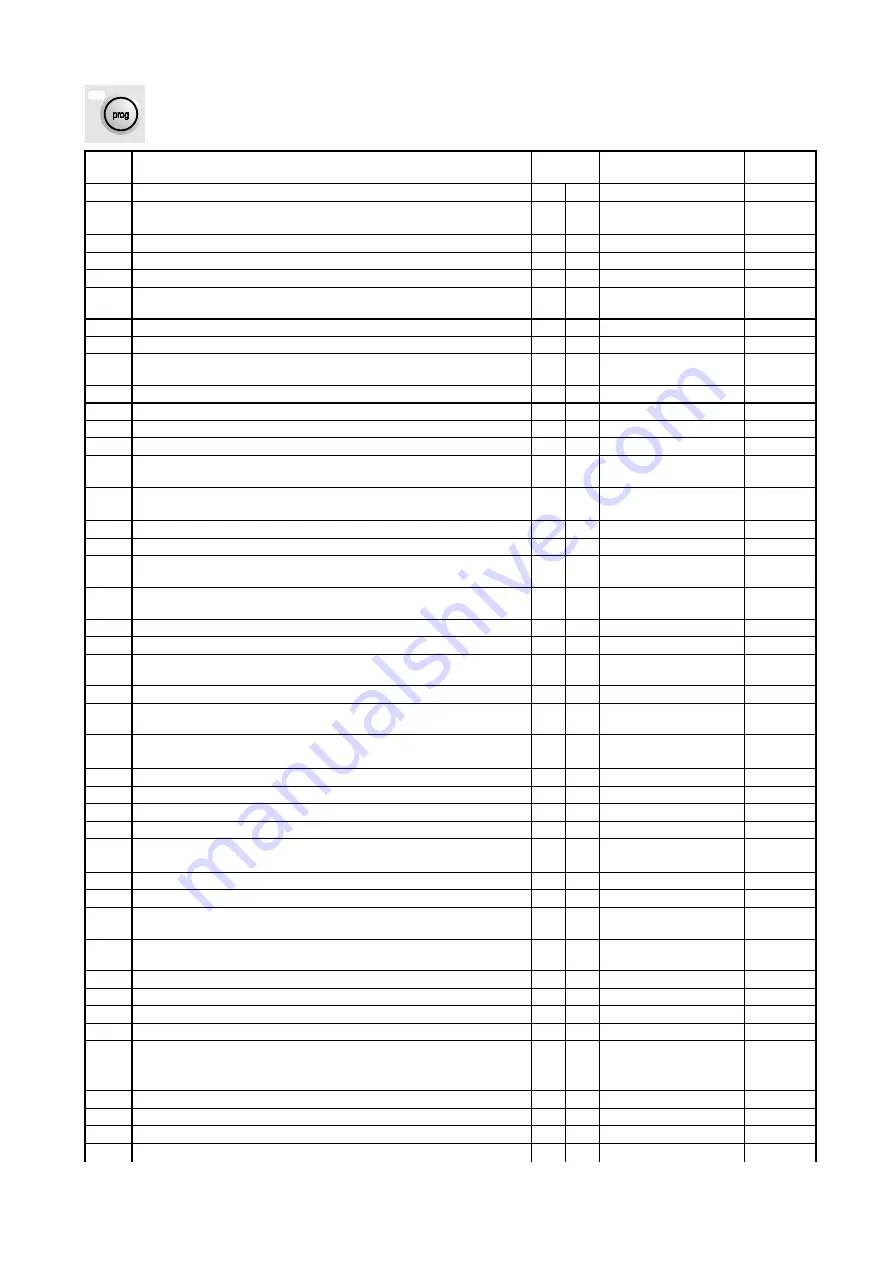
Programming button
Code
Description
Default
Rating
Unit of
measure
PSn
password that allows access to the programming branch
0
0
÷
999
P1
probe 1 type
3
0
→
absent 1
→
active
2
→
passive 3
→
keller
P2
probe 1 lower range (only if P1=3)
-0.5 -0.5
÷
30
bar
P3
probe 1 higher range (only if P1=3)
7
-0.5
÷
30
bar
P4
probe 1 device number (only if P1>0)
5
0
÷
11
P5
operating probe 1 devices with active broken-probe alarm (only
if P1>0 and P4>0)
0
0
÷
P4
P6
number of voltage variations (see explanation)
0
0
÷
3
P7
logic of voltage variations (only if P1>0 and P4>0 and P6>0)
0
0
→
n.excit. 1
→
n.deen.
P8
minimum time between compressor starting and voltage
variations (only if P1>0 and P4>0 and P6>0)
10
0
÷
999
sec
P9
full/par activation of volt. variations (only if P1>0 and P4>0 and P6>0)
0
0
→
full 1
→
partial
P10
turn on minim. time of the probe 1 devices (only if P1>0 and P4>0 )
60
0
÷
999
sec
P11
turning off minim. time of the probe 1 devices (only if P1>0 and P4>0)
120 0
÷
999
sec
P12
min. time between probe 1 device turning on (only if P1>0 and P14=1)
10
0
÷
999
sec
P13
minimum time between probe 1 same device turning on “Anti-
court cycle” (only if P1>0 and P4>0)
360 0
÷
999
sec
P14
regulation with neutral zone or lateral band of probe 1 circuit
(only if P1>0 and P4>0)
0
0
→
neutral z.
1
→
lat. band
P15
type of regulat. of the probe 1 circuit (only if P1>0 and P4>0 and P14=1)
0
0
→
P 1
→
P+I
P16
integrat. time of the primary circuit (only if P1>0 and P4>0 and P15=1)
600 300
÷
900
sec
P17
time between turning on requests of the probe 1 devices (only if
P1>0 and P4>0 and P14=0)
20
0
÷
999
sec
P18
time between turning off requirements of the probe 1 devices
(only if P1>0 and P4>0 and P14=0)
10
0
÷
999
sec
P19
rotation enabling of the probe 1 devices (only if P1>0 and P4>1)
1
0
→
disable 1
→
enable
P20
inverter enabling of the device no. 1/valve (see explanation)
0
0
→
disable 1
→
enable
P21
analog input enabling for setpoint variation (only if P1>0 and
P4>0 and P22=0)
0
0
→
disable 1
→
enable
P22
enabling of the air temperature probe (only if P21=0)
0
0
→
disable 1
→
enable
P23
enabling of probe 1 compensation (only if P1>0 and P4>0 and
P21=0 and P22=1)
0
0
→
disable 1
→
enable
P24
probe 2 type
3
0
→
absent 1
→
active
2
→
passive 3
→
keller
P25
probe 2 lower range (only if P24=3)
0
-0.5
÷
30
bar
P26
probe 2 higher range (only if P24=3)
30
-0.5
÷
30
bar
P27
probe 2 device number (only if P24>0)
5
0
÷
11
P28
min. time betw. turning on of the probe 2 devices (if P24>0 and P27>1)
2
0
÷
999
sec
P29
regulation with neutral zone or lateral band of the probe 2 circuit
(only if P24>0 and P27>0)
1
0
→
neutral z.
1
→
lat. band
P30
type of regulat. of the probe 2 circuit (only if P24>0 and P27>0 and P30=1)
0
0
→
P 1
→
P+I
P31
integration time of the sec. circuit (only if P24>0 and P27>0 and P31=1)
600 300
÷
900
sec
P32
time between turning on request of the probe 2 devices (only if
P24>0 and P27>1 and P30=0)
20
0
÷
999
sec
P33
time between turning off requests of the probe 2 (only if P24>0
and P27>1 and P30=0)
10
0
÷
999
sec
P34
rotation enabling of the probe 2 devices (only if P24>0 and P27>1)
1
0
→
disable 1
→
enable
P35
enabling of fan inveter
0
0
→
disable 1
→
enable
P36
alarm delay of low pressure/flow regulator (only if P4>0 and/or P27>0)
40
0
÷
999
sec
P37
enabling of self-starting procedure
1
0
→
disable 1
→
enable
P38
type of cooling gas (refrigerant)
1
0
→
not sel. 1
→
R22
2
→
R134a 3
→
NH3
4
→
R404a
P39
°C or °F display
0
0
→°
C;
→°
F
P40
remote on/off selection
0
0
→
disable 1
→
enable
P41
clock enabling
0
0
→
disable 1
→
enable
P42
printer enabling
0
0
→
disable 1
→
enable