


docs.carbide3d.com
8/26/2020
Version 1.0
35
Update Your Machine Settings
Update Software
1.
Download and install Carbide Motion from:
https://carbide3d.com/carbidemotion/download/
2.
Confirm all of the proximity switches and motors are connected correctly, then, ensure that there is nothing
restricting the Shapeoko’s mo
vement.
Update Settings
Now, you’re
ready to turn the Shapeoko on and make the required software changes.
1.
Connect your machine to Carbide Motion.
a.
Plug in your USB cable.
b.
Open Carbide Motion.
c.
Turn on your Shapeoko.
d.
Click the Connect to Cutter button.
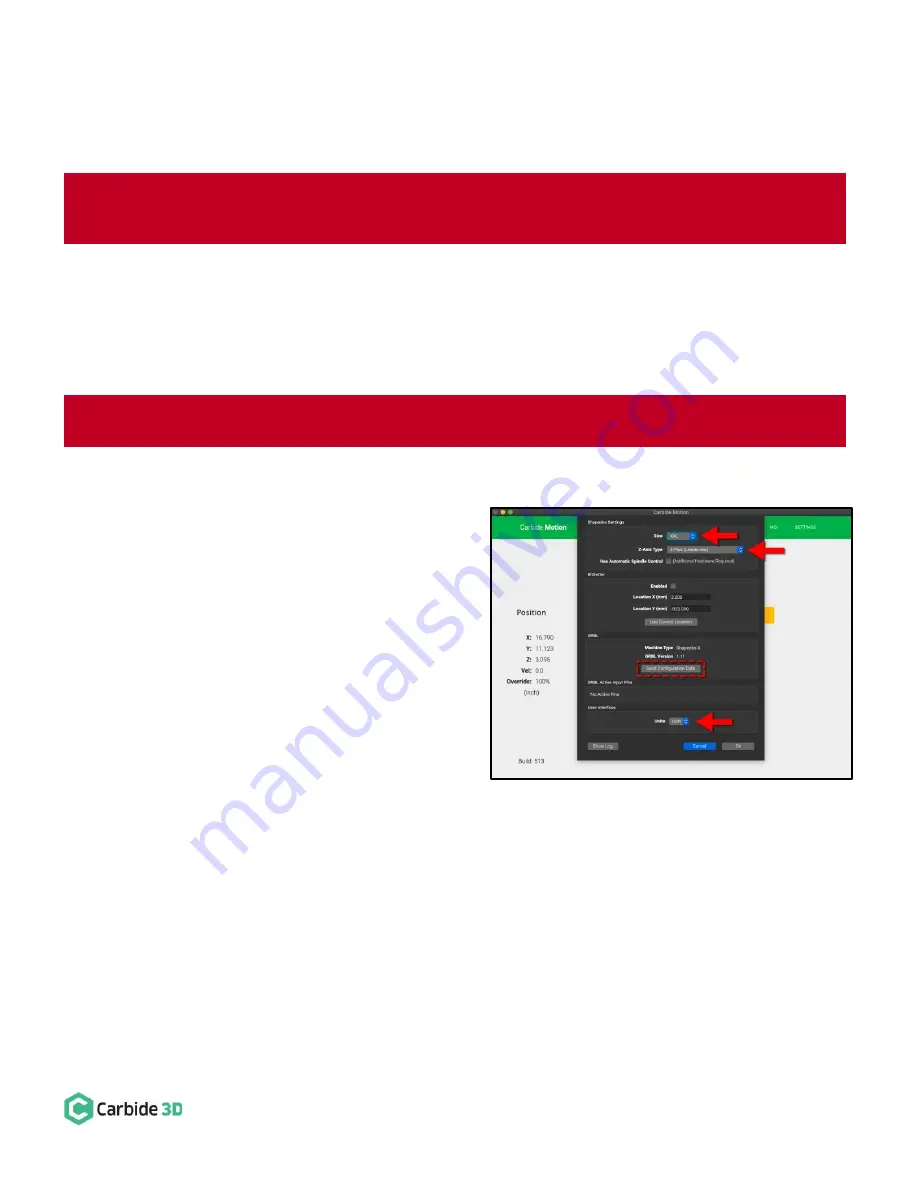
2.
Update your machine settings. See
Fig. 37
.
a.
Click Settings in the top menu bar.
b.
In the Settings window, choose your
Shapeoko size from the Size dropdown list,
then choose
“
Z-Plus (Leadscrew)
” from the
Z
‑
Axis Type dropdown list, then choose
“Inches” or “MM” from the
Units
dropdown list.
c.
Click the Send Configuration Data button in the middle of the dialog window.
d.
The configuration data will send. Wait until this has finished before moving on to test your proximity
switches.
WARNING:
The Z-Plus is supported by Carbide Motion 4.17 onwards. Do NOT use an older version of Carbide
Motion.
WARNING: DO NOT
try to home or jog the Shapeoko before applying the updated settings.
Figure 37


