docs.carbide3d.com
05/01/20
v1.1
8
Connect to the Router and Power
1.
Plug the spindle/router power cord into the BitRunner.
2.
Plug the BitRunner power cord into a wall outlet.
Upgrade Carbide Motion (If Necessary)
If your kit contains a new Carbide Motion board, you need at least Carbide Motion 4. Check for the build
number in the bottom-left corner of Carbide Motion
—
build numbers higher than 400 do not need to be
upgraded. If you have an older version of Carbide Motion, to upgrade your software, download the updated
version from:
carbide3d.com/carbidemotion/download
and install it to your computer.
How to Use the BitRunner
Power Switch Options
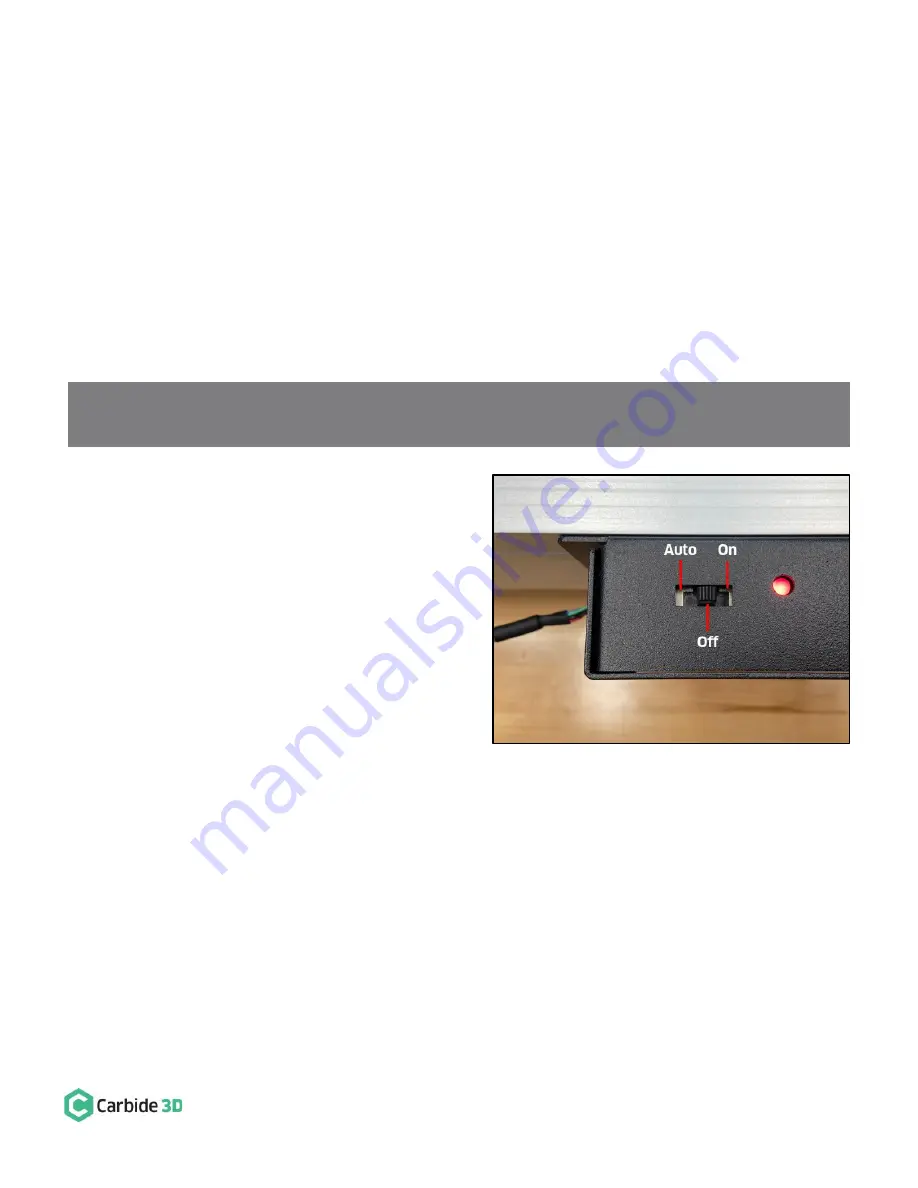
The BitRunner power switch has three (3) positions
(see
Figure 8
):
1.
Left (Forward): Auto On/Off, the LED is green
or red. The G-code (or absence thereof)
determines when BitRunner cuts or supplies
power to the router. If there is no G-code/.nc
file being executed in Carbide Motion, then no
power is supplied to the router. When G-code
is being executed in Carbide Motion, the
commands will determine if power is on or off.
a.
An M3 S command of 1000 or greater
(1000 is the RPM) automatically turns
the router on. M3 S2800 is an example M3 S command. Alternately, you might see commands
written like this: M3S2800.
b.
An M5 command turns the router off.
c.
An M6 command indicates a tool change.
2.
Middle: Always Off, the LED is red. Power is cut to the router.
3.
Right (Rear): Always On, the LED is green. Power is supplied to the router.
Figure 8
NOTE:
If you
experience any problems with your BitRunner, don’t worry, we’ve got you covered! Just send an
and we’ll get you taken care of ASAP.


