10
11
Instruction manual WMi4000
Instruction manual WMi4000
Please keep this instruction manual for future reference
Please keep this instruction manual for future reference
I N S TA L L AT I O N
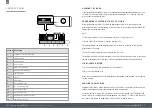
U N PAC K I N G T H E WA S H I N G M AC H I N E
Unpack your washing machine and check if there is any damage during the transportation. Also
make sure that all the items (as shown on page 9) in the attached bag are received. If there is
any damage to the washing machine during the transportation, or any item is missing, please
contact your retailer immediately.
D I S P O S E O F T H E PAC K I N G M AT E R I A L S
WARNING:
Keep packaging materials away from children.
The packing materials of this machine may be dangerous to children. Please dispose of them
properly. Please dispose of the related packing materials according to the relevant local
regulations. Please do no throw the packing materials away together with the other daily
living disposals.
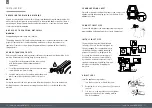
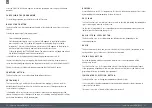
R E M OV E T R A N S P O RT B O LT S
Before using this washing machine, transport bolts must be removed from the backside of this
machine. Please take the following steps to remove the bolts:
1. Loosen all bolts with spanner and then remove along
with the flat washers, rubber bungs and plastic
spacer tubes.
2. Cover the open transportation bolt holes with the plastic
cap included in the instruction bag.
3. Keep the transport bolts, flat washers, rubber bungs and
plastic spacer tubes stored away safely for future use.
NOTE:
During the removal of the bolts, spacer tubes fall inside the product. These can be removed
by tilting the product forward and recovering them from the floor or inside the base of the
machine.
min 50 cm
max 85 cm
+2,6 mt
max
max 100 cm
min 4 cm
Overflow
vent
min 50 cm
max 85 cm
+2,6 mt
max
max 100 cm
min 4 cm
Overflow
vent
1
2
3
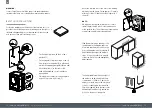
S O U N D P R O O F I N G S H E E T
Place the corrugated sound-proofing sheet, found on top of the
appliance during the unpacking process, into the base of the
appliance as shown.
C O N N E C T I N L E T P I P E
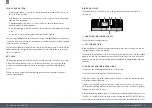
Connect the inlet pipe to the water supply tap only using the
pipe supplied with the appliance (do not reuse old pipe-sets).
I N S TA L L I N L E T P I P E
The washing machine should be installed in
its final position such that the inlet pipe is not
kinked or trapped. The corrugated drain hose
should be inserted into suitable drain pipe of
between 50cm and 85cm height above the
floor using the curved drain hose support. If
an under sink connection is used the drain
hose must be routed above the sink overfill
opening to prevent back siphoning. Care must
be taken to avoid kinking or trapping the
drain hose.
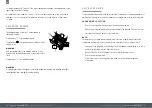
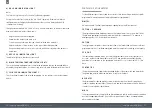
A D J U S T L E G S
Level the appliance using the feet:
1. Turn the nut clockwise to release the screw.
2. Rotate the foot to raise or lower it until it touches to
the floor.
3. Lock the foot, screwing in the nut, until it tightens
against to the bottom of the washing machine.
Plug in the appliance.


