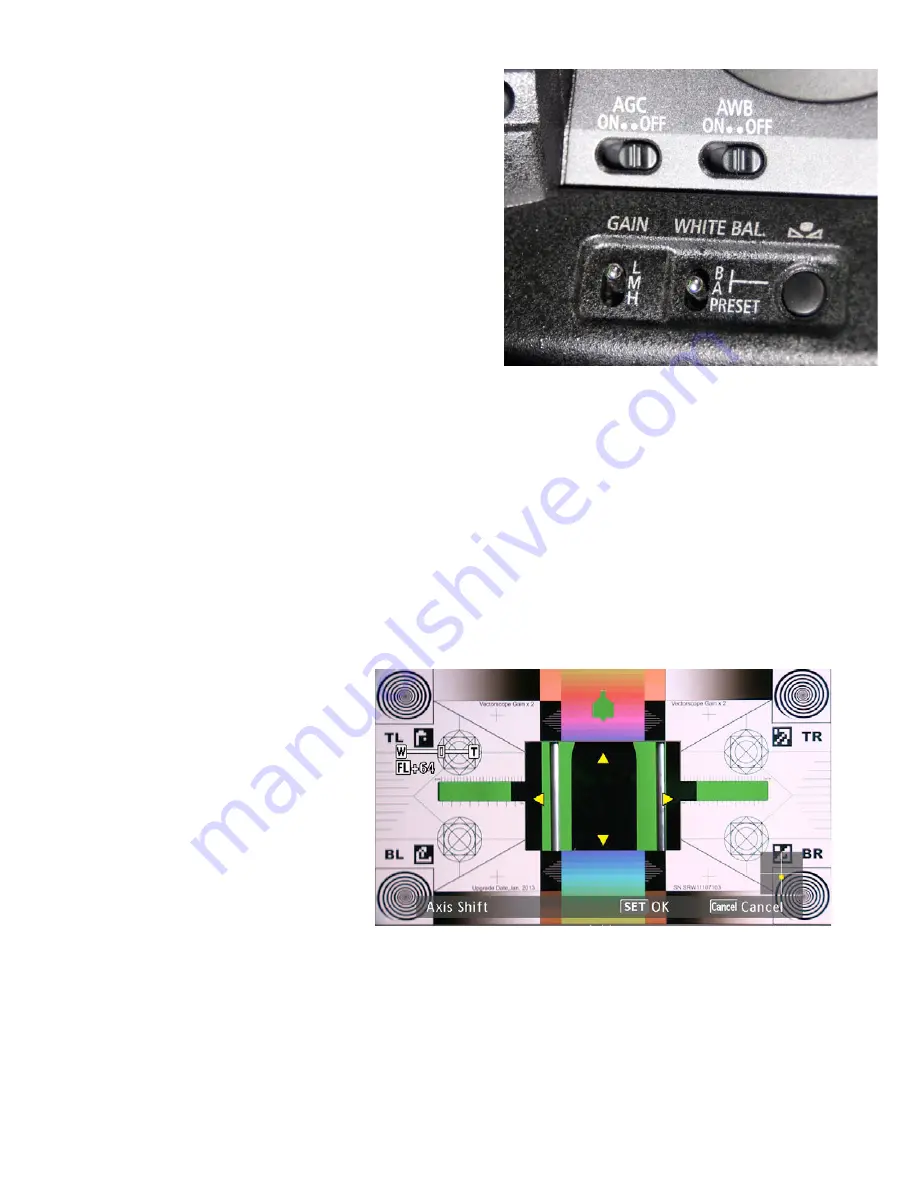
Manually Set White Balance
Use a white card, chart or 18% gray card to set the
manual white balance of both cameras. On
beamsplitter rigs it is not advisable to use preset
white balance settings because the mirror glass
introduces its own tint to the image on each camera.
Set the WB switch to either A or B and press and hold
the AWB button to execute the white balance
sequence.
Using lens axis shift built-in function
Before you mount the cameras in a beamsplitter rig
fi
rst open the CAMERA SETUP-OIS FUNCTIONS
submenu, select AXIS SHIFT and then RESET. Now mount the cameras into the rig, set the interaxial
distance to zero, set the zoom lenses to the same focal length, and adjust the controls on your rig to
align the images of the two cameras. It is best to use a left right signal muxer to see the camera
images superimposed or use a professional stereoscopic monitor that can accept left and right HD-
SDI inputs.
If you have aligned your rig as closely as you can get it you can take it one step further within the
camera and utilize the LENS AXIS
SHIFT to tune out vertical disparity
or converge on any point. Just open
the CAMERA SETUP-OIS FUNCTIONS
submenu, select AXIS SHIFT and
then select ADJUST. You will see
four yellow triangles and will be able
to move the optical axis up/down or
side to side to achieve
fi
ner
alignment. When you are happy
with position press SET.
Although the lens axis shift function is available in the cameras, the author recommends that it not
be used if stereoscopic post-production software will be available for use to
fi
ne tune the alignment.
XF300/305 Whitepaper
Stereoscopic 3D
Tim Dashwood
15
Summary of Contents for XF105
Page 1: ......


