


23
Printing ID Photos
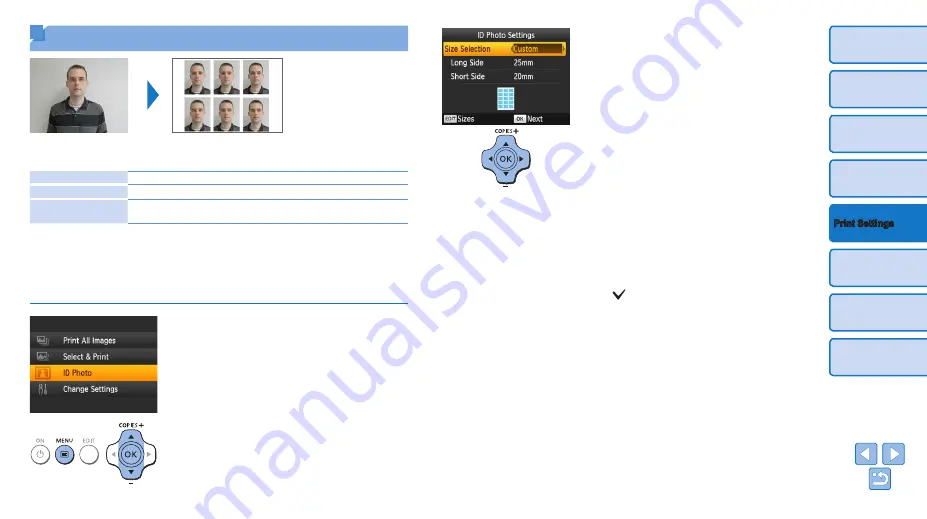
Images can be printed for use in photo identification. Choose from the
following three sizes.
[Custom]
Specify the length of the long and short sides, and then print.
[Standard]
Print a photo that complies with the international ICAO standard.
[Dual]
Print two sizes: 50x50 mm (approx. 2.0x2.0 in.) and 45x35 mm
(approx. 1.8x1.4 in.).
z
z
With [Custom] and [Standard], two different images can be printed on
each sheet.
z
z
The photo may not be accepted as an official ID photo, depending on
the intended purpose. For details, contact the institution that requires the
photo.
1
Specify ID photo printing.
z
z
Press the <
k
> button.
z
z
Press the <
u
><
d
> buttons to select [ID
Photo], and then press the <
o
> button.
2
Specify the finished size of the
photo.
z
z
Press the <
l
><
r
> buttons to specify
how the size is determined.
z
z
[Custom]: Press the <
u
><
d
> buttons
to select [Long Side], and then press the
<
l
><
r
> buttons to specify the length.
Specify the [Short Side] length, and then
press the <
o
> button again. Note
that options available for [Short Side]
are automatically updated based on the
[Long Side] length.
z
z
[Standard] or [Dual]: Check the indicated
image size and press the <
o
> button.
3
Choose an image to print.
z
z
Press the <
l
><
r
> buttons to select an
image, and then press the <
u
> button.
is shown in the lower right (up to two
images with [Custom] and [Standard],
only one image with [Dual]).
z
z
To specify the cropping area (
),
press the EDIT button.
z
z
Print as described in step 6 of “Printing
Images” (
).
z
z
Settings are cleared after printing.


