4
-8
Adjust the Image
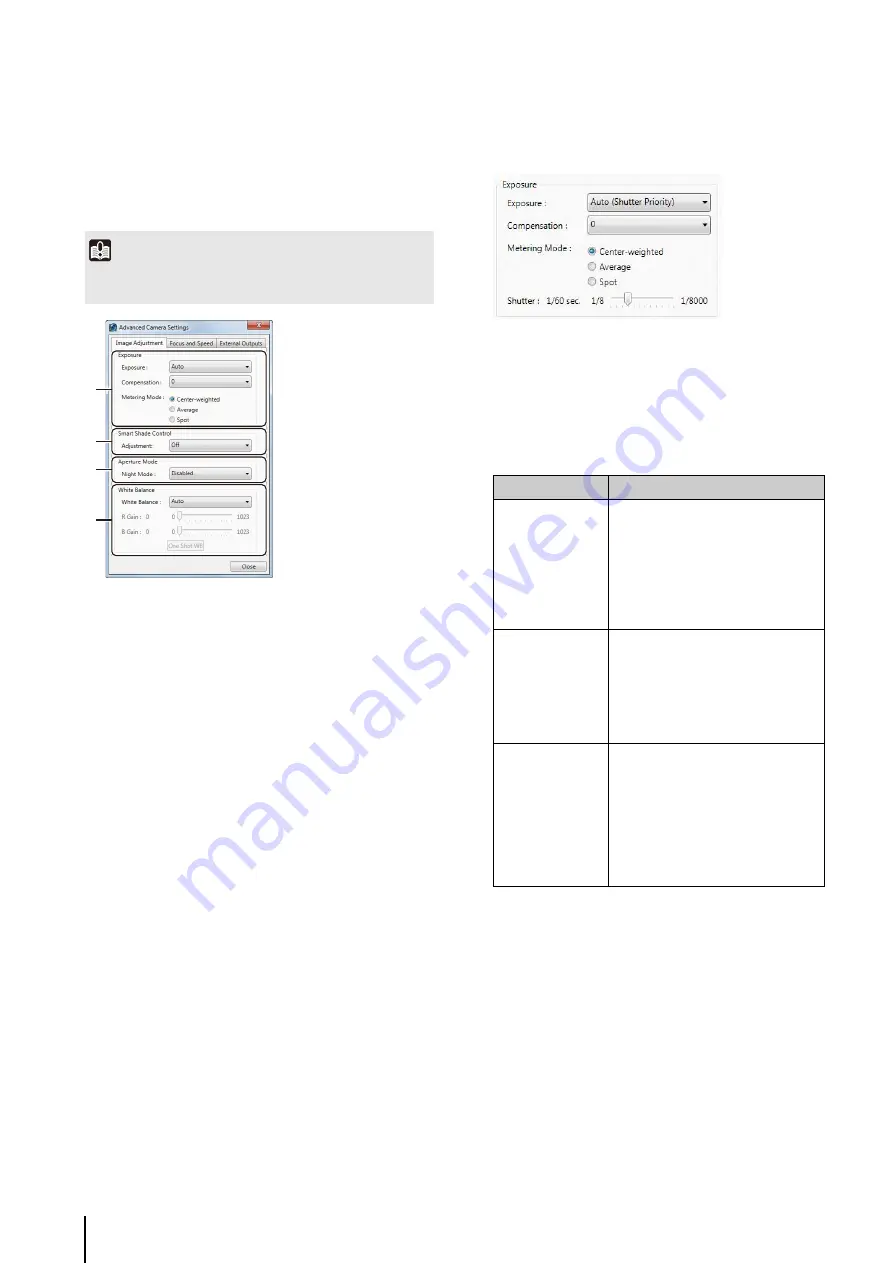
Adjust the image quality using the [Image Adjustment] tab
in the [Advanced Camera Settings] dialog box.
[Image Adjustment] tab
➀
[Exposure]
The settings change according to the selected
exposure setting.
• [Auto]
Automatically control the exposure.
• [Auto (
S
hutter Priority)]
Specify the shutter speed.
• [Auto (Flickerless)]
Reduce flicker from light sources, such as
fluorescent lighting. The shutter speed is
automatically adjusted according to the lighting
conditions.
The exposure compensation setting is displayed when
[Auto], [Auto (Shutter Priority)] or [Auto (Flickerless)] is
selected.
[Compensation]
: Specify exposure compensation using
seven levels, from -3 to +3 (alternately [Off],
[Low], [Medium], [High]). Select negative
values to darken the image and positive values
to lighten the image.
[Metering Mode]
: Specify the metering mode setting:
[Center-weighted], [Average], or [Spot].
[
S
hutter]
: Specify the shutter speed when [Exposure] is
set to [Auto (Shutter Priority)] using 12 levels,
from 1/8 to 1/8000 seconds.
Important
The settings may be different for different camera models. For
details, see the camera manual.
➀
➁
➂
➃
Metering mode
Description
[Center-weighted]
Meters the entire image, focusing on
the center of the image.
A correct exposure is obtained for a
subject near the center of the image,
even though the periphery may be
slightly darker or lighter.
Use for subjects that are in the center
of the image.
[Average]
Meters the entire image by averaging.
A uniform exposure is obtained even
when the scene has significant
differences in brightness.
Use for scenes where, for example,
cars are passing through or people
are entering and exiting.
[Spot]
Meters the center of the image.
The correct exposure is obtained for a
subject near the center of the image,
irrespective of the brightness of the
periphery.
Use if the subject is lit by a spotlight or
is backlit, where the exposure should
be adjusted to the center of the
image.
Summary of Contents for RM-Lite 1.0
Page 7: ...vii ...
Page 12: ...xii ...
Page 22: ...1 10 ...
Page 23: ...Chapter 2 Setup How to install the software Settings after installation ...
Page 28: ...2 6 ...
Page 43: ...Chapter 4 Viewer Settings Configuring the Viewer Configuring a camera Creating a layout ...
Page 56: ...4 14 ...
Page 76: ...6 14 ...
Page 82: ...7 6 ...
Page 86: ...8 4 ...
Page 96: ...9 10 ...
Page 97: ...Appendix ...
Page 103: ...Index 10 7 Appendix ...


