


89
Before Use
Basic Guide
Advanced Guide
1
Camera Basics
2
Creative Shot Mode
3
Auto Mode / Hybrid Auto
Mode
4
Other Shooting Modes
6
Playback Mode
7
Wi-Fi Functions
8
Setting Menu
9
Accessories
10
Appendix
Index
5
P Mode
●
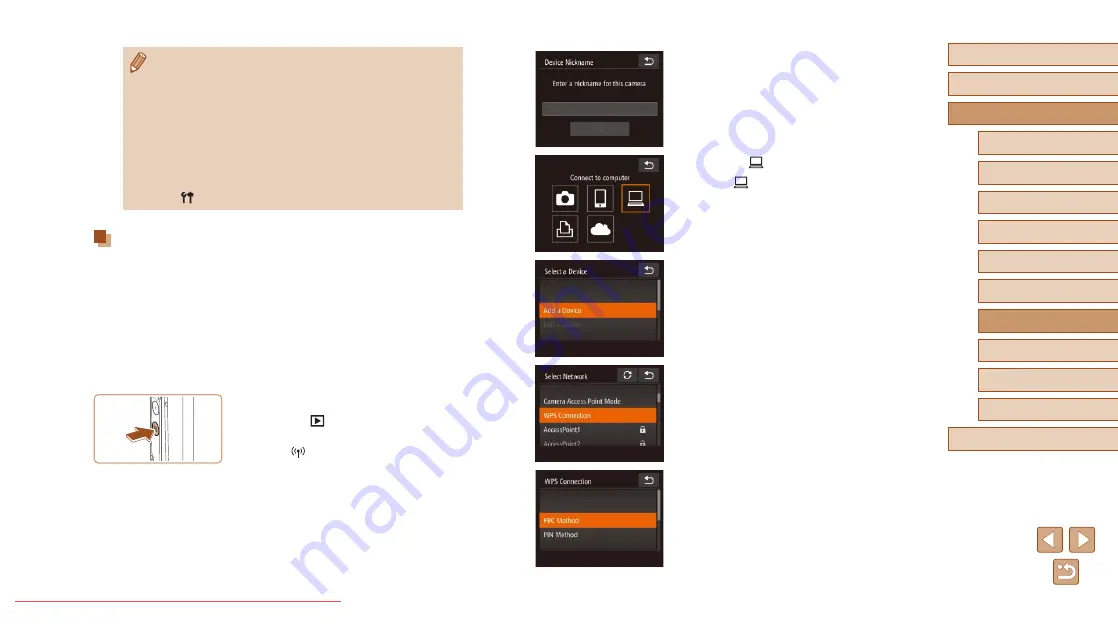
When the [Device Nickname] screen
is displayed, touch the text box to
access the keyboard. Use the keyboard
displayed to enter a nickname (
On the [Device Nickname] screen, touch
[OK].
3
Choose [ ].
●
Touch [
].
4
Choose [Add a Device].
●
Touch [Add a Device].
5
Choose [WPS Connection].
●
Touch [WPS Connection].
6
Choose [PBC Method].
●
Touch [PBC Method].
●
For information on WPS compatibility and for instructions on
checking settings, refer to the access point user manual.
●
A router is a device that creates a network (LAN) structure for
connecting multiple computers. A router that contains an internal
Wi-Fi function is called a “Wi-Fi router”.
●
This guide refers to all Wi-Fi routers and base stations as “access
points”.
●
If you use MAC address filtering on your Wi-Fi network, be sure
to add the camera’s MAC address to your access point. You can
check your camera’s MAC address by choosing MENU (
> [
] tab > [Wi-Fi Settings] > [Check MAC Address].
Using WPS-Compatible Access Points
WPS makes it easy to complete settings when connecting devices over
Wi-Fi. You can use either Push Button Configuration Method or PIN
Method for settings on a WPS supported device.
1
Confirm that the computer is
connected to an access point.
●
For instructions on checking the
connection, refer to the device and
access point user manuals.
2
Access the Wi-Fi menu.
●
Press the [
] button to turn the camera
on.
●
Touch [
].


