background image

Basic Functions  

& Features

Contents

Things to  

Remember

Mastering  

the Basics

More Advanced 

Techniques

Appendices

44

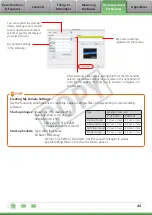
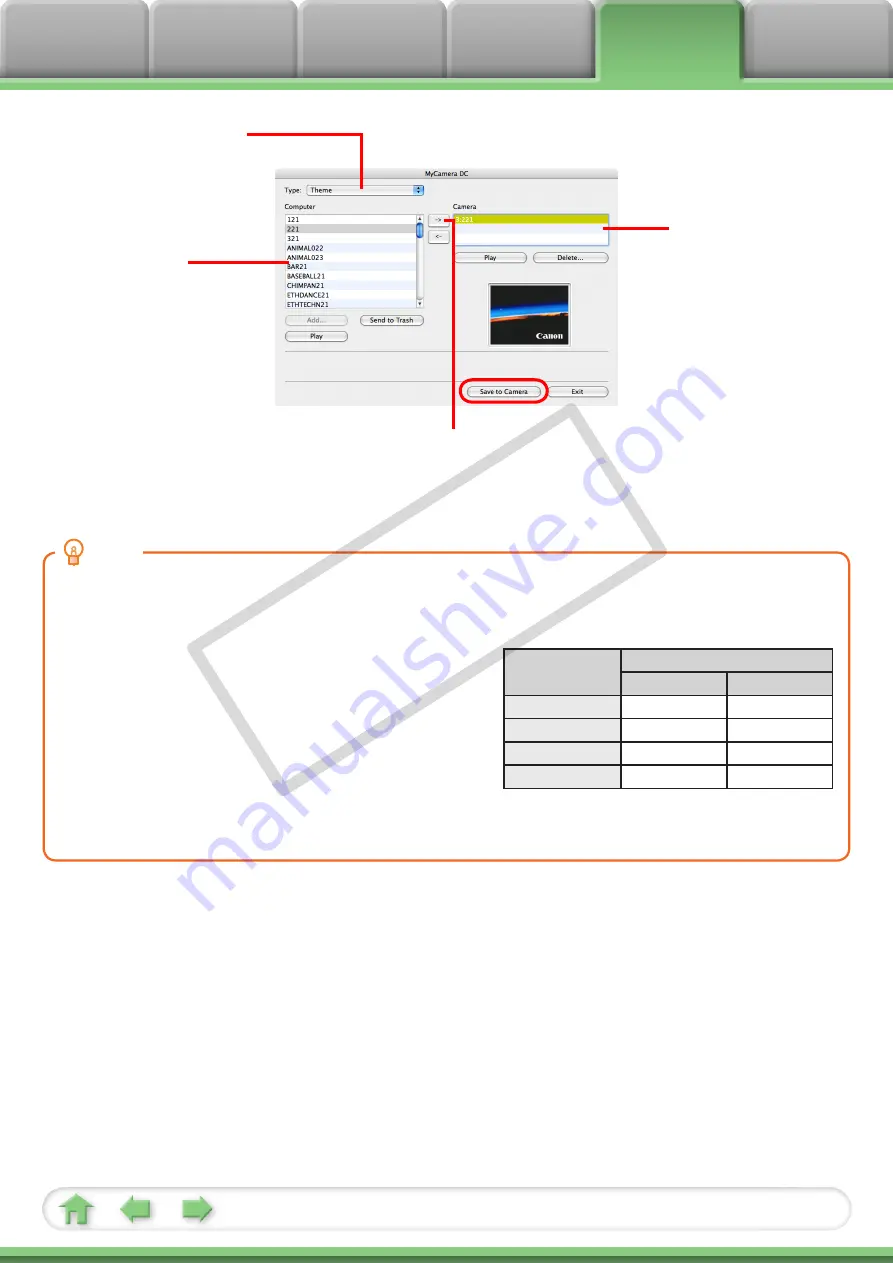
You can register the start-up 
image, start-up sound, shutter 
sound, operation sound and 
self-timer sound collectively if 
you select [Theme].

My Camera Settings 
registered in the camera.

My Camera Settings 
in the computer.

After selecting a My Camera Settings file from the left-hand list, 
select a My Camera Settings file to replace in the right-hand list 
and click this button, then click [Set to Camera]  to register it in 
the camera. 

 HINT

Creating My Camera Settings

Use the following specifications to create My Camera Settings files in image editing or sound editing 
software.   

Start-up images: 

Image Type: JPEG (Baseline JPEG)


Data Sampling: 4:2:0 or 4:2:2


Resolution (W x H):  
  

320 x 240 or 512 x 288* 


* Varies with camera model

Start-up Sounds: 

Type: WAV (Monaural)


Bit Rate / Frequency: 

8 bits (11.025 kHz or 8.000 kHz. Set the sound file length to values 
approximating those in the chart as shown above.)

Type

Duration in Seconds
11.025 kHz

8.000 kHz

Start-Up Sound

1.0 sec. or less 1.3 sec. or less

Operating Sound 0.3 sec. or less 0.4 sec. or less
Self-Timer Sound 2.0 sec. or less 2.0 sec. or less
Shutter Sound

0.3 sec. or less 0.4 sec. or less

COP

Y

Summary of Contents for PowerShot G10 - Digital Camera - Compact

Page 1: ...s Things to Remember Mastering the Basics More Advanced Techniques Appendices 1 for Macintosh Software User Guide ImageBrowser PhotoStitch How to Use This Manual New Features in This Version Click a t...

Page 2: ...e screen shots and procedures may appear slightly different if you are using another version of Mac OS The displayed screens and procedures may also differ slightly from the examples depending upon th...

Page 3: ...d images with a single click 100 0031 100 0032 100 0033 100 0034 100 0035 100 0036 100 0037 100 0038 ABC 200X 09 09 To Print Printing p 13 Print with the layouts you want To View Magnifying the Displa...

Page 4: ...ging Images into Panoramas p 28 Formatting Images as Wallpaper p 31 Saving Still Images from Movies p 21 Resizing Images p 30 Editing Movies Cutting Movies p 21 To Connect to a Camera Uploading to a C...

Page 5: ...mputer 10 Printing 13 Printing a Single Image on a Single Page 13 Index Print 15 How to Use CameraWindow 17 First Window to Open 17 Screen Showing the Image Index List and Image View 18 How to Use the...

Page 6: ...s by Shooting Date 34 Classifying Images Into Star Ratings Folders 35 Configuring Image Information Settings 36 Setting Star Ratings 36 Inserting Comments 36 Assigning Keywords 37 Searching Filtering...

Page 7: ...window which opens when a camera is connected CameraWindow View of camera images You can download all or a selection of images from the connected camera CameraWindow closes and the screen changes aft...

Page 8: ...s folder followed by the Canon Utilities folder ImageBrowser folder and the ImageBrowser icon Names of the Browser Window Parts Menu Bar Display Modes Last Acquired Images Displays the last images dow...

Page 9: ...9 How to Perform Tasks Selecting and Using Functions You can use many ImageBrowser functions by selecting them from the Control Panel or a menu and then following the instructions in the window that...

Page 10: ...e software See the guides supplied with your product package for software installation procedures If CameraWindow fails to open when you connect the camera click the CameraWindow icon in the Dock the...

Page 11: ...odels only classification These are virtual folders Folders containing newly acquired images Images from memory cards with large numbers of images more than 1 000 may not download correctly If this ha...

Page 12: ...ding Using Camera Commands You can use the camera s Print Share button to download the images to the computer Direct Transfer See the Camera User Guide for Direct Transfer settings and procedures Down...

Page 13: ...ents Things to Remember Mastering the Basics More Advanced Techniques Appendices 13 2 Click Print Email and Photo Print 1 Select images for printing Printing Printing a Single Image on a Single Page P...

Page 14: ...ts the shooting date time imprint settings 4 Click Print Print window will display 5 Click Print Printing will start HINT Laying Out and Printing You can also select multiple images add captions and p...

Page 15: ...ons Features Contents Things to Remember Mastering the Basics More Advanced Techniques Appendices 15 Index Print Prints an index of the images 1 Select images for printing 2 Click Print Email and Inde...

Page 16: ...inting will start 3 Set the categories as desired Sets the printer paper size and number of print copies settings Rotates selected images Click here to crop a portion of the selected image and print i...

Page 17: ...ced Techniques Appendices 17 How to Use CameraWindow First Window to Open This is the first screen to appear in CameraWindow Downloads all images that have not yet been downloaded Closes this window a...

Page 18: ...Switches between window display modes Configures settings such as the thumbnail size and download folder Configures the name of the camera owner Uploads computer images to the camera A symbol appears...

Page 19: ...t Get Info Canon Camera Displays CameraWindow View Image Displays the selected image in the Viewer Window Slide Show Displays the selected images in succession in the window Rotate Image To rotate ima...

Page 20: ...f the thumbnails Functions Used in the Browser Area Create New Folder To create a new folder in the Browser Area click the File menu and select New Folder Select Images Clicking an image in the Browse...

Page 21: ...e images side by side Display the shooting information You can configure the information display by clicking the ImageBrowser menu and selecting Preferences Display at full screen size Shooting inform...

Page 22: ...lso start the same process by clicking the Edit menu and selecting Edit still image Trimming Cropping a Portion of an Image Use this to delete unnecessary portions of the image and leave only the nece...

Page 23: ...es and RAW images cannot be edited Inserting Text Use this to insert text onto the image Procedures 1 Double click an image 2 Edit and Insert Text Placing a checkmark in the Antialias box causes the t...

Page 24: ...while viewing its histogram Correcting Tone Curves You can adjust the color balance and brightness of an image using its tone curve input output conversion graph of image brightness Tone Curve Adjust...

Page 25: ...images appear sharper by emphasizing the outlines of subjects such as people and objects Procedures 1 Double click an image 2 Edit and Sharpness Movies and RAW images cannot be edited Auto Adjustment...

Page 26: ...Editing Program Register the program so it can be started from within ImageBrowser Procedures 1 ImageBrowser and Preferences 2 Register Application ImageBrowser Other Image Editing Program Editing Im...

Page 27: ...heck that recording is enabled in the System Preferences Sound window To delete a recorded sound click the File menu and select Sound followed by Send to Trash To record a new sound for an image that...

Page 28: ...into one image HINT Using the Stitch Assist Mode If you use the camera s Stitch Assist mode to record the images PhotoStitch can automatically detect the image order and merge direction making it eas...

Page 29: ...ormed in the camera they can be converted on a computer with a lossless process Processing in the Camera Standard Image Capture Image Adjustment Compression JPEG Image Image sensor data from shutter r...

Page 30: ...ocedures 1 Select an image 2 File and Export Image 3 Edit and Save Image 4 Next You will lose the shooting information if you save images as a type other than JPEG bmp jpg tif Exporting Shooting Infor...

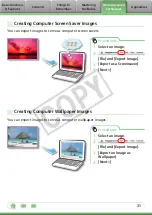
Page 31: ...r Images You can export images to serve as computer screen savers Creating Computer Wallpaper Images You can export images to serve as computer wallpaper images Procedures 1 Select an image 2 File and...

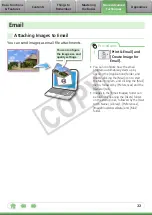
Page 32: ...Print Email and Create Image for Email You can configure how the email program automatically starts up by opening the Applications folder and double clicking the Mail icon to start the Mail program an...

Page 33: ...elect images 2 SlideShow You can configure the slide show display method by clicking the View menu and selecting Slide Show Options HINT Slide Show Button Functions The following buttons appear at the...

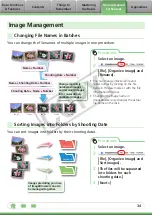
Page 34: ...05 Procedures 1 Select an image 2 File Organize Image and Rename You can change individual file and folder names by clicking on the file name in Preview mode or with the File Information Window Changi...

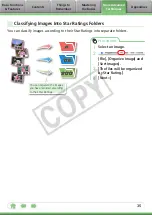
Page 35: ...fying Images Into Star Ratings Folders You can classify images according to their Star Ratings into separate folders You can organize the images you have recorded according to their Star Ratings Proce...

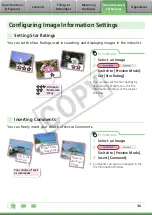
Page 36: ...res 1 Select an image 2 Switch to Preview Mode 3 Set Star Rating You can also set the Star Ratings by accessing the Edit menu the File Information Window or the Viewer Window Inserting Comments You ca...

Page 37: ...mation This chart shows the information other than shooting information that can be added to images Information Type My Category Star Ratings Comments Keywords Content Categories such as People Scener...

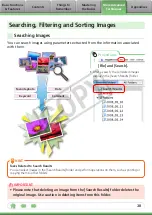
Page 38: ...omment Date Keyword Favorite photo Procedures 1 File and Search After a search the correlated images display in the Search Results folder HINT Tasks Related to Search Results You can select images in...

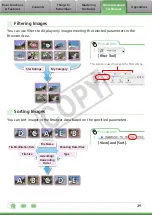
Page 39: ...isplay only images meeting the selected parameters in the Browser Area Star Ratings My Category Procedures 1 Filter Tool This section is used to specify the filter criteria Sorting Images You can sort...

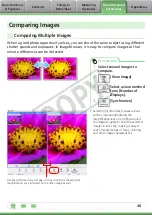
Page 40: ...ifferences can be detected Procedures 1 Select several images to compare 2 View Image 3 Select a view method from Number of Displays 4 Synchronize Selecting Synchronize causes actions such as increasi...

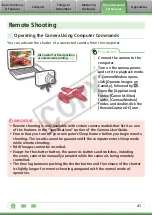
Page 41: ...er and double click the RemoteCapture DC icon IMPORTANT Remote shooting is only available with certain camera models that list it as one of the features in the Specifications section of the Camera Use...

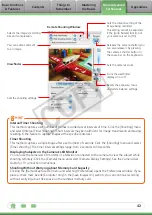
Page 42: ...enu and select Interval Timer Shooting Short intervals may be insufficient for image transmission and saving resulting in the failure to capture images at the specified interval Timer Shooting This me...

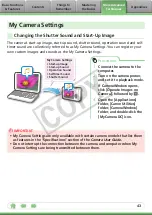
Page 43: ...ge Start up Sound Operation Sound Selftimer Sound Shutter Sound Procedures 1 Connect the camera to the computer 2 Turn on the camera power and set it to playback mode 3 If CameraWindow opens click Ope...

Page 44: ...ster it in the camera HINT Creating My Camera Settings Use the following specifications to create My Camera Settings files in image editing or sound editing software Start up images Image Type JPEG Ba...

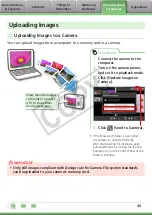
Page 45: ...er and set it to playback mode 3 Click Operate Images on Camera Show favorite images to friends or connect a TV to show them on a large screen IMPORTANT Only still images compliant with Design rule fo...

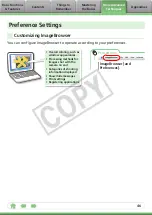
Page 46: ...ing ImageBrowser You can configure ImageBrowser to operate according to your preferences Overall coloring such as window appearances Processing methods for images shot with the camera on end Categorie...

Page 47: ...hooting data to a JPEG image RAW This is a proprietary image type provided by Canon It allows the output of the image pixels from a digital camera without any deterioration in the quality of the image...

Page 48: ...her end of a movie clip RAW Image Conversion Method Changed RAW image conversion is no longer performed within ImageBrowser instead Digital Photo Professional is now used If you are already using a RA...

Page 49: ...ght to change the specifications of the hardware and software described herein at any time without prior notice No part of this guide may be reproduced transmitted transcribed stored in a retrieval sy...

Reviews: