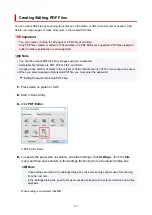


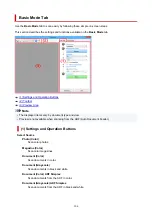


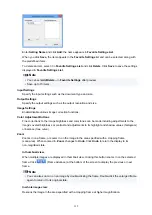


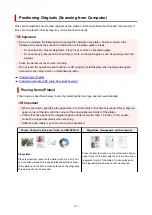

Deleting:
Select the output size you want to delete in
Output Size List
, and then click
Delete
. Click
Save
to save the items listed in
Output Size List
.
Important
• Predefined output sizes such as
A4
and
1024 x 768 pixels
cannot be deleted.
Note
• Save up to 10 items.
• An error message appears when you enter a value outside the setting range. Enter a value
within the setting range.
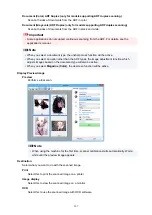
Note
• For details on whether or how the cropping frame initially appears on a preview image, see
Cropping Frame on Previewed Images
in
Preview
Tab of the
Preferences
dialog box.
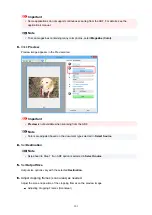
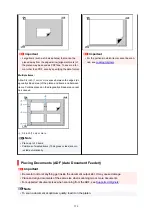
Invert aspect ratio
Available when
Output Size
is set to anything but
Flexible
.
Click this button to rotate the cropping frame. Click again to return it to the original orientation.
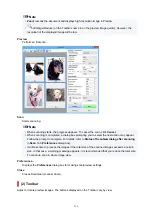
Adjust cropping frames
Adjust the scan area within the Preview area.
If an area is not specified, the document will be scanned at the document size (Auto Crop). If an area
is specified, only the portion in the cropping frame will be scanned.
Adjusting Cropping Frames (ScanGear)
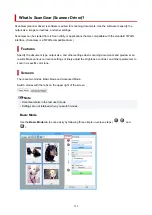
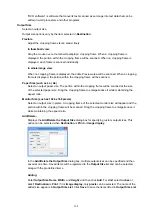
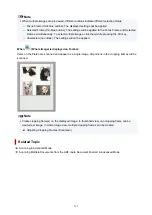
Image corrections
Correct the image to be scanned.
Important
•
Apply Auto Document Fix
and
Correct fading
are available when
Recommended
is selected
on the
Color Settings
tab of the
Preferences
dialog box.
Note
• Available functions vary by the document type selected in
Select Source
.
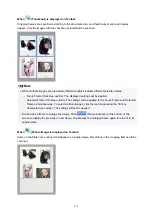
Apply Auto Document Fix
Sharpens text in a document or magazine for better readability.
Important
• Scanning may take longer than usual when this checkbox is selected.
• The color tone may change from the source image due to corrections. In that case, deselect
the checkbox and scan.
• Correction may not be applied properly if the scan area is too small.
Correct fading
Corrects photos that have faded with time or have a colorcast.
309
Summary of Contents for PIXMA TR4720
Page 1: ...TR4700 series Online Manual English...
Page 73: ...TR9530 series TS3300 series E3300 series 73...
Page 75: ...Loading Paper Loading Plain Paper Loading Photo Paper Loading Envelopes 75...
Page 90: ...Note To scan the original at optimum quality load it on the platen 90...
Page 94: ...94...
Page 126: ...Safety Safety Precautions Regulatory Information WEEE EU EEA 126...
Page 148: ...148...
Page 152: ...Main Components Front View Rear View Inside View Operation Panel 152...
Page 155: ...S ON lamp Lights after flashing when the power is turned on 155...
Page 170: ...pqrs PQRS 7 tuv TUV 8 wxyz WXYZ 9 0 _ SP 2 Switch the input mode 2 SP indicates a space 170...
Page 238: ...Related Topic Changing the Printer Operation Mode 238...
Page 278: ...Printing Using Canon Application Software Easy PhotoPrint Editor Guide 278...
Page 292: ...Note To set the applications to integrate with see Settings Dialog Box 292...
Page 305: ...ScanGear Scanner Driver Screens Basic Mode Tab Advanced Mode Tab 305...
Page 380: ...7 Press the OK button 7 The LCD returns to the Fax standby screen 380...
Page 391: ...4 When a confirmation message is displayed click Yes 4 391...
Page 399: ...Receiving Faxes Receiving Faxes Changing Paper Settings Memory Reception 399...
Page 409: ...Other Useful Fax Functions Document Stored in Printer s Memory 409...
Page 421: ...Cannot Find Printer on Network Windows macOS Cannot Find Printer on Network 421...
Page 425: ...See below Manually Solved Network Troubles 425...
Page 430: ...Note This printer supports WPA WPA2 PSK WPA WPA2 Personal and WPA2 PSK WPA2 Personal 430...
Page 474: ...Scanning Problems Windows Scanning Problems 474...
Page 475: ...Scanning Problems Scanner Does Not Work ScanGear Scanner Driver Does Not Start 475...
Page 479: ...Problems Sending Faxes Cannot Send a Fax Errors Often Occur When Send a Fax 479...
Page 485: ...Telephone Problems Cannot Dial Telephone Disconnects During a Call 485...