9
Loading Printing Paper
EN
G
L
IS
H
Loading Printing Paper
This machine offers two paper sources to load printing paper; the Rear Tray, found at the top of the
machine, and the Front Tray, found at the front of the machine.
Loading Printing Paper in the Rear Tray
1
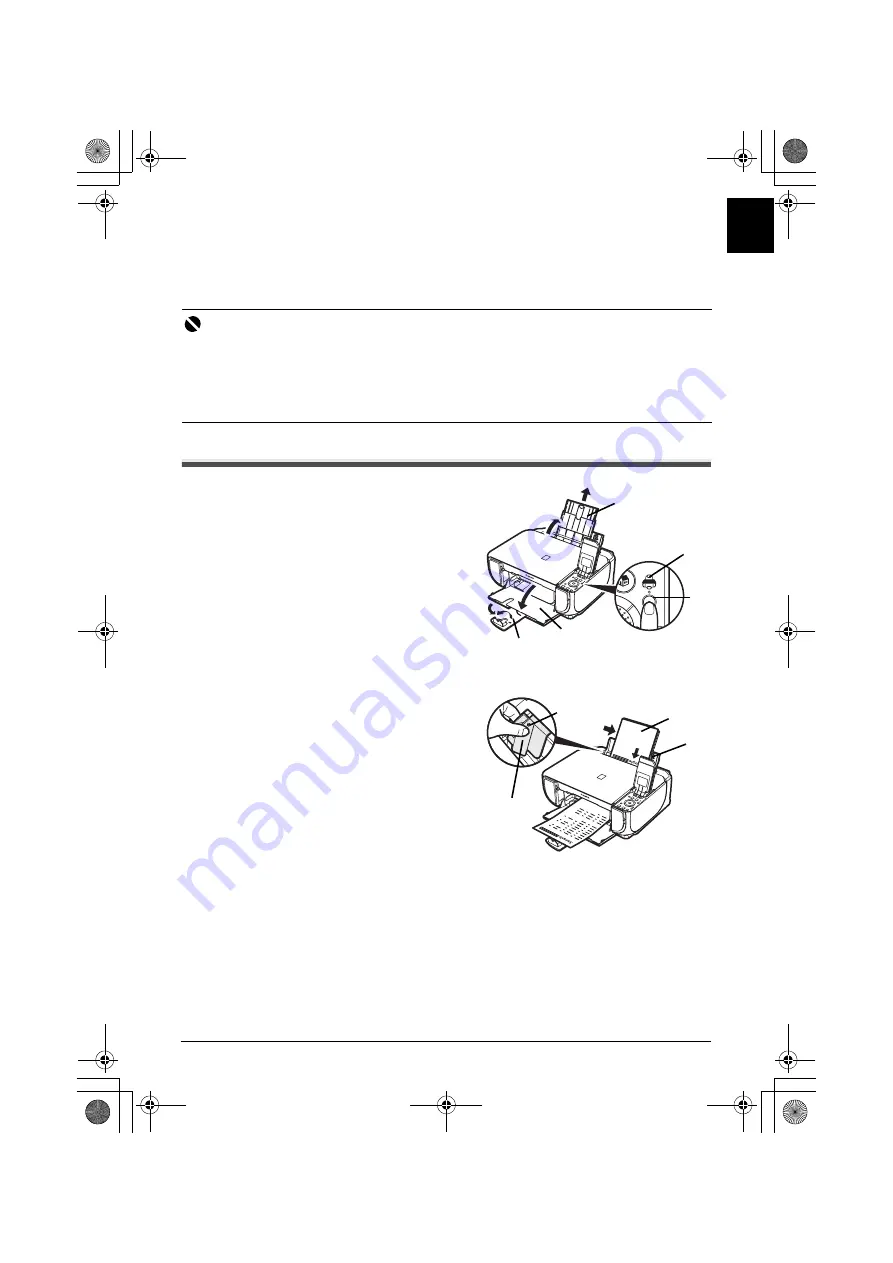
Open the Rear Tray, then pull out the
Paper Support.
2
Open the Front Tray.
3
Extend the Output Paper Support.
4
Press the
Paper Feed Switch
(A) so that
the
Rear Tray
lamp (B) lights.
5
Load the paper in the Rear Tray with the
print side facing UP.
Do not load higher than the Load Limit Mark
(C).
6
Align the paper stack against the Cover
Guide on the right side of the Paper
Support.
7
Pinch the Paper Guide and slide it against
the left side of the paper stack.
Important
z
When Printing for the first time
At purchase, the machine is set to feed from the Rear Tray.
If you are printing without changing paper source setting, load paper in the Rear Tray.
z
If you cut plain paper to 4" x 6" / 101.6 x 152.4 mm, 5" x 7" / 127.0 x 177.8 mm, or 2.13" x 3.39" / 54.0 x
86.0 mm (credit card-size) for a trial print, it can cause paper jams.
z
Always load paper in portrait orientation. Loading paper in landscape orientation can cause the paper
to be jammed.
(B)
1
2
3
(A)
6
5
7
(C)
MP520_QSG_EN.book Page 9 Thursday, May 17, 2007 4:00 PM


