background image

S a v e   M o n e y   a n d   I m p r o v e   Y o u r   P r i n t i n g


MIS Associates Inc                2901 Auburn Rd                Auburn Hills, MI  48326                 800-445-8296


http://www.inksupply.com                          Fax: 248-289-6013                           Email: [email protected]  


Canon Pixma iP6000 Installation Instructions 

Installation Procedure 


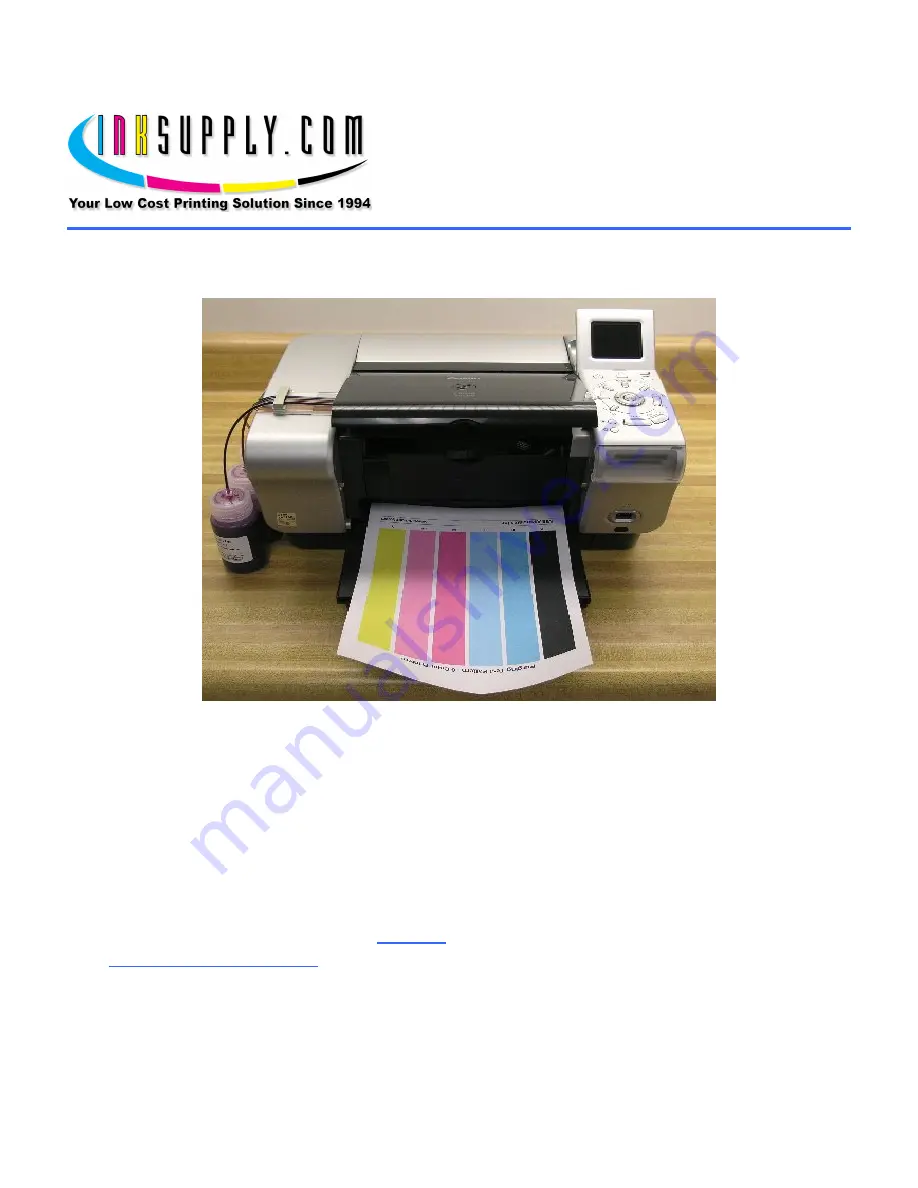
Canon Pixma iP6000 with MIS CFS Installed


Prerequisite

 - 

Before starting this installation, you MUST test your printer to make sure it is printing 100% 
correctly. The best way to do this is to first print a Nozzle pattern, using the printer utility 
software provided by Canon. Once a perfect nozzle pattern is achieved, print 5 copies of the 
MIS 

purge6.tif

 image using the Plain Paper and Standard Quality settings on the printer. All 5 

pages must print without banding or skipping (white spaces). If your printer can not do this, 

do 

not

 install the CFS. Run some cleaning cycles or get new cartridges. Do not proceed until you 

can pass these tests. The Purge6 image can be found on the diskette included with your 
system. If you have a Mac you can download it from our website. You can also get it from the 
Helpdesk Download Library.


Tools & Materials Needed

 - 


MIS CFS System, ink, and a working Canon iP6000 printer  

Summary of Contents for Pixma iP6000

Page 1: ...ern using the printer utility software provided by Canon Once a perfect nozzle pattern is achieved print 5 copies of the MIS purge6 tif image using the Plain Paper and Standard Quality settings on the printer All 5 pages must print without banding or skipping white spaces If your printer can not do this do not install the CFS Run some cleaning cycles or get new cartridges Do not proceed until you ...

Page 2: ...Some paper to print on Items In This Kit You Will Need To Save MIS iP6000 PIXMA Installation Instructions Orange Cartridge Caps White Tube Plugs Vacuum Pump Kit and Instructions 1 If you purchased your system pre filled go to Step 2 else continue with Step 1 Remove the caps from the ink bottles and replace them with the caps from the package supplied with your CFS system The vacuum pump must be as...

Page 3: ...3 Email sales inksupply com CARTRIDGE FILL PROCEDURE Before filling If the orange caps are not installed on the cartridges install the orange caps that originally came with the CFS over the cartridge ink supply ports Make sure not to twist the tubing between the color cartridges and the clip on the black cartridge as this will cause issues with filling and installation ...

Page 4: ...thout letting the tube unfold Keep pinching the tube This is important Plug the tube into the fitting on the top of the correct ink bottle for the position being filled Release the fold in the Ink should rush up the tube and into the cartridge The ink level in the bottle should go down about 1 2 inch or more depending on cartridge size After about 30 seconds the cartridge will be full When the pro...

Page 5: ...ange caps as they are not available for sale separate from a CFS unit PARTIALLY install the CFS cartridges by placing them in their installed position but do not push the cartridges all the way down Make sure that the tubing between the color cartridges and the clip on the cyan cartridge is not twisted or pinched Do not push the cartridges all the way down We do not want the seals on the bottom to...

Page 6: ... o v e Y o u r P r i n t i n g MIS Associates Inc 2901 Auburn Rd Auburn Hills MI 48326 800 445 8296 http www inksupply com Fax 248 289 6013 Email sales inksupply com CFS Partially Installed Bridge Bracket and beige clip installation ...

Page 7: ...a should have been cleaned with an alcohol pad Now peel the protective film from the double sided tape strips on the bracket See the photos below 4 The tubing ends with the white plugs should now be on the left hand side of the printer You can now place the tubing into the beige clips on the bridge brackets using the marks on the tubing and close them The tubes should be positioned in the right Br...

Page 8: ...end beginning at the white plug up to the right hand side of the beige clip so that each tube can be independently on to its bottle The tubes are easily un webbed by just pulling them apart no tools are required Don t go too far You can now align the bottles on the left hand side of the printer The order of the ink bottles from front to back are Magenta Light Magenta Yellow Black Cyan Light Cyan 7...

Page 9: ...e all the way to the right hand inside of the printer 9 Before closing the lid install the Black Foam Switch Activator into the recessed area on the right bottom of the underside of the printer lid as shown in the photo bellow You will need to cut the Switch Activator to exactly 1 x 5 8 making sure to not cut it too small as it is a friction fit Cutting the Switch Activator too small may cause it ...

Page 10: ...cycles on the color cartridges or black cartridge individually If only one of the cartridges is problematic limit the cleaning cycles to include the fewest number of cartridges possible If you are still having problems after about 3 or 4 sets of 3 cleanings then let the printer rest for a few hours or overnight and try again later This has worked on many Canon printers in the past It gives the air...

Reviews: