Scanning Multiple Documents in Whole Image View
7. Select the images you want to scan.
Select the checkboxes of the images you want to scan.
8. Click
Scan
.
Scanning Multiple Documents in Whole Image View
Follow these steps if thumbnails are not displayed correctly when previewed or if you want to scan
multiple documents as a single image.
Note
• Positions of slanted documents are not corrected in whole image view.
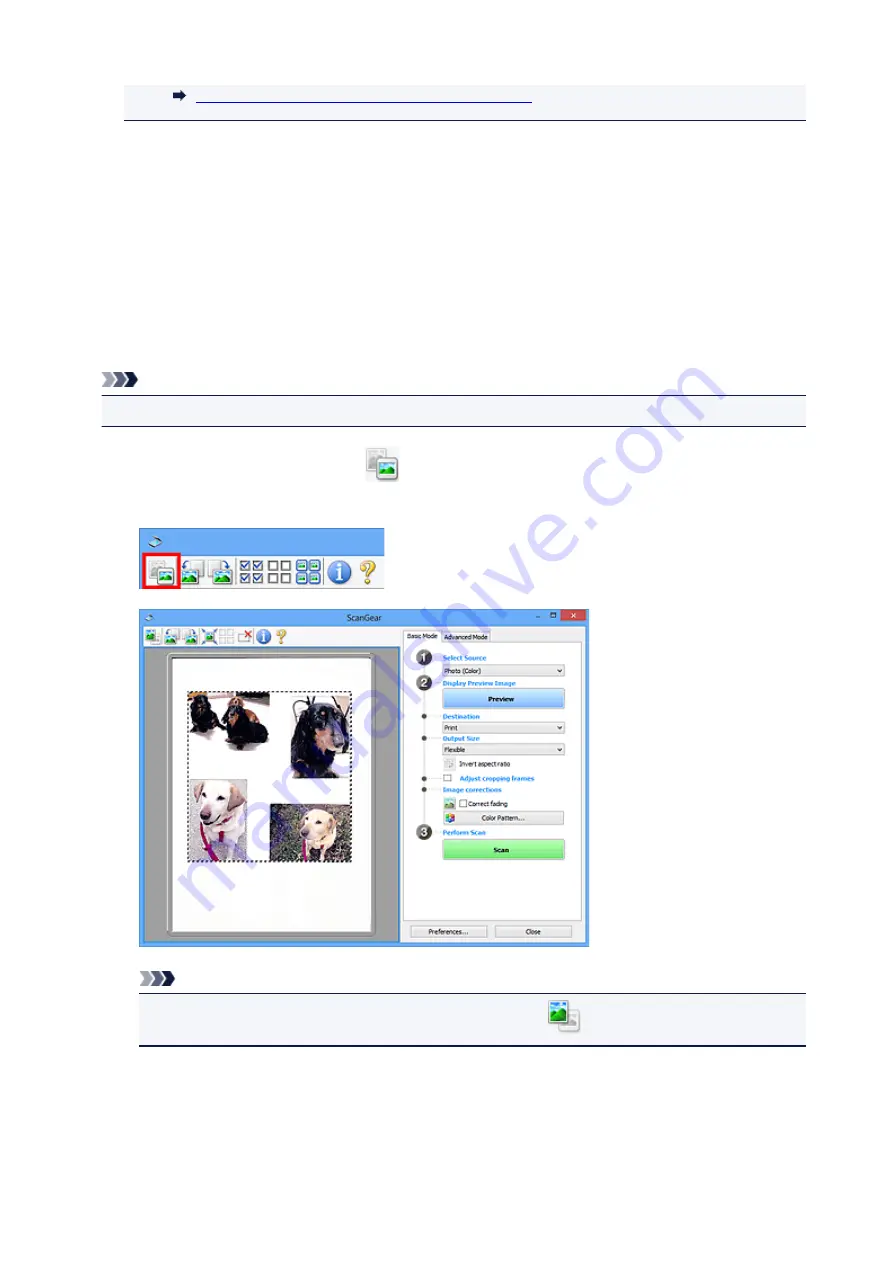
1. After previewing images, click
(Thumbnail) on the Toolbar.
Switch to whole image view.
Note
• When the whole image is displayed, the icon changes to
(Whole Image).
2. Set
Destination
.
3. Set
Output Size
according to purpose.
795
Summary of Contents for MB5450 Series
Page 48: ...Faxing 48...
Page 137: ...All registered users can register and delete apps freely 137...
Page 173: ...Loading Paper Paper Sources Loading Plain Paper Photo Paper Loading Envelopes 173...
Page 176: ...176...
Page 195: ...Inserting a USB Flash Drive Inserting a USB Flash Drive Removing a USB Flash Drive 195...
Page 198: ...Replacing Ink Tanks Replacing Ink Tanks Checking Ink Status on the Touch Screen 198...
Page 244: ...Safety Safety Precautions Regulatory Information WEEE EU EEA 244...
Page 264: ...Main Components Front View Rear View Inside View Operation Panel 264...
Page 267: ...15 platen glass Load originals here 267...
Page 271: ...Device user settings 271...
Page 287: ...The Page Setup tab is displayed again 287...
Page 297: ...For more on setting items on the operation panel Setting Items on Operation Panel 297...
Page 355: ...The resending setting is completed 355...
Page 356: ...Network Connection Network Connection Tips 356...
Page 399: ...IJ Network Device Setup Utility Menus Printer Menu View Menu Option Menu Help Menu 399...
Page 406: ...Other Network Information Technical Terms Restrictions Firewall 406...
Page 437: ...Print Area Print Area Standard Sizes Envelopes 437...
Page 442: ...Administrator Settings Sharing the Printer on a Network 442...
Page 506: ...Related Topic Displaying the Print Results before Printing 506...
Page 509: ...Note During Grayscale Printing inks other than black ink may be used as well 509...
Page 514: ...Adjusting Color Balance Adjusting Brightness Adjusting Intensity Adjusting Contrast 514...
Page 647: ...Copying Making Copies Basics Reducing Enlarging Copies Two Sided Copying Special Copy Menu 647...
Page 673: ...See Two Sided Copying for two sided copying 673...
Page 680: ...Note Refer to Settings Dialog Box for how to set the applications to integrate with 680...
Page 780: ...Related Topic Scanning Originals Larger than the Platen Image Stitch 780...
Page 801: ...None Medium 801...
Page 864: ...Other Scanning Methods Scanning with WIA Driver 864...
Page 873: ...Scanning Tips Resolution Data Formats Color Matching 873...
Page 900: ...Print send log Prints out the send log of the printer Tap Yes to start printing 900...
Page 941: ...8 Specify number of time and tap OK 9 Tap OK The Function list screen is displayed 941...
Page 982: ...5 Tap Complete to finalize changing 982...
Page 1049: ...4 When a confirmation message is displayed click Yes 1049...
Page 1057: ...Sending Faxes from Computer Mac OS Sending a Fax General Notes 1057...
Page 1059: ...5 Specify fax paper settings as needed 6 Enter fax telephone numbers in To 1059...
Page 1081: ...Perform setup following the instructions on the screen 1081...
Page 1123: ...Back of Paper Is Smudged Uneven or Streaked Colors 1123...
Page 1189: ...Telephone Problems Cannot Dial Telephone Disconnects During a Call 1189...
Page 1249: ...1660 Cause An ink tank is not installed What to Do Install the ink tank 1249...
Page 1279: ...3401 Cause Reserve copy is canceled What to Do Tap OK on the touch screen of the printer 1279...
Page 1282: ...3404 Cause Document is remained in ADF What to Do Wait for a while Copying will start 1282...


