


LENSES
E9
1
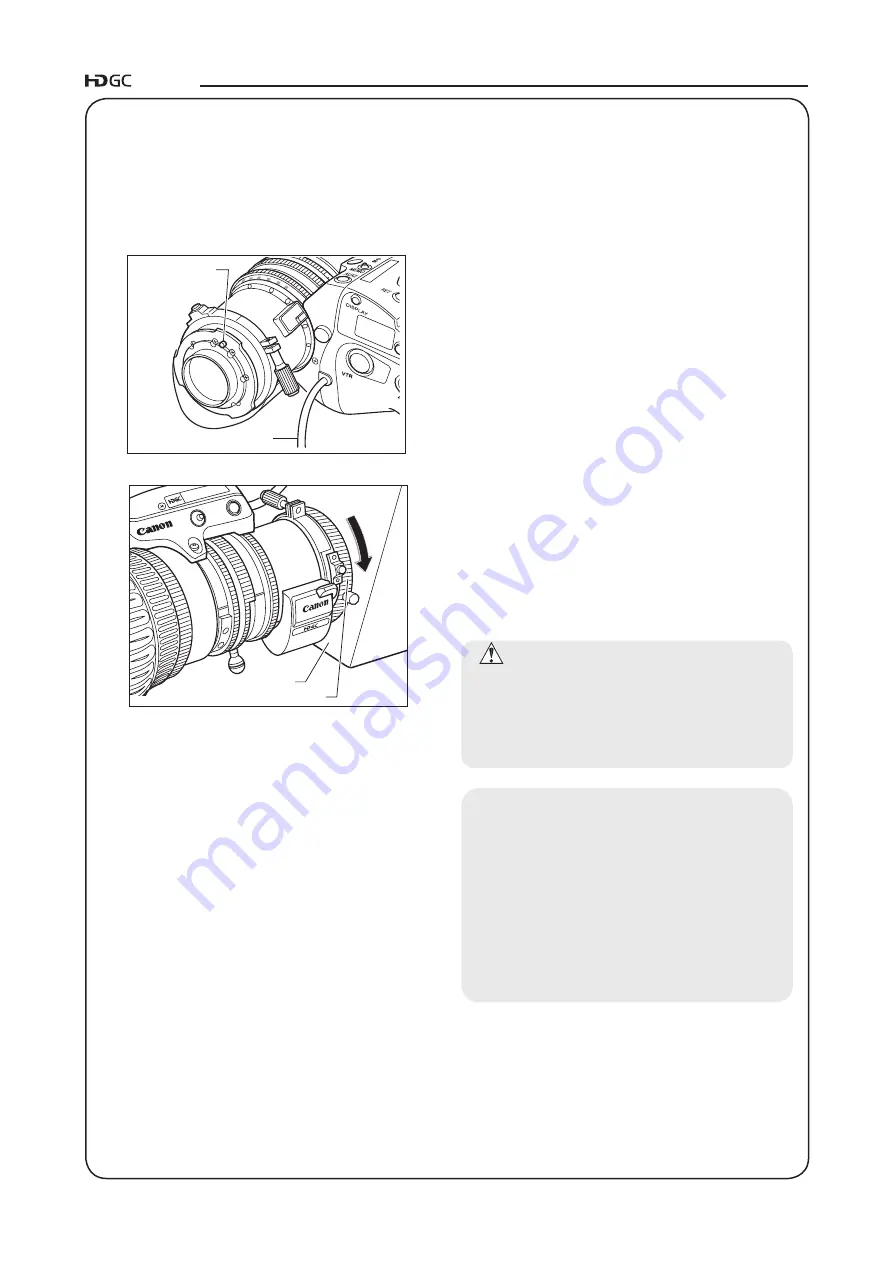
Position the camera horizontally.
2
Turn the bayonet ring of the camera counterclockwise
as viewed from the lens.Remove the dust cap from
the camera mount.
3
Remove the dust cap from the lens.
4
Align the locating pin on the lens mount with the slot
on the camera mount and press the lens into the
camera mount surface.
5
Turn the bayonet ring clockwise until the lens mount
is firmly fixed in place.
6
Connect the power/iris control cable on the back of
the drive unit housing to the appropriate receptacle
on the camera head.
CAUTION
Never hold the lens, drive unit and band portion
to support the entire weight of the camera.
Excessive force to the mount portion and drive
unit of the lens may result in damage to the lens
mechanism.
NOTE
1
)
Once it has been removed, keep the caps in a
safe place so that it will not be lost or misplaced.
2
)
A master key mark is provided on the power/iris
control cable.
Connection can be performed smoothly by
aligning the master key mark on the camera
connector with this mark.
3
)
Depending on systems,it is required to check the
camera's specification.
3 HOW TO MOUNT
3-1. MOUNT THE LENS ON THE CAMERA
Before mounting the lens on the camera,make sure that the camera's power is turned off.
Locating Pin
Power/Iris Control Cable
ع
ع
ع
ع
ع
ع
ع
ع
ع
M
AUX2
MEMO
10x
Camera
Bayonet Mount Ring
KJ10ex4.5B IASE
A
3 HOW TO MOUNT
↓
↓
↓
↓
↓
Summary of Contents for KJ10EX4.5B IRSE
Page 2: ......
Page 3: ...ENGLISH VERSION See Page E1 中文版 请参阅第 C1 页 日 本 語 版 ...
Page 4: ......
Page 8: ......
Page 33: ...ENGLISH VERSION ...
Page 38: ......
Page 63: ...中 文 版 ...
Page 68: ......
Page 93: ...資料集 TECHNICAL INFORMATION 资料汇编 ...
Page 94: ......
Page 98: ......


