background image

Application

This manual has been issued by Canon Inc. for qualified persons to learn technical theory, installation, maintenance, and

repair of products. This manual covers all localities where the products are sold. For this reason, there may be

information in this manual that does not apply to your locality.

Corrections

This manual may contain technical inaccuracies or typographical errors due to improvements or changes in products.

When changes occur in applicable products or in the contents of this manual, Canon will release technical information

as the need arises. In the event of major changes in the contents of this manual over a long or short period, Canon will

issue a new edition of this manual.

The following paragraph does not apply to any countries where such provisions are inconsistent with local law.

Trademarks

The product names and company names used in this manual are the registered trademarks of the individual companies.

Copyright

This manual is copyrighted with all rights reserved. Under the copyright laws, this manual may not be copied,

reproduced or translated into another language, in whole or in part, without the written consent of Canon Inc.

COPYRIGHT  © 2001 CANON INC.

Printed in Japan 

Caution

Use of this manual should be strictly supervised to avoid disclosure of confidential information.

Summary of Contents for iR2000 Series

Page 1: ...Aug 23 2004 Installation Procedure iR2000 Series...

Page 2: ......

Page 3: ...need arises In the event of major changes in the contents of this manual over a long or short period Canon will issue a new edition of this manual The following paragraph does not apply to any countri...

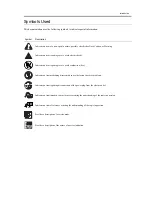
Page 4: ...uiring care to avoid combustion fire Indicates an item prohibiting disassembly to avoid electric shocks or problems Indicates an item requiring disconnection of the power plug from the electric outlet...

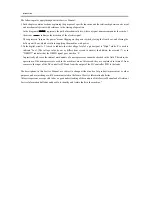
Page 5: ...ed to indicate Low The voltage value however differs from circuit to circuit In addition the asterisk as in DRMD indicates that the DRMD signal goes on when 0 In practically all cases the internal mec...

Page 6: ......

Page 7: ...Contents 1 Installation Procedure 1 1 Installing the Card Reader 2 1 1 1Points to Note 2 1 1 2Checking the Contents 2 1 1 3Installation Procedure 3 1 1 4Installation in a NetSpot Accountant NSA Envir...

Page 8: ...Contents...

Page 9: ...Chapter 1 Installation Procedure...

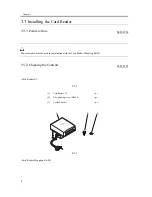
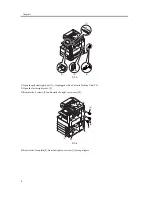
Page 10: ...07 2705 The card reader must be used in combination with the Card Reader Mounting Kit B1 1 1 2 Checking the Contents 0007 2707 Card Reader C1 T 1 1 F 1 1 Card Reader Mounting Kit B1 1 Card Reader C1 1...

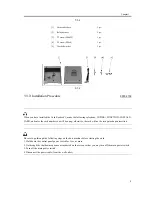
Page 11: ...sertion Be sure to go through the following steps on the host machine before starting the work 1 Hold down the control panel power switch for 3 sec or more 2 Go through the shutdown sequence as instru...

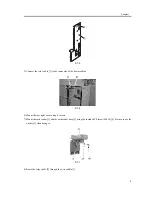
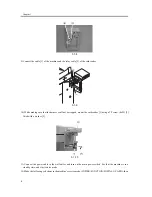
Page 12: ...t door 1 if equipped with a Cassette Feeding Unit Y2 2 Open the lower right cover 2 3 Remove the 5 screws 3 and detach the right cover rear 4 F 1 4 4 Remove the face plate 2 from the right cover rear...

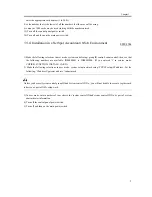
Page 13: ...of the host machine F 1 6 6 Mount the rear right cover using 4 screws 7 Mount the card reader 1 and the card reader base 2 using the included TP screw M4x8 4 Be sure to use the washer 3 when doing so...

Page 14: ...ll not be trapped mount the card reader 1 using a TP screw 4x25 3 fitted with a washer 2 F 1 10 11 Connect the power cable to the wall outlet and turn on the main power switch See that the machine is...

Page 15: ...en see that the following numbers are available ID00000001 to ID00001000 If you entered 1 in service mode COPIER FUNCTION INSTALL CARD 2 Make the following selections in user mode system setup network...

Page 16: ......

Page 17: ...Aug 23 2004...

Page 18: ......

Reviews: