Erasing Shadows/Frame Lines (Frame Erase)
3-20
Ad
v
anced
Co
p
y
ing
F
e
at
ur
es
3
NOTE
•
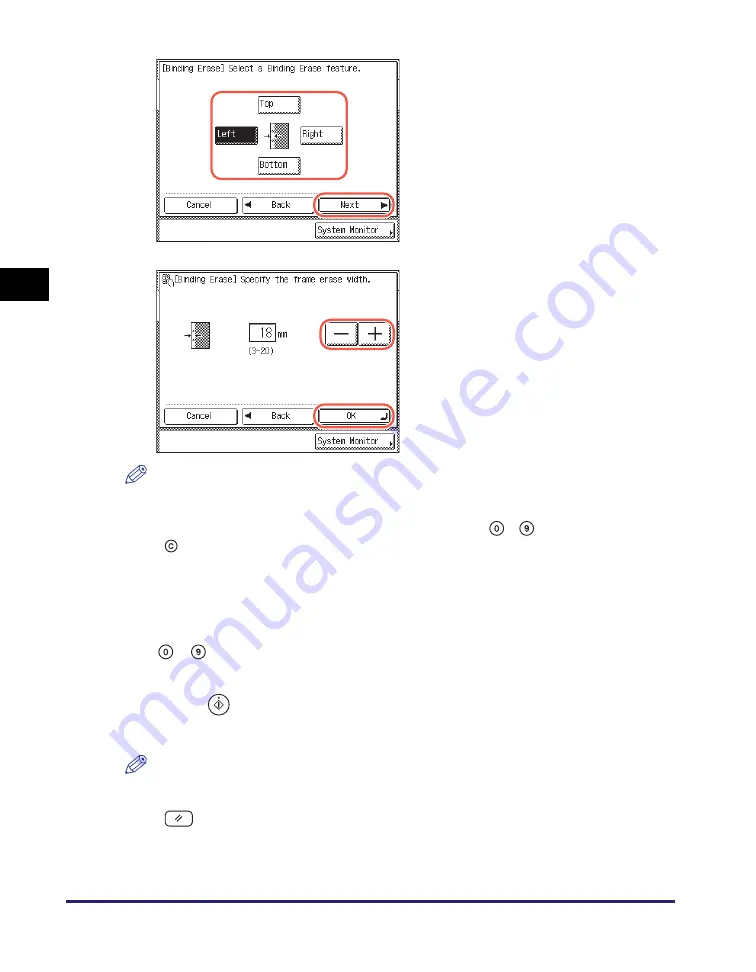
The default setting is ‘18 mm’. You can adjust the frame erase width to between 3 mm
and 20 mm.
•
When entering values in millimeters, you can also use
-
(numeric keys) and
(Clear) on the control panel.
•
To enter values in inches, see Chapter 3, “Configuring the Machine’s Basic Settings,”
in the
Reference Guide
.
5
Enter the desired copy quantity (from 1 to 999) usin
g
-
(numeric keys).
6
Press
(Start).
Copying starts.
NOTE
•
To cancel this setting, press [Special Features]
➞
[Frame Erase]
➞
[Cancel].
•
To cancel all settings and return the machine to the Standard Settings, press
(Reset).
3
Select the side where the bindin
g
holes are located
➞
press [Next].
[Top], [Left], [Right], and [Bottom] on the
display refer to the positions of your
originals when you place them on the
platen glass.
4
Press [-] or [+] to set the frame
erase width
➞
press [OK]
➞
[Done].
The display returns to the top screen.
Summary of Contents for imageRUNNER 2545i
Page 2: ...imageRUNNER 2545i 2545 2535i 2535 2530i 2530 2525i 2525 2520i 2520 Copying Guide...
Page 11: ...x...
Page 29: ...Checking Changing Canceling Selected Settings 1 18 Introduction to Copy Function 1...
Page 63: ...Finishing 2 34 Basic Copying Features 2...
Page 113: ...Index 5 6 Appendix 5...


