


Chapter 15
Chapter 15
#TEST MODE
#TEST MODE
Makes various status checks, such as contact sensor, sensor and print
Makes various status checks, such as contact sensor, sensor and print status.
status.
15.1.2 Using the Mode
15.1.2 Using the Mode
0013-1302
0013-1302
F-15-1
F-15-1
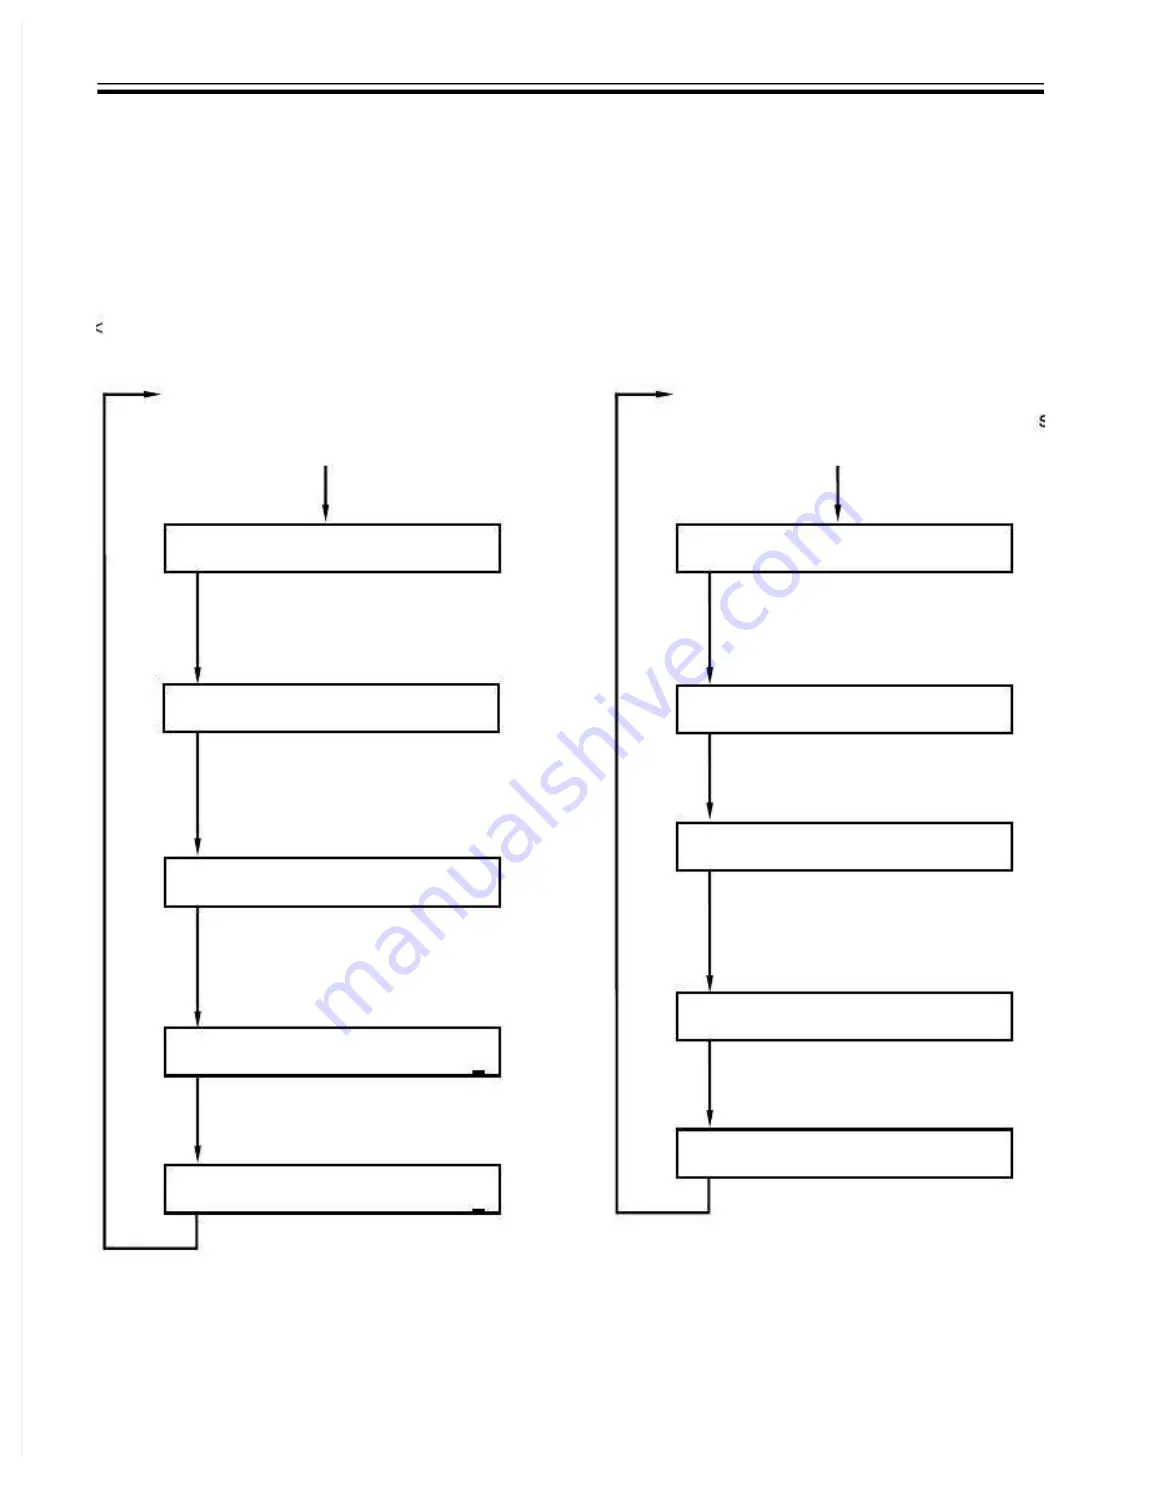
1) Selecting Service Mode
1) Selecting Service Mode
Press the Additionalfunctions
Press the Additionalfunctions
key, 2key, 8key, Additional function
key, 2key, 8key, Additional function
key sequentially.
key sequentially.
#SSSW
#SSSW
# N U M E R I C P a r a m .
# N U M E R I C P a r a m .
# N U M E R I C P a r a m .
# N U M E R I C P a r a m .
2) Selecting a Menu Item
2) Selecting a Menu Item
Select the Menu item using the
Select the Menu item using the
[left arrow]/[right arrow] on the
[left arrow]/[right arrow] on the
touch panel.
touch panel.
3) Press [OK].
3) Press [OK].
5) Registering/Setting Data
5) Registering/Setting Data
Enter data using the keypad,
Enter data using the keypad,
and then press [OK].
and then press [OK].
6) Press the [Stop]/[Additional
6) Press the [Stop]/[Additional
functions]/[Reset] key to end
functions]/[Reset] key to end
the service mode.
the service mode.
# N U M E R I C P a r a m .
# N U M E R I C P a r a m .
#
# 3
3
NU
NUM
MER
ER II C
C P a
P a
r
r
a
a
m
m
.
.
0
0
0
0
1
1
0
0
0
0
1
1
0
0
0
0
2
2
0
0
0
0
2
2
0
0
0
0
1
1
0
0
4) Selecting a Prarameter
4) Selecting a Prarameter
Select the Prarameter using the
Select the Prarameter using the
[left arrow]/[right arrow].
[left arrow]/[right arrow].
1) Selecting Service Mode
1) Selecting Service Mode
Press the Additionalfunctions
Press the Additionalfunctions
key, 2key, 8key, Additional functions
key, 2key, 8key, Additional functions
key sequentially.
key sequentially.
#SSSW
#SSSW
3) Selecting a Menu Item
3) Selecting a Menu Item
Press [OK].
Press [OK].
2) Press [OK] on the
2) Press [OK] on the
touch panel.
touch panel.
5) Registering/Setting Data
5) Registering/Setting Data
Enter data using the keypad,
Enter data using the keypad,
and press the [OK].
and press the [OK].
6) Press the [Stop]/[Additional
6) Press the [Stop]/[Additional
functions]/[Reset] key to end
functions]/[Reset] key to end
the service mode.
the service mode.
0
0
3
3
3
3
4) Selecting a Bit Switch
4) Selecting a Bit Switch
Select the bit using the
Select the bit using the
[left arrow]/[right arrow] on
[left arrow]/[right arrow] on
the touch panel.
the touch panel.
# S S S W
# S S S W
# S S S W
# S S S W
000000000
000000000
000000000
000000000
O
O
p
p
e
e
r
r
a
a
t
t
i
i
o
o
n
n
a
a
t
t
t
t
h
h
e
e
t
t
i
i
m
m
e
e
o
o
f
f
B
B
i
i
t
t
S
S
W
W
>
>
<
<
O
O
p
p
e
e
r
r
a
a
t
t
i
i
o
o
n
n
a
a
t
t
t
t
h
h
e
e
t
t
i
i
m
m
e
e
o
o
f
f
P
P
a
a
r
r
a
a
m
m
e
e
t
t
e
e
r
r
>
>
0
0
3
3
3
3
# S S S W
# S S S W
000000000
000000000
0
0
3
3
3
3
# S S S W
# S S S W
000000001
000000001
Summary of Contents for imageRUNNER 1023
Page 28: ......
Page 33: ...Chapter Chapter 4 4 ORIGINAL E ORIGINAL EX XPOSURE SYSTEM POSURE SYSTEM ...
Page 43: ...Chapter Chapter 6 6 IMAGE FORMATION IMAGE FORMATION ...
Page 57: ...Chapter 9 EXTERNALS CONTROLS ...
Page 107: ......
Page 108: ...SERVICE MANUAL Cassette Feeding Module N1 ...
Page 117: ...Chapter 4 MAINTENANCE ...
Page 120: ......


