Chapter 6
6-23
b) Operation
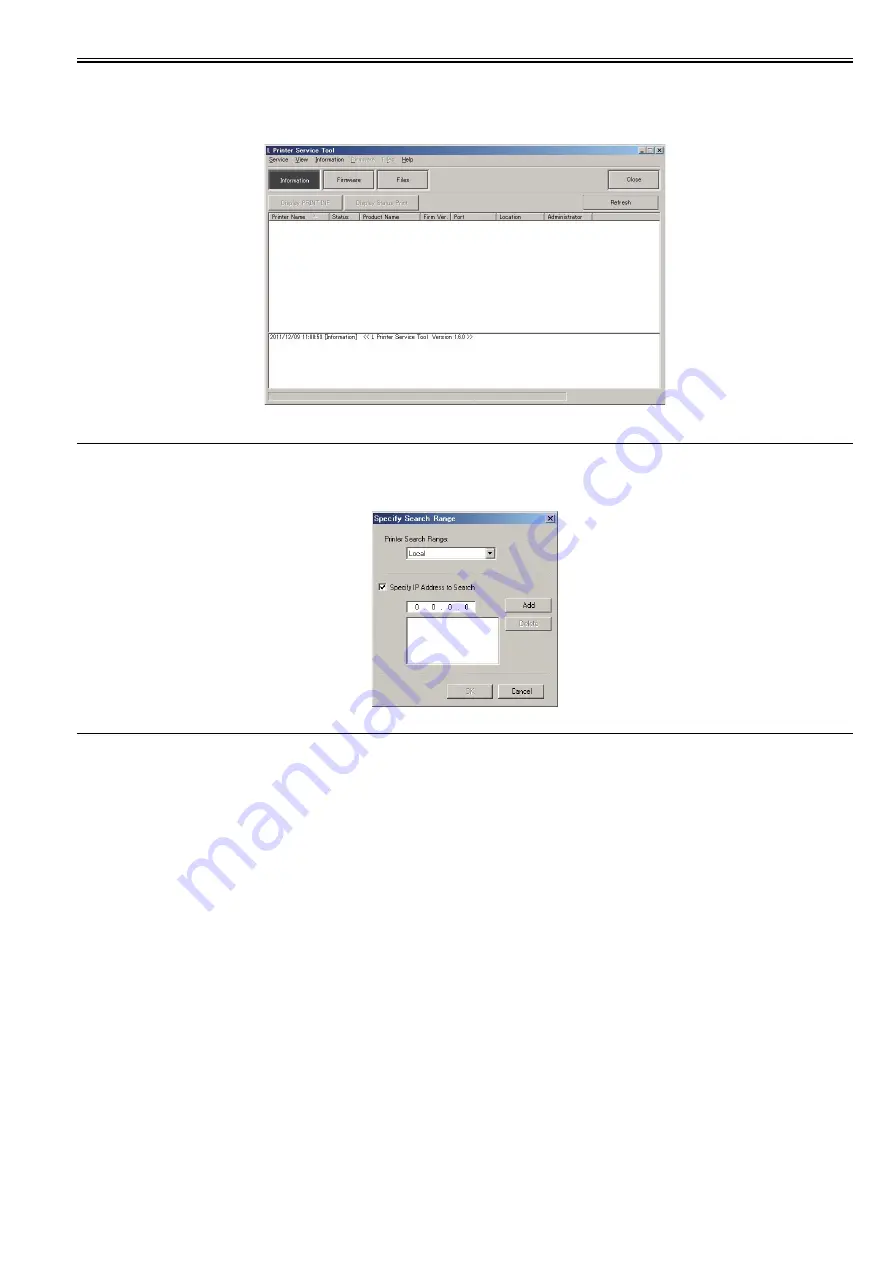
1) Showing the information of the printer
The data of PRINT INF or status print is shown.
(1) Choose the [Information] of the main menu button or the "[Service]-[Information]" of the main menu.
F-6-11
(2) Choose the printer from the list shown to the printer information area.
MEMO:
- The list is refreshed when choosing the [Refresh] of the sub menu button or the "[View]-[Refresh]" of the main menu.
- The printer is searched according to the setting of the [Specify Search Range] dialogue box after choosing the "[View]-[Specify Search Range]" of the main menu
to display the dialogue box. The five IP addresses at the maximum can register when searching by the IP address.
F-6-12
(3)-1 Choose the [Display PRINT INF] of the sub menu button or the "[Information]-[Display PRINT INF]" of the main menu when showing the PRINT INF.
- The data of PRINT INF is shown by the appointed application software.
(3)-2 Choose the [Display Status Print] of the sub menu button or the "[Information]-[Display Status Print]" of the main menu when showing the Status Print.
- The data of Status Print is shown by the appointed application software.
(3)-3 Choose the [Color Check] of the sub menu button or the "[Information]-[Color Check]" of the main menu when executing the color check.
- This mode judges the OK or NG by checking the color check data that measured by the multi sensor.
- Before executing the color check, need the following media to set to the printer.
Roll media of more than 10 inch width, or cut sheet of more than A4-size.
Paper type: Glossy Photo Paper 170gsm
- When executing the color check, the paper type that selected by the dialogue box must match with the paper type that set to the printer so that the check can
execute correctly.
Summary of Contents for imagePROGRAF iPF815
Page 2: ......
Page 6: ......
Page 11: ...Chapter 1 PRODUCT DESCRIPTION...
Page 12: ......
Page 14: ......
Page 74: ......
Page 75: ...Chapter 2 TECHNICAL REFERENCE...
Page 76: ......
Page 86: ...Chapter 2 2 8 Printing Modes...
Page 87: ...Chapter 2 2 9...
Page 129: ...Chapter 3 INSTALLATION...
Page 130: ......
Page 132: ......
Page 146: ...Chapter 3 3 14...
Page 147: ...Chapter 4 DISASSEMBLY REASSEMBLY...
Page 148: ......
Page 150: ......
Page 207: ......
Page 208: ......
Page 209: ...Chapter 5 MAINTENANCE...
Page 210: ......
Page 212: ......
Page 216: ...Chapter 5 5 4 5 Close upper cover 1 F 5 6 1...
Page 217: ...Chapter 5 5 5...
Page 218: ......
Page 219: ...Chapter 6 TROUBLESHOOTING...
Page 220: ......
Page 222: ......
Page 249: ...Chapter 7 SERVICE MODE...
Page 250: ......
Page 252: ......
Page 273: ...Chapter 7 7 21...
Page 274: ......
Page 275: ...Chapter 8 ERROR CODE...
Page 276: ......
Page 278: ......
Page 313: ...Appendix...
Page 314: ......
Page 322: ......
Page 323: ...Feb 27 2017...
Page 324: ......


