


15
裝入紙張
1.
按下
(裝入)。
2.
選擇紙張。
3.
遵循螢幕的指示來執行操作。
執行色彩校準
建議您完成設定印表機和軟體後執行色彩校準。色彩校準可以補償由於印表
機之間的個別差異和隨時間變化而導致的色調變化。
執行色彩校準
在主螢幕中,依次選擇
維護
(Maintenance)
、
色彩校準
(Color calibration)
、
自動調整
(Auto adjust)
。
●
色彩校準大約需要
10
分鐘。
●
可以使用支援色彩校準的調整用紙張執行色彩校準。如需詳細資訊,請參
閱線上手冊中的
"Paper Information List"
。
備註
●
可以使用該功能定期通知您執行色彩校準(校準指南設定)。如需詳
細資訊,請參閱線上手冊中的
"Performing Color Calibration"
。
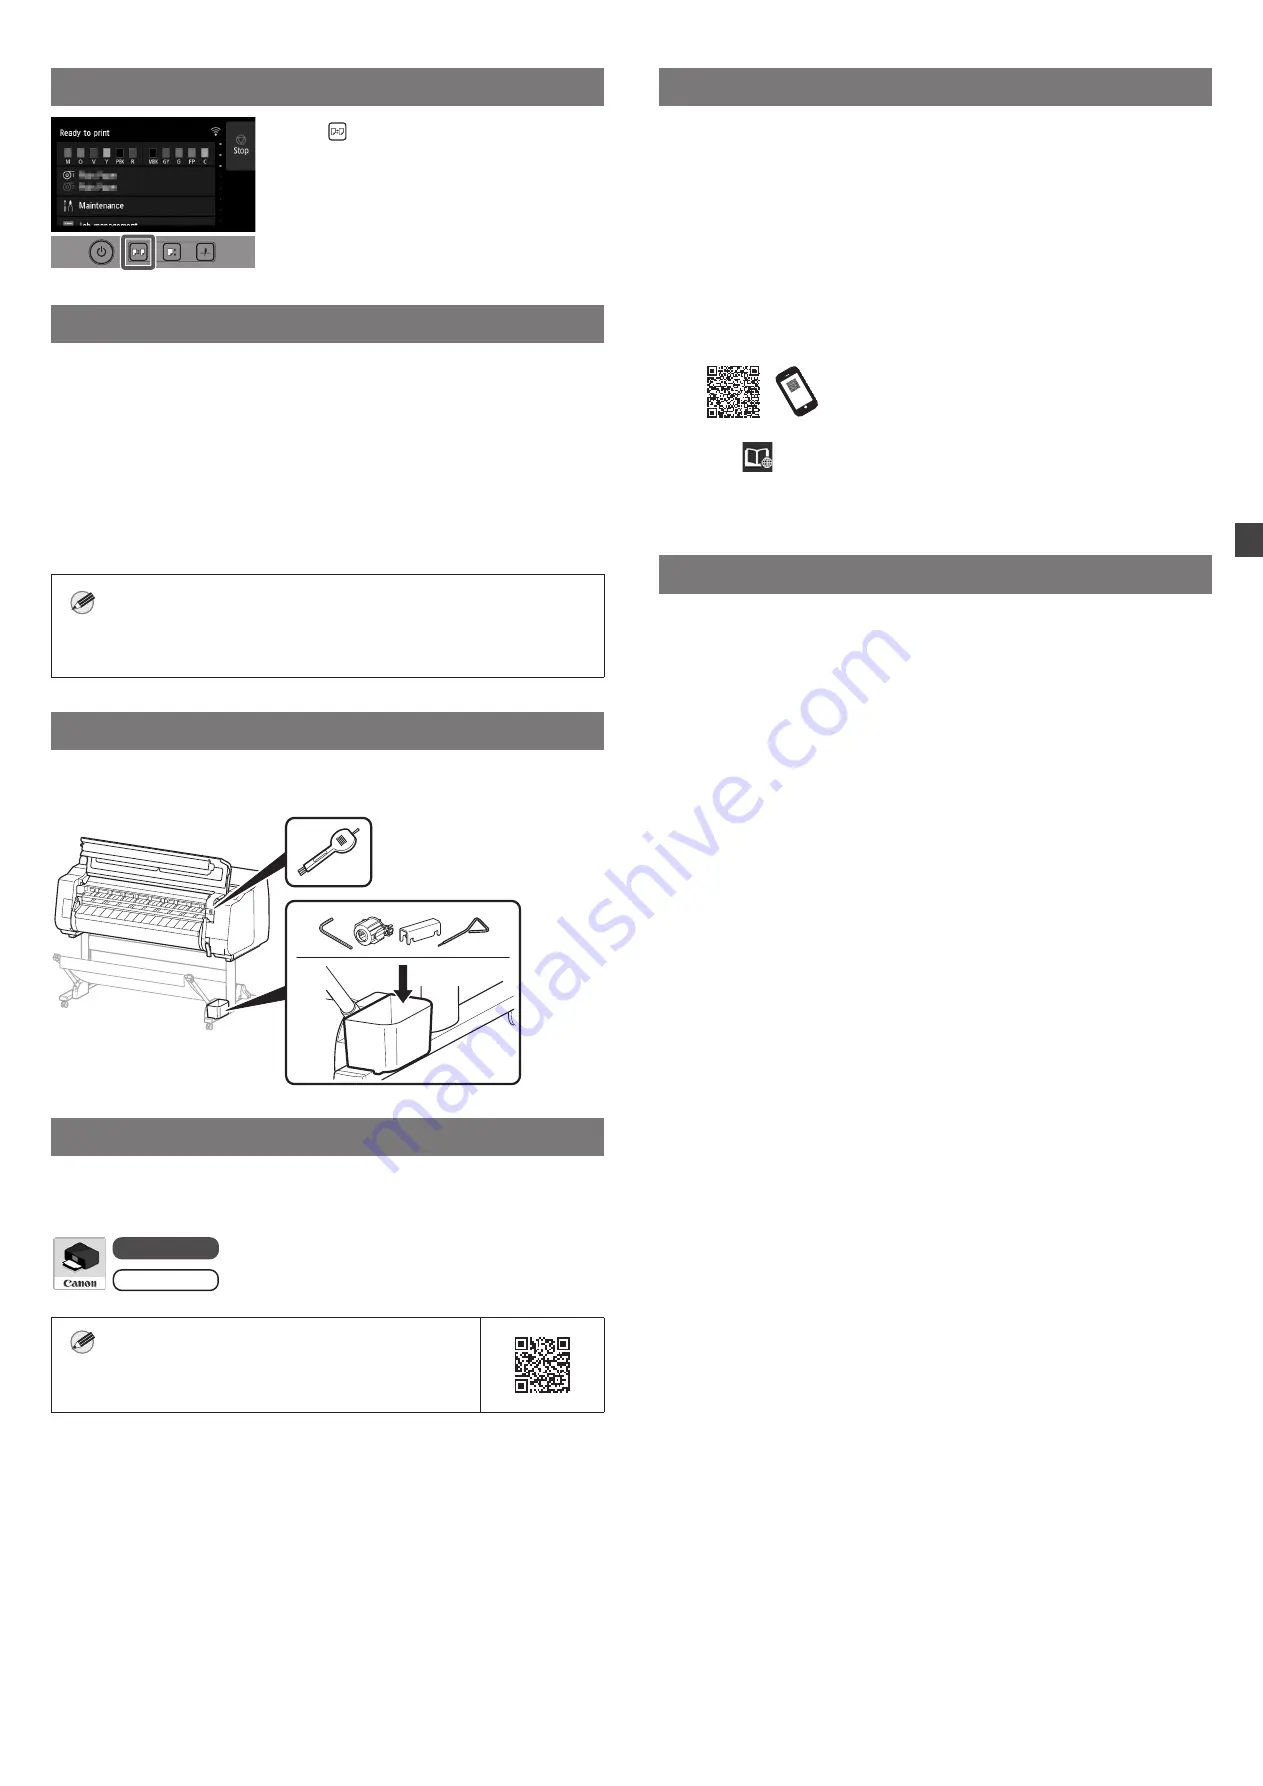
存放位置
開啟上蓋時,右側存放有一支清潔刷(用於清潔內部)。附件盒可用來存放
附件,例如:
3in
紙軸安裝件。
從智慧型手機或平板電腦列印
有了「
Canon PRINT Inkjet/SELPHY
」應用程式軟體,您就能透過無線輕鬆
列印儲存在您智慧型手機或平板電腦(執行
iOS/iPadOS/Android
系統)上
的相片。
iOS/iPadOS
在
App Store
中搜尋「
Canon Print
」。
Android
在
Google Play
中搜尋「
Canon Print
」。
注意
●
您也可以掃描右側的
QR
代碼,進入
Canon
網站
下載應用程式。
顯示線上手冊
線上手冊說明了如何使用印表機。可透過
Canon
網站存取該內容,網址如
下。
1
透過下列任何方式造訪
Canon
網站。
●
輸入
URL
https://ij.start.canon
選擇所用印表機的型號。
●
掃描
QR
代碼
2
選擇
閱讀線上手冊
(Read Online Manual)
。
●
遵循螢幕的指示來執行剩餘的操作,以顯示線上手冊。
將資訊傳送至
Canon
為能提供與印表機相關的服務,以及開發與銷售更能符合客戶需求的產
品及服務,
Canon
要求透過網際網路將與您
Canon
產品相關的資訊傳回
Canon
(如果在中國使用
Canon
產品,則會傳送至法定研究機構)。
與印表機
/
掃描器
/
資訊裝置有關的資訊
●
印表機
ID
號碼、安裝日期和時間、國家
/
地區設定等基本資訊
●
已安裝墨水的類型、墨水使用資訊、已列印的頁數、掃描次數和維護資訊
等使用歷史記錄
●
紙張使用資訊、列印環境
/
條件、掃描作業設定和問卷結果
●
型號名稱、作業系統版本、語言和顯示設定資訊等基本裝置資訊
●
裝置驅動程式和應用程式軟體的版本資訊以及使用歷史記錄
*
根據所用型號和
/
或應用程式軟體的不同,可能不會傳送上述某些資訊。
*
傳送的資訊可能會傳遞給
Canon
的關係企業。
*
網際網路連線費用會由各客戶自行負擔。
如果所用的
Canon
產品為共同使用,則將會傳送共用產品所記錄的上述資
訊。如果同意,請將該事實轉達給與之共用產品的使用者並預先獲得對方同
意。
如果同意上述事項,請選擇
同意
(Agree)
。否則,請選擇
不同意
(Do not
agree)
。
Summary of Contents for imagePROGRAF GP-540
Page 2: ......
Page 21: ...3 GP 540 106 kg 6 GP 520 85 kg 6 GP 540...
Page 22: ...4 4 2 4 3 5 1 1 3 2 1 2...
Page 23: ...5 5 1 2 3 4 5 GP 520 GP 540...
Page 24: ...6 6 7 8 Next Canon 15 9 OK...
Page 25: ...7 6 1 2 A A 3 4 5 7 8 6 7 8...
Page 26: ...8 9 10 2 4 8 9 11 2 10 12...
Page 27: ...9 7 1 2 3 4 5 2...
Page 28: ...10 6 7 8 9...
Page 29: ...11 8 1 OK 2 Manual 3 4 5 1 A B GP 520 2 6 A B A B A B...
Page 37: ...3 GP 540 106 kg 6 GP 520 85 kg 6 GP 540...
Page 38: ...4 4 2 4 3 5 1 1 3 2 1 2...
Page 39: ...5 5 1 2 3 4 5 GP 520 GP 540...
Page 40: ...6 6 7 8 Next Canon 15 9 OK...
Page 41: ...7 6 1 2 A A 3 4 5 7 8 6 7 8...
Page 42: ...8 9 10 2 4 8 9 11 2 10 12...
Page 43: ...9 7 1 2 3 4 5 2...
Page 44: ...10 6 7 8 9...
Page 45: ...11 8 1 OK 2 Manual 3 4 5 1 A B GP 520 2 6 A B A B A B...
Page 69: ...3 GP 540 106kg 6 GP 520 85kg 6 GP 540...
Page 70: ...4 4 2 4 3 5 1 1 3 2 1 2...
Page 71: ...5 5 1 2 3 4 5 GP 520 GP 540...
Page 72: ...6 6 7 8 Next Canon 15 9 OK...
Page 73: ...7 6 1 2 A A 3 4 5 7 8 6 7 8...
Page 74: ...8 9 10 2 4 8 9 112 10 12...
Page 75: ...9 7 1 2 3 4 5 2...
Page 76: ...10 6 7 8 9...
Page 77: ...11 8 1 OK 2 Manual 3 4 5 1 A B GP 520 2 6 A B A B A B...


