6. Work with the network administrator to configure the IP address settings manually.
• Disable Get IP address automatically and enter the IP address.
• Enter the subnet mask.
• Disable Get DNS address automatically and enter the DNS address.
7. Save the settings and close Setup.
● To configure a static IP address for the imagePRESS Server(Fiery QuickTouch)
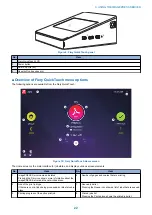
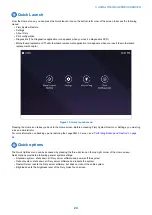
1. On the Fiery QuickTouch Home screen, press the Quick launch icon on the bottom-left corner.
2. Select Settings, and log in to the server as Admin user (the default password is
Fiery password
3. Select Configure IP Address, and select IP Address, DNS, Subnet Mask, WINS, and Default Gateway, as necessary.
4. Save the settings and exit.
● Reserved IP addresses
The following subnet mask is reserved for internal use and should never be assigned as an IP address to the imagePRESS
Server or to any other device on the customer network:
• 10.255.255.x (for example, 10.255.255.1 or 10.255.255.2)
IMPORTANT:
Assigning any of these IP addresses will result in system corruption of the imagePRESS Server, and you will need to
reinstall system software to fix the problem.
■ Completing installation
To complete the installation of the
imagePRESS Server
at the customer site, do the following:
1. Makes sure that the printer is powered on.
2. Power on the
imagePRESS Server
“Starting the imagePRESS Server for the first time” on page 17
)
3. Wait for the system to power on and for the
imagePRESS Server
info screen to reach idle.
NOTE:
If the message “Check power and cable” displays on the printer touch panel, verify that the printer interface cable is connected
properly to the printer and the
imagePRESS Server
.
4. Perform any required system software upgrades. For instructions, see the documentation that accompanies the
imagePRESS
Server
system upgrade.
Updates to
imagePRESS Server
software may be available from a variety of sources (for example, System Updates
“Installing software patches” on page 83
) or patches downloaded by the customer).
Windows operating system updates should be obtained from Microsoft directly. Because such updates are available directly
from Microsoft, EFI does not maintain or provide them via the System Updates feature.
5. Print the Test Page and Configuration page and ask the customer to verify the output (see
pages from the monitor, keyboard, and mouse” on page 20
)
6. If the
imagePRESS Server
requires a static IP address (for example, in a non-DHCP network environment), work with the
network administrator to configure a static IP address (see
“Configuring a static IP address for the imagePRESS Server” on
7. Change the factory default language, if needed. For more information on changing the factory default language, see
the language of the imagePRESS Server” on page 11
.
8. Ask the network administrator to perform Setup and print some test documents over the network.
9. Store the output and the current Configuration page(s) near the printer.
10. Inform the site administrator that the
imagePRESS ServerimagePRESS Server
user software must be installed on networked
computers that print to the
imagePRESS Server
.
11. Ask the site administrator to make sure that all media (DVDs and/or CDs) shipped with the
imagePRESS Server
is stored
in a safe location, accessible to you.
2. INSTALLING HARDWARE
18
Summary of Contents for ImagePRESS Server H350 V2
Page 8: ...Introduction 1 Introduction 2 Specifications 7 ...
Page 17: ...INSTALLING HARDWARE 2 Installing Hardware 11 ...
Page 26: ...USING THE IMAGEPRESS SERVER 3 Using the imagePRESS Server 20 ...
Page 35: ...REPLACING PARTS 4 Replacing parts 29 ...
Page 86: ...INSTALLING SYSTEM SOFTWARE 6 Installing System Software 80 ...
Page 91: ...TROUBLESHOOTI NG 7 Troubleshooting 85 ...
Page 104: ...INSTALLATION PROCEDURE 8 Installation 98 Removable HDD Kit B5 108 ...


