


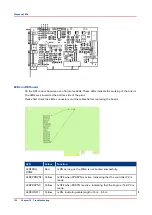


Comprehensive system inspection
If the previous checks did not solve the problem, perform a component inspection.
A comprehensive inspection allows you to verify that each hardware component is properly
installed and configured. It also prevents the unnecessary replacement of expensive components.
Component
Actions
External connectors
• See
Check external connections on page 121
• Cables, cable connectors, and mating connectors are undamaged.
Internal components
All replaceable parts are:
• Present
• Properly aligned
• Installed securely
• Installed on the appropriate site
• The correct part for the system
• Appear undamaged
Chassis and contents have not been tampered with.
Chassis does not contain any foreign objects.
Motherboard
• Motherboard, including components and traces, appear undamaged,
and no foreign objects are evident
• CPU is present, well-seated, and appears undamaged.
• CPU cooling assembly is well-aligned and firmly attached.
• Each fan (including fan cable) is well-positioned (not upside down),
installed in the correct connector (CPU_FAN1), and appears undam-
aged.
• Boards required on the motherboard are present, well-seated, and in
the correct slots.
• Battery is installed.
DDR3 modules
• Each DIMM is well-seated.
• Each DIMM is of the same brand and type.
• Each DIMM is seated in the correct port. Pairs DIMM1/DIMM3 and
DIMM2/DIMM4
PCI boards
Each board required is:
• Present
• Installed in the correct slot
• Well-seated
• Appears undamaged
Required cables (if applicable) are
• Present
• Firmly connected in the correct connectors
• Appear undamaged
4
Comprehensive system inspection
Chapter 10 - Troubleshooting
123
Summary of Contents for imagePRESS C800 Series
Page 2: ...Edition 2015 04 GB ...
Page 6: ...Contents 6 ...
Page 7: ...Chapter 1 Preface ...
Page 10: ...Preface 10 Chapter 1 Preface ...
Page 11: ...Chapter 2 Introduction ...
Page 13: ...Chapter 3 Installation ...
Page 31: ...Chapter 4 Using the PRISMAsync ...
Page 44: ...Engine service mode during printing 44 Chapter 4 Using the PRISMAsync ...
Page 53: ...Chapter 5 Start shutdown and restart the system ...
Page 61: ...Chapter 6 The Settings Editor ...
Page 64: ...The Settings editor 64 Chapter 6 The Settings Editor ...
Page 65: ...Chapter 7 Service procedures ...
Page 82: ...Connect Harness 22W01 82 Chapter 7 Service procedures ...
Page 83: ...Chapter 8 Firmware upgrades via PRISMAsync ...
Page 103: ...Chapter 9 System software ...
Page 118: ...Configure the machine for the USA 118 Chapter 9 System software ...
Page 119: ...Chapter 10 Troubleshooting ...
Page 140: ...Escalation procedure 140 Chapter 10 Troubleshooting ...
Page 141: ...Chapter 11 Appendix ...
Page 162: ... 26 Picture 2 Engine reports 162 Chapter 11 Appendix ...
Page 167: ......


