32
• [CaptureOnTouch Lite] may not appear on the auto play
screen. In this case, click [Open folder to view files] and
double-click
(ONTOUCH.exe).
4
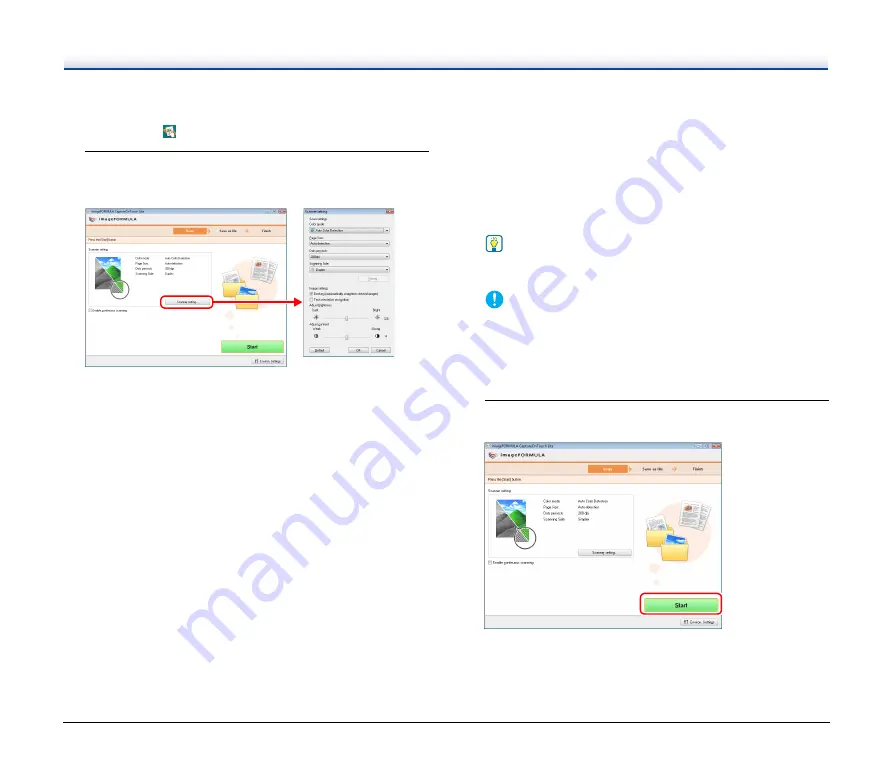
Set the scanning conditions.
Click [Scanner setting], and set the scanning conditions in the
dialog box that appears.
[Color mode]
Specify the mode (color, grayscale, or black-and-white binary) for
scanning the document. To automatically detect whether the
document is color or black-and-white, select [Auto Color
Detection].
[Page Size]
Specify the page size of documents.
[Dots per inch]
Specify the scanning resolution.
[Scanning Side]
Specify whether to scan one side or two sides. If [Skip blank page]
is specified, blank pages within the document are skipped during
scanning.
[Deskew]
Slanted scanned images are detected, and then straightened.
[Text orientation recognition]
The orientation of text in scanned images is detected, and the
images are rotated so that the text is correctly oriented and then
saved.
[Adjust brightness]
Adjust the brightness of scanned images.
[Adjust contrast]
Adjusts the contrast of scanned images.
[Default]
Returns all settings to their default values.
When you have finished configuring the settings, click [OK] to
close the dialog box.
Hint
When splitting up multiple documents to scan in parts, select the
[Enable continuous scanning] check box on the main screen.
IMPORTANT
If you configure scanning conditions that require a large amount
of the computer’s memory, scanning may be disabled. If an error
message appears due to insufficient memory while scanning is in
progress, exit the application and try scanning again using
different scanning condition settings.
5
Click [Start].
You can also press the start button on the scanner.
Scanning of the document starts.
When scanning of the whole document is completed, the output
settings screen appears.


