background image

SERVICE 

MANUAL


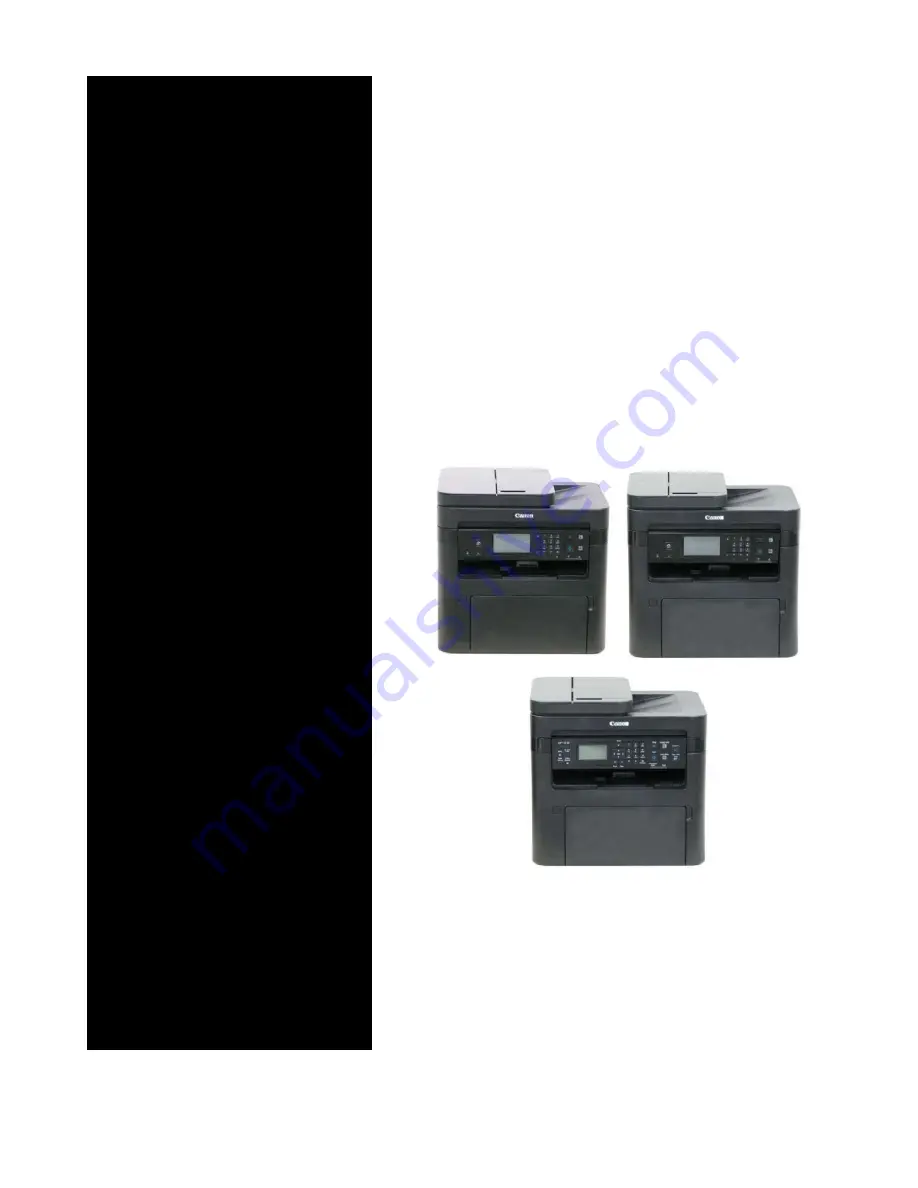
imageCLASS 
MF269dw 
MF267dw 
MF264dw 


Canon


June 6, 2018 
Rev. 1


COPYRIGHT

 ©

 2018 CANON INC.


CANON imageCLASS MF260dw Series Rev. 1 PRINTED IN U.S.A. 


Summary of Contents for imageCLASS MF264dw

Page 1: ...SERVICE MANUAL imageCLASS MF269dw MF267dw MF264dw Canon June 6 2018 Rev 1 COPYRIGHT 2018 CANON INC CANONimageCLASS MF260dw Series Rev 1 PRINTED IN U S A ...

Page 2: ...al over a long or short period Canon will issue a new edition of this manual The following paragraph does not apply to any countries where such provisions are inconsistent with local law Trademarks The product names and company names used in this manual are the registered trademarks of the individual companies Copyright The copyright of this document belongs to Canon Inc This document may not be c...

Page 3: ...g the front door and closing the delivery unit door which results in supplying the machine with power 2 In the digital circuits 1 is used to indicate that the voltage level of a given signal is High while 0 is used to indicate Low The voltage value however differs from circuit to circuit In addition the asterisk as in DRMD indicates that the DRMD signal goes on when 0 In practically all cases the ...

Page 4: ...cations 9 Product Specifications 9 Reader Specifications 10 ADF Specifications DADF SADF 11 FAX specification 11 Paper Type 12 Paper Size 12 Parts Name 14 External view 14 Cross Section View 17 Control Panel 20 2 Technology 22 Basic Configuration 23 Functional Configuration 23 Document Exposure Feeder System 24 Document Exposure System 24 Document Feeder System 24 Controller System 31 Functional C...

Page 5: ...th Detection 55 Jam Detection 56 3 Periodical Service 57 Periodically Replaced Parts 58 Consumable Parts 59 Periodical Service 60 Cleaning Parts 61 4 Parts Replacement and Cleaning 62 Preface 63 Outline 63 List of Parts 64 External Cover 64 Main Unit 68 Electrical Components List 71 External Cover System 77 Removing the Cartridge 77 Removing the Right Cover 78 Removing the Left Cover 80 Removing t...

Page 6: ...153 Original Exposure Feed System Copyboard Model 157 Removing the Copyboard Cover 157 Removing the Copyboard Cover Reader Unit 157 Removing the Platen Glass Copyboard Model 161 Removing the Contact Image Sensor Copyboard Model 163 Removing the Reader Motor Copyboard Model 168 Controller System 172 Removing the Control Panel Unit 172 Removing the Wireless Lan PCB 173 Removing the Main Controller P...

Page 7: ...rming Nip Width 226 Debug Log 228 Function Overview 228 Firmware Log Collection Using Log Collection Tool 228 Version Upgrade 231 Function Overview 231 Version Upgrade Using UST 231 Version Upgrade via Internet 231 7 Error Jam Alarm 234 Overview 235 Outline of Codes 235 Error Jam Log Indication 235 Error Code 238 Error Code Details 238 Jam Code 241 Jam Code Table Host Machine 241 Table of Jam Code...

Page 8: ...parameter setting mode 269 NCU NCU parameter setting mode 270 TESTMODE Service mode for test print operation check etc 274 SYSTEM SYSTEM Test Mode 274 SCAN SCAN Test Mode 274 FAX FAX test mode 277 PANEL PANEL Test Mode 278 APPENDICES 279 Service Tools 280 Special Tools 280 Solvents and Oil List 280 General Circuit Diagram 281 General Circuit Diagram 1 2 281 General Circuit Diagram 2 2 282 Backup D...

Page 9: ...s Laser Safety 2 How to Handle the Laser Scanner Unit 2 Power Supply 2 Toner Safety 3 Notes When Handling a Lithium Battery 3 Notes Before it Works Serving 3 Points to Note at Cleaning 4 Notes on Assembly Disassembly 4 ...

Page 10: ...laser scanner unit Dieses Gerät ist der Klasse 1 der Laserprodukte zugeordnet Allerdings enthält die Laserscannereinheit eine Laserstrahlquelle der Klasse 3B die Augenschäden verursachen kann wenn man in diesen Strahl blickt Deshalb darf die Laserscannereinheit nicht zerlegt werden An der Laserscannereinheit kann keine Justage vor Ort vorgenommen werden Das in dem folgenden Bild dargestellte Kennz...

Page 11: ...losion if battery is replaced by an incorrect type The following warnings are given to comply with Safety Principles EN60950 1 CAUTION Wenn mit dem falschen Typ ausgewechselt besteht Explosionsgefahr Gebrauchte Batterien gemäß der Anleitung beseitigen Notes Before it Works Serving At servicing be sure to turn OFF the power source according to the specified steps and disconnect the power plug Be su...

Page 12: ...screw type length diameter etc at the right position when assembling 4 To keep electric conduction binding screws with washers are used to attach the grounding wire and the varistor Ensure to use the right screw type when assembling 5 Unless it is specially needed do not operate the device with some parts removed 6 Never remove the paint locked screws when disassembling CAUTION English CAUTION The...

Page 13: ...Product Overview 1 Product Lineup 6 Features 8 Specifications 9 Parts Name 14 ...

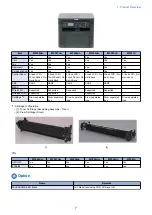
Page 14: ...Product Lineup Host machine MF269dw MF267dw MF266dn MF264dw MF263dn MF261d 1 Product Overview 6 ...

Page 15: ... Nu meric keys ADF DADF SADF SADF SADF SADF MEAP Wired LAN Supported Supported Supported Supported Supported Wireless LAN Supported Supported Supported Cartridge 1 Drum separated type Drum separated type Drum separated type Drum separated type Drum separated type Drum separated type 1 Cartridge configuration 1 Toner Cartridge Developing Assembly Toner 2 Drum Cartridge Drum 1 2 PDL MF269dw MF267dw ...

Page 16: ...ded print function on all models Control Panel with a large screen excellent in visibility and operability Equipped with usability considered Control Panel with 6 line black and white Touch Panel MF269dw MF267dw MF266dn Drum separated type Cartridge Configuration of Toner Cartridge Developing Assembly Toner and Drum Cartridge Drum 1 Product Overview 8 ...

Page 17: ...ed printing 17 8 pages min A4 18 4 pages min LTR Paper types for Pickup Tray Plain paper Recycled paper Heavy paper Bond paper Label paper Envelope Multi purpose Tray paper type Plain paper Recycled paper Heavy paper Bond paper Label paper Envelope Pickup Tray paper size A4R B5R A5 A5R A6R LGLR LTRR STMTR EXECR OFFICIOR B OFFICIOR M OFFICIOR GLTRR G LGLR AFLS R FLS R 16KR IndianLGLR F4AR Index Car...

Page 18: ...arge capacity Drum Cartridge Approx 0 2 kg 1 The time from when the power is turned ON to when the basic screen appears This may vary depending on the usage conditions and environment of this machine 2 The print speed may become lower depending on the settings such as paper type orientation and number of sheets printed 3 The actual stack capacity varies depending on the site environment and the ty...

Page 19: ...figuration only Original size detection function None Function to automatically detect document density None Stamp function None Original feed speed at reading 100 DADF 129 34 mm s SADF 113 38 mm s Original processing speed A4 B W Stream reading 300 dpi x 300 dpi DADF 1 sided 22 ipm DADF 2 sided 8 ipm SADF 1 sided 20 ipm Color Stream reading 300 dpi x 300 dpi DADF 1 sided 15 ipm DADF 2 sided 5 ipm...

Page 20: ...ditions 2 Based on ITU T ITU Telecommunication Standardization Sector Standard Chart No 1 MMR standard mode Paper Type Type of paper Paper settings in this machine Plain 60 g m2 Plain L2 61 to 70 g m2 Plain L 71 to 89 g m2 Plain Recycled 71 to 89 g m2 Recycled Heavy paper 90 to 105 g m2 Heavy 1 106 to 120 g m2 Heavy 2 121 to 163 g m2 Heavy 3 121 to 163 g m2 Heavy 4 1 Bond paper 60 to 104 g m2 Bond...

Page 21: ... OFFICIO 341 0 215 9 Yes Yes G LTR 266 7 203 2 Yes Yes G LGL 330 2 203 2 Yes Yes AFLS 337 0 206 0 Yes Yes FLS 330 2 215 9 Yes Yes 16KR 270 0 195 0 Yes Yes Indian LGL 345 0 215 0 Yes Yes F4A 342 9 215 9 Yes Yes Index Card 3x5inch 127 0 76 2 Yes Yes Envelope No 10 COM10 241 3 104 7 Yes Yes Envelope Monarch 190 5 98 4 Yes Yes Envelope C5 229 0 162 0 Yes Yes Envelope DL 220 0 110 0 Yes Yes Custom 127 ...

Page 22: ... Name 1 Original Pickup Tray 2 Original Guide 3 Feeder Cover 4 Control Panel 5 Delivery Tray 6 Handle for carrying 7 Power Switch 8 Document Delivery Tray 9 Delivery Stopper 10 Pickup Tray 11 Front Cover 12 Original Read Area 13 Ventilation hole 14 Copyboard Glass Copyboard model 1 Product Overview 14 ...

Page 23: ... 3 4 5 6 9 4 No Name 1 Copyboard cover 2 Control Panel 3 Delivery Tray 4 Handle for carrying 5 Power Switch 6 Delivery Stopper 7 Pickup Tray 8 Front Cover 9 Ventilation hole 10 Copyboard Glass 1 Product Overview 15 ...

Page 24: ...Rear Cover 2 Rating name plate label 3 USB port 4 LAN Port 5 Power Socket 6 1 External phone terminal 7 1 Phone line terminal 1 FAX model only Copyboard model 1 2 4 3 No Name 1 Rear Cover 2 Rating name plate label 3 USB port 4 Power Socket 1 Product Overview 16 ...

Page 25: ... 2 3 4 4 4 No Name 1 Toner Cover 2 Delivery Guide 3 Multi purpose Tray 4 Paper Guide Cross Section View DADF 4 5 3 1 2 No Name 1 Separation Roller 2 Pickup Roller 3 Separation Pad 4 Delivery Roller 5 Feed Roller 1 Product Overview 17 ...

Page 26: ... SADF 4 5 3 1 2 No Name 1 Separation Roller 2 Pickup Roller 3 Separation Pad 4 Delivery Roller 5 Feed Roller Reader 1 No Name 1 Contact Image Sensor 1 Product Overview 18 ...

Page 27: ...ame 1 Transfer Roller 2 Pressure Roller 3 Fixing Film Unit 4 Delivery Roller 5 Drum Cartridge 6 Photosensitive Drum 7 Toner Cartridge 8 Laser Scanner Unit 9 Pickup Roller 10 Separation Pad 11 Feed Roller 12 Duplex Roller 1 Product Overview 19 ...

Page 28: ...f the quiet mode Off In normal machine operation On Green In quiet mode 8 Error LED Indicates Error status Off No Error On Orange When an error that cannot be recovered by the user service call occurs Blinking Orange When an error that can be recovered by the user such as paper jam no paper etc occurs On status overrides Blinking status when the both occur simultaneously 9 Processing Data LED Indi...

Page 29: ...he scanned data to the registered PC 12 Paper Save Copy key Press to set 2 on 1 1 Sided 2 Sided 4 on 1 1 Sided 2 Sided 2 on 1 1 Sided 1 sided 4 on 1 1 Sided 1 sided 13 Quiet mode key Press to switch On Off of the quiet mode Off In normal machine operation On Green In quiet mode 14 Error LED Indicates Error status Off No Error On Orange When an error that cannot be recovered by the user service cal...

Page 30: ...Technology 2 Basic Configuration 23 Document Exposure Feeder System 24 Controller System 31 Laser Exposure System 39 Image Formation System 41 Fixing System 47 Pickup Feed System 50 ...

Page 31: ...ng System Pickup Feed System Laser scanner Laser exposure system Main controller Engine controller Controller system Laser beam Paper flow simplex Paper flow duplex Signal flow Transfer Image formation system Pickup Tray Multi purpose Tray Registration Pickup feed system Fixing assembly Fixing system Delivery assembly Reader ADF 1 Drum Pickup unit Document exposure feeding system 1 ADF model only ...

Page 32: ...ow M3 UNIT13 Symbol Name Symbol Name UNIT13 Contact Image Sensor M3 Reader Motor Document Feeder System Functional Configuration SADF SADF is a Single side Auto Document Feeder dedicated to stream reading Pickup feeding and delivery are performed using the SADF Motor M5 SADF Motor M5 drives to pick up and feed the original inserted face up into the Document Pickup Tray one sheet at a time from the...

Page 33: ... a time from the top of the pile when copy fax or scan is started Original images are read by the Contact Image Sensor UNIT13 when the original is passing through the Copyboard Glass then delivered face down to the Document Delivery Unit Main Controller PCB J12 1 2 3 4 A0 A0 B0 B0 M4 J8 SL4 UNIT13 Following operation is performed at duplex reading Operation at duplex reading 1 DADF motor is rotate...

Page 34: ...clockwise 4 The Contact Image Sensor read the 2nd side of the original when the original which is fed to the duplex path is passing through the copyboard glass M4 SL4 UNIT13 5 The original is reversed by rotating the DADF Motor M4 counterclockwise after the trail edge of the original reached the Document Delivery Unit M4 6 After feeding the original for the certain period of time and at the timing...

Page 35: ...ts Major components of the original feed system are shown below SADF M5 PS9 PS8 Symbol Name Symbol Name PS8 SADF Document End Sensor M5 SADF Motor PS9 SADF Document Sensor DADF PS6 M4 PS7 SL4 Symbol Name Symbol Name PS6 DADF Document End Sensor M4 DADF Motor PS7 DADF Document Sensor SL4 DADF Solenoid 2 Technology 27 ...

Page 36: ... is detected by Document Sensor In the case of SADF SADF Document Sensor PS9 In the case of DADF DADF Document Sensor PS7 When placing an original on the Document Pickup Tray the Document Sensor detects the leading edge of the document and judges that the original is present Original is set on the feeder message is displayed on the control panel In the case of SADF Main Controller PCB J12 1 2 3 4 ...

Page 37: ...edge of the original reached the Document End Sensor Also when the trailing edge of the original passes the Document End Sensor it is judged that the trailing edge of the original reached the Document End Sensor The original length is determined by the time required from when the Document End Sensor detects the original s leading edge to when it detects its trailing edge In the case of SADF Main C...

Page 38: ...oes not detect the leading edge of the original although the original has fed for a specified distance after reception of a pickup request Pickup Stationary Jam The Document End Sensor does not detect the back end of the original although a specified period of time has passed after detection of the leading edge Sequence Jam abnormal timing When a software sequence did not end normally in a specifi...

Page 39: ...Controller PCB Main Controller PCB Main controller receives the printing information from the external devices computer etc through interface cables This information consists of 2 types of data which includes command data to handle the printer status and the machine specific information and data to be printed The main controller receives the data to be printed and creates the video data and send i...

Page 40: ...mage Sensor J8 Control Panel PCB J16 ADF Motor J9 Low Voltage Power Supply PCB J18 NCU PCB May not be installed according to the specification of applicable model Engine Controller PCB The Engine Controller PCB is a circuit to control the operation sequences of this machine and controlled by DC Controller and High Voltage Power Supply in the Engine Controller PCB When the DC power is supplied thro...

Page 41: ... controller PCB Sensor Motor Transfer roller Main controller PCB Fixing unit J511 J582 J581 J311 J512 J303 J536 J563 J561 J531 J541 J551 SW501 No Destination Role No Destination Role J303 Transfer High Voltage J551 Motor PCB J311 Pre exposure LED J561 TOP Sensor PCB J511 Low Voltage Power Supply PCB J563 Environment Pickup Sensor PCB J512 Low Voltage Power Supply PCB J581 Drum Cartridge Memory J53...

Page 42: ...r Motor Contact Image Sensor None M4 DADF Motor DADF Pickup Roller DADF Feed Roller DADF Delivery Roller None M5 SADF Motor SADF Pickup Roller SADF Feed Roller SADF Delivery Roller None Error Code E110 Scanner Motor failure E110 0000 Error in startup of the Scanner Motor E110 0001 Scanner Motor rotation error Door Open Detection This machine uses the Toner Cover Switch SW501 of the Engine Controll...

Page 43: ...Fan Control This machine uses a fan to prevent temperature rise inside the machine FM1 Sym bol Name Cooling area Type Speed Failure Detection FM1 Main Fan Inside the printer Suction Full speed Yes Error Code E806 Main Fan failure E806 0000 The Main Fan Motor fails to rotate at the specified rotation speed 2 Technology 35 ...

Page 44: ...4 V generation circuit in the power supply generates DC power voltage 24V 3 3 V is generated from DC voltage 24 V which is generated in the power supply then supplied to the DC Controller and the Main Controller DC Controller generates 5 V from DC voltage 24 V and then supplies it to the High Voltage PCB Voltage generated by the Fixing Power Supply PCB and DC Controller is supplied to each load 24...

Page 45: ...ent in the 24 V line If overcurrent occurs the power supply fuse blows and cuts off the power supply CPU for the engine controller judges the door is open when the Toner Cover Switch is turned OFF WARNING As the power of this machine is turned ON OFF by the remote switch control circuit power is supplied to the AC line even when the Power Switch is turned OFF Do not perform disassembly work while ...

Page 46: ...ted Sleep 2 Sleep 1 Auto Shutdown Timer haz passed Service call Sleep Auto Sleep Timer has passed The energy saver key is pressed Power off Power on Standby Service error The low voltage power supply stops supplying power from the 24V generation circuit when it receives a power saving transition mode signal LVM from the DC Controller 2 Technology 38 ...

Page 47: ... Controller DC Controller Engine Controller PCB Main Controller PCB SCANNER MOTOR SPEED CONTROL signal LASER CONTROL signal VIDEO signal BD INPUT signal Scanner Mirror BD Sensor Scanner Motor Unit Photosensitive Drum Laser Unit Failure Detection Overview The DC Controller detects the following failures in the Laser Scanner Unit Scanner area failure Scanner Motor failure Description Scanner area fa...

Page 48: ...canner Motor is being driven an error code is notified Error Code E100 Scanner area failure E100 0001 BD correction error E110 Scanner Motor failure E110 0000 Scanner Motor start up error E110 0001 Scanner Motor rotation error 2 Technology 40 ...

Page 49: ...DC Controller controls the Laser Scanner Unit and the High Voltage Power Supply to form the toner image on the Photosensitive Drum and transfers and fixes this to the paper Fixing Unit Laser Scanner Unit Transfer Roller 6 4 5 DC Controller High voltage power supply Engine Controller PCB Drum Cartridge Toner Cartridge 2 Technology 41 ...

Page 50: ...curvature separation method the paper is separated from the Photosensitive Drum In the case of thin paper which has low elastic force the Static Eliminator reduces the electric charge on the back side of paper to make the thin paper to be separated easily Fixing block 7 Fixing Toner on the paper is fixed on the paper using heat and pressure Cleaning block 8 Drum cleaning Residual toner on the Prim...

Page 51: ...n Controller and displays a warning message on the Control Panel Messages indicated when cartridge memory error is detected Cartridge type Message Toner Cartridge Cartridge communication error A counterfeit or non Canon toner cartridge may be in use Drum Cartridge Cartridge communication error A counterfeit or non Canon drum cartridge may be in use Messages indicated when non genuine cartridge is ...

Page 52: ...n Controller when cartridge consumption reaches the specified value Upon receipt of the notification the Main Controller displays a warning or a message that the cartridge has reached the end of its life Warning display End of life display 3 Toner Drum level 1 When the Cartridge level reached X 2 0 Detected to location Cartridge Memory Cartridge Memory 1 Remaining toner drum level can be checked w...

Page 53: ...achine Status of the machine Developing Roller Power Supply Off Standby Disengagement Print Engagement Description The Developing Roller is engaged with the Photosensitive Drum only at printing The Developing Roller is engaged only when needed to prevent deterioration of the Photosensitive Drum for ensuring its maximum life Engagement disengagement of the Developing Roller is controlled by the DC ...

Page 54: ...Cartridge Pre transfer Guide Transfer Roller The high voltage biases are generated by the DC Controller controlling the High Voltage Power Supply DC Controller Transfer front guide bias circuit High voltage power supply Engine Controller PCB Transfer bias circuit Developing Blade bias circuit Developing bias circuit Primary charging bias circuit Primary Charging Roller Transfer Front Guide Transfe...

Page 55: ...ngine controller PCB TH1 TP1 H1 Symbol Component name Function H1 Fixing Heater Heats the fuser film ass y TH1 Thermistor Detects the temperature of the fuser heater TP1 Thermal Fuse Prevents an abnormal temperature rise of fuser heater Fixing temperature control Overview This control circuit controls the fixing heater temperature to be maintained within the target temperature Description The DC C...

Page 56: ...Fixing heater safety circuit CPU Relay control circuit Zerocross circuit 220 to 240V only H1 Protection Function Overview This machine has a function to detect abnormal temperature rise in the Fixing Unit and cut off the power supply to the Fixing Heater Description This machine is equipped with 4 types of protection function as follows DC Controller Fixing Heater safety circuit Thermoswitch Down ...

Page 57: ...x 18 sheets 1 suded are fed Fixing Unit Failure Detection Overview The DC Controller shuts down the power supply to the Fixing Unit and notifies an error when the Fixing Unit is in the following condition Startup failure Abnormal high temperature failure Abnormal low temperature failure Fixing drive circuit error Description Fixing Unit startup failure An error code is notified if the Fixing Unit ...

Page 58: ...up feed and deliver paper The pickup feed and delivery systems consist of the following three blocks Pickup and feed blocks From the pickup slot to the Fixing Unit Fixing and delivery blocks From the delivery slot to the TOP Sensor Duplexing blocks from the delivery slot to the TOP Sensor Paper flow simplex Paper flow duplex Pickup Feed block Fixing block Delivery Duplex block 2 Technology 50 ...

Page 59: ...Drawing of Rollers 6 7 4 3 1 5 2 No Name No Name 1 Transfer Roller 5 Separation Pad 2 Pressure Roller 6 Feed Roller 3 Delivery Roller 7 Duplex Roller 4 Pickup Roller Sensors Layout Drawing PS2 PS1 PS3 PS5 PS4 PS10 2 Technology 51 ...

Page 60: ...livery Sensor PS2 Pickup Paper Width Sensor PS5 Fixing Paper Width Sensor PS3 TOP Sensor PS10 Multi purpose Tray Sensor Diagram of Load Drives M2 SL1 SL3 Symbol Name Symbol Name SL1 Pickup Solenoid M2 Main Motor SL3 Duplex Reverse Solenoid 2 Technology 52 ...

Page 61: ...the Engine Controller judges that a misprint due to no paper has occurred and notifies it to the Main Controller For the Pickup Tray Engine Controller PCB PS1 Sensor lever Paper Sensor lever Paper PS1 DC Controller DC Controller Engine Controller PCB For the Multi purpose Tray メインコントローラー Main Controller PCB Main Controller PCB Sensor lever Paper PS10 Sensor lever Paper PS10 Pickup Control Descript...

Page 62: ...ensor PS2 detected the presence of a paper Paper width is judged as Small if the Pickup Paper Width Sensor PS2 detected the absence of a paper PS2 Paper Width Small Paper Width Large Feed direction Paper Paper Leading Edge Fixing Paper Width Detection After the Fixing Delivery Sensor PS4 has detected the paper leading edge the status of the Fixing Paper Width PS5 Sensor is checked at the timing th...

Page 63: ...played on the control panel PS4 Paper Width Large Feed direction Feed direction Paper PS4 Paper Width Small Paper Paper Leading Edge Paper Leading Edge Detected paper existence Detected paper nothing PS5 PS5 PS5 PS5 Paper Length Detection Description Paper length is detected by measuring the time from when the TOP Sensor PS3 detects the leading edge of paper until when the trailing edge of paper p...

Page 64: ... stationary Jam In the case the Fixing Delivery Sensor PS4 cannot detect the back end although a specified period of time has passed after the TOP Sensor PS3 detected the back end Internal residual Jam In the case the following sensors detected the presence of paper before after the power ON closing the door and printing operation Top Sensor PS3 Fixing Delivery Sensor PS4 Fixing Paper Width Sensor...

Page 65: ...Periodical Service 3 Periodically Replaced Parts 58 Consumable Parts 59 Periodical Service 60 Cleaning Parts 61 ...

Page 66: ...Periodically Replaced Parts Periodic replacement parts are not required in this machine 3 Periodical Service 58 ...

Page 67: ...Consumable Parts Consumable parts are not required in this machine 3 Periodical Service 59 ...

Page 68: ...Periodical Service No periodic services are required to this machine 3 Periodical Service 60 ...

Page 69: ... 2 No Name Work description 1 Delivery Roller When there is soiling or foreign matter clean with lint free paper moistened with al cohol 2 Pickup Roller 3 Separation Pad 4 Feed Roller 5 Duplex Roller 3 Periodical Service 61 ...

Page 70: ...r System 77 Original Exposure Feed System DADF Model 93 Original Exposure Feed System SADF Model 126 Original Exposure Feed System Copyboard Model 157 Controller System 172 Laser Exposure System 192 Image Formation System 196 Fixing System 204 Pickup Feed Delivery System 211 ...

Page 71: ...hine before disassembling and assembling the machine be sure to put the Photosensitive Drum in a protective bag even in a short period of time to prevent the adverse effect of light Reassembling procedures are followed by the reverse of disassembly unless otherwise specified Note the length diameters and locations of screws as you remove them When reassembling the host machine be sure to use them ...

Page 72: ...DF Unit Reader Unit 1 2 4 5 6 8 7 3 9 10 No Name 1 Document Pickup Tray Unit 2 Document Auxiliary Tray 3 DADF Handle Cover 4 DADF Front Cover 5 DADF Lower Cover 6 DADF Upper Cover 7 DADF Rear Cover 4 Parts Replacement and Cleaning 64 ...

Page 73: ...r Frame SADF Unit Reader Unit 1 2 4 5 6 8 7 3 9 10 No Name 1 Document Pickup Tray Unit 2 Document Auxiliary Tray 3 SADF Handle Cover 4 SADF Front Cover 5 SADF Lower Cover 6 SADF Upper Cover 7 SADF Rear Cover 8 SADF Base Unit 4 Parts Replacement and Cleaning 65 ...

Page 74: ...No Name 9 Reader Upper Cover Unit 10 Reader Frame Copyboard Cover Reader Unit 1 2 3 No Name 1 Copyboard Cover 2 Reader Upper Cover Unit 3 Reader Frame 4 Parts Replacement and Cleaning 66 ...

Page 75: ... Host Machine 2 3 4 5 1 6 6 7 8 9 10 No Name 1 Left Cover 2 Toner Cover 3 Top Cover 4 Front Cover 5 Multi purpose Tray 6 Control Panel Unit 7 Duplex Door Unit 4 Parts Replacement and Cleaning 67 ...

Page 76: ...No Name 8 Right Cover 9 Upper Cover Sub 10 Hinge Face Cover Main Unit DADF Unit Reader Unit 1 2 No Name 1 DADF Unit 2 Reader Unit 4 Parts Replacement and Cleaning 68 ...

Page 77: ... SADF Unit Reader Unit 1 2 No Name 1 SADF Unit 2 Reader Unit 4 Parts Replacement and Cleaning 69 ...

Page 78: ... Copyboard Cover Reader Unit 1 2 No Name 1 Copyboard Cover 2 Reader Unit 4 Parts Replacement and Cleaning 70 ...

Page 79: ...ler 3 Duplex Frame Unit 4 Fixing Unit 5 Transfer Unit 6 Duplex Reverse Unit 7 Pickup Roller 8 Laser Scanner Unit 9 Low Voltage Power Supply Unit 10 Separation Pad Unit Electrical Components List DADF Unit Reader Unit SL4 M4 M3 PS6 PS7 UNIT13 4 Parts Replacement and Cleaning 71 ...

Page 80: ...r SL4 DADF Solenoid SADF Unit Reader Unit M5 M3 PS8 PS9 UNIT13 Electric code Name UNIT13 Contact Image Sensor M3 Reader Motor M5 SADF Motor PS8 SADF Document End Sensor PS9 SADF Document Sensor Copyboard Cover Reader Unit M3 UNIT13 Electric code Name UNIT13 Contact Image Sensor M3 Reader Motor 4 Parts Replacement and Cleaning 72 ...

Page 81: ...tric code Name M1 Scanner Motor M2 Main Motor FM1 Main Fan SL1 Pickup Solenoid SL2 Developer Disengagement Solenoid SL3 Duplex Reverse Solenoid Heater TH1 TP1 H1 Electric code Name H1 Fixing Heater TH1 Thermistor 4 Parts Replacement and Cleaning 73 ...

Page 82: ...peaker SW1 SW740 SW501 SP1 Electric code Name SW1 Developer Disengagement Switch SW501 Toner Cover Switch SW740 Power Switch SP1 Speaker Sensor PS601 PS2 PS1 PS5 PS4 PS3 PS10 Electric code Name PS1 Paper Sensor 4 Parts Replacement and Cleaning 74 ...

Page 83: ...Rotation Number Sensor PCB UNIT11 UNIT12 UNIT2 UNIT8 UNIT9 UNIT7 UNIT1 UNIT4 UNIT14 UNIT17 UNIT15 UNIT16 DSP1 DSP2 Electric code Name UNIT1 Engine Controller PCB UNIT2 Main Controller PCB UNIT4 Motor PCB UNIT7 Delivery Sensor PCB UNIT8 Top Sensor PCB UNIT9 Environment Pickup Sensor PCB UNIT11 Wireless LAN PCB UNIT12 Power Switch PCB 4 Parts Replacement and Cleaning 75 ...

Page 84: ...Electric code Name UNIT14 NCU PCB UNIT15 Control Panel PCB UNIT16 Control Panel PCB UNIT17 Touch Panel DSP1 Display DSP2 Display 4 Parts Replacement and Cleaning 76 ...

Page 85: ...UTION shown below 1 When removing the cartridge be sure to block light to the Photosensitive Drum Cover the removed drum with 5 or more sheets of paper to block light 2 Do not place the cartridge in a location where it is exposed to direct rays of the sun e g near the window 1 2 3 4 Parts Replacement and Cleaning 77 ...

Page 86: ...4 5 Removing the Right Cover Preparation 1 Removing the Cartridge on page 77 Procedure 1 1x 4 Parts Replacement and Cleaning 78 ...

Page 87: ...2 70 mm 70 mm 3 NOTE The following shows the locations of the 5 claws and the rib of the Right Cover 4 Parts Replacement and Cleaning 79 ...

Page 88: ...4 Removing the Left Cover Preparation 1 Removing the Cartridge on page 77 Procedure 1 2 1x 4 Parts Replacement and Cleaning 80 ...

Page 89: ...3 80 mm 80 mm 4 Parts Replacement and Cleaning 81 ...

Page 90: ...4 NOTE The following shows the locations of the 5 claws and the rib of the Left Cover 4 Parts Replacement and Cleaning 82 ...

Page 91: ...n 1 Removing the Cartridge on page 77 2 Removing the Right Cover on page 78 3 Removing the Left Cover on page 80 4 Removing the Speaker Fax Model on page 188 Procedure 1 If the Fax is installed 3x 3x 1x 4 Parts Replacement and Cleaning 83 ...

Page 92: ... If the Fax is not installed 3x 2x 1x 2 60 mm 3 4 Parts Replacement and Cleaning 84 ...

Page 93: ...4 NOTE If the FAX is installed remove the wire harness from the gap A of NCU PCB A 5 4 Parts Replacement and Cleaning 85 ...

Page 94: ...ickup Guide 1 If the Fax is installed pass the harness through the gap A A 2 Lift the Multi purpose Tray Paper Detection Actuator using a screwdriver and insert the Front Cover 3 Removing the Toner Cover Preparation 1 Removing the Cartridge on page 77 2 Removing the Right Cover on page 78 3 Removing the Left Cover on page 80 4 Parts Replacement and Cleaning 86 ...

Page 95: ... one of the following operation Removing the DADF Unit Reader Unit on page 93 Removing the SADF Unit Reader Unit on page 126 Removing the Copyboard Cover Reader Unit on page 157 Procedure 1 1x 2 1x 4 Parts Replacement and Cleaning 87 ...

Page 96: ...3 4 Parts Replacement and Cleaning 88 ...

Page 97: ...4 5 4 Parts Replacement and Cleaning 89 ...

Page 98: ...moving the Duplex Door Preparation 1 Removing the Cartridge on page 77 2 Removing the Right Cover on page 78 3 Removing the Left Cover on page 80 Procedure 1 30 mm 2 3 4 Parts Replacement and Cleaning 90 ...

Page 99: ...n the model perform one of the following operation Removing the DADF Unit Reader Unit on page 93 Removing the SADF Unit Reader Unit on page 126 Removing the Copyboard Cover Reader Unit on page 157 5 Removing the Toner Cover on page 86 Procedure 1 4x Removing the Multi purpose Tray Preparation 1 Removing the Cartridge on page 77 4 Parts Replacement and Cleaning 91 ...

Page 100: ...Removing the Right Cover on page 78 3 Removing the Left Cover on page 80 4 Removing the Speaker Fax Model on page 188 5 Removing the Front Cover on page 83 Procedure 1 4 Parts Replacement and Cleaning 92 ...

Page 101: ... Feed System DADF Model Removing the DADF Unit Reader Unit Preparation 1 Removing the Cartridge on page 77 2 Removing the Left Cover on page 80 Procedure 1 2x 2x 4x 2 2x 1x 1x 3 1x 1x 4 Parts Replacement and Cleaning 93 ...

Page 102: ...4 CAUTION When opening or closing the Hinge Arm move it slowly because the pressure is strong 4 Parts Replacement and Cleaning 94 ...

Page 103: ...5 CAUTION When placing the units do NOT damage the Flat Cable and the Harness NOTE The following shows how to route the harness 4 Parts Replacement and Cleaning 95 ...

Page 104: ...ing the Left Cover on page 80 3 Removing the DADF Unit Reader Unit on page 93 Procedure CAUTION Do not damage the White Sheet and White Guide Plate 1 NOTE Be sure to put a piece of paper and place the Control Panel Unit on it carefully so as not to damage it 4 Parts Replacement and Cleaning 96 ...

Page 105: ...2 3 1x 4 Parts Replacement and Cleaning 97 ...

Page 106: ...4 CAUTION When placing the units do NOT damage the Flat Cable and the Harness 4 Parts Replacement and Cleaning 98 ...

Page 107: ...up Unit Preparation 1 Removing the Cartridge on page 77 2 Removing the Left Cover on page 80 3 Removing the DADF Unit Reader Unit on page 93 4 Separating the DADF Unit Reader Unit on page 96 4 Parts Replacement and Cleaning 99 ...

Page 108: ... Procedure CAUTION Do not damage the White Guide Plate 1 2 4 Parts Replacement and Cleaning 100 ...

Page 109: ...3 4 NOTE How to Install the DADF Front Cover When installing the DADF Front Cover Align the 2 DADF Front Cover Claws with the holes A A 4 Parts Replacement and Cleaning 101 ...

Page 110: ...5 6 4x 1x 1x 7 4 Parts Replacement and Cleaning 102 ...

Page 111: ...artridge on page 77 2 Removing the Left Cover on page 80 3 Removing the DADF Unit Reader Unit on page 93 4 Separating the DADF Unit Reader Unit on page 96 5 Removing the DADF Pickup Unit on page 99 Procedure 1 1x 2x 2x 4 Parts Replacement and Cleaning 103 ...

Page 112: ... 3 4 5 6 1 Separation Swing Arm 2 Separation Gear 21T 42T 3 Gear 17T 51T 4 Gear 23T 46T 5 Gear 20T 6 DADF Motor Unit NOTE Ensure that the 1 point A in the DADF Pickup Unit and DADF Motor Unit are in contact with the edge of the shafts A 4 Parts Replacement and Cleaning 104 ...

Page 113: ...ing the DADF Unit Reader Unit on page 96 5 Removing the DADF Pickup Unit on page 99 6 Removing the DADF Motor on page 103 Procedure 1 2x NOTE How to assemble the DADF Solenoid Pass the Solenoid Shaft through the Solenoid Arm hole Ensure that the 2 DADF Pickup Unit Shafts and the 2 DADF Solenoid Unit contact points A are in contact A 4 Parts Replacement and Cleaning 105 ...

Page 114: ...ng the DADF Pickup Roller Unit Procedure CAUTION Do not touch the surface of the roller with bare hands as doing so will attach skin oil on it and decrease feedability 1 2 4 Parts Replacement and Cleaning 106 ...

Page 115: ...3 4 5 4 Parts Replacement and Cleaning 107 ...

Page 116: ...6 4 Parts Replacement and Cleaning 108 ...

Page 117: ...he spring to the boss Be sure to pay attention to the direction of the 2 bushings Be sure to align the gear and the D cut of the DADF Pickup Roller shaft Removing the DADF Pickup Roller Preparation 1 Removing the DADF Pickup Roller Unit on page 106 4 Parts Replacement and Cleaning 109 ...

Page 118: ... on it and decrease feedability 1 2 Removing the DADF Separation Roller Preparation 1 Removing the DADF Pickup Roller Unit on page 106 Procedure CAUTION Do not touch the surface of the roller with bare hands as doing so will attach skin oil on it and decrease feedability 4 Parts Replacement and Cleaning 110 ...

Page 119: ...1 2 CAUTION Be careful not to lose the Parallel Pin during installation removal as it comes off easily 3 4 Parts Replacement and Cleaning 111 ...

Page 120: ...g the DADF Separation Pad Procedure CAUTION Do not touch the surface of the roller pad with bare hands as doing so will attach skin oil on it and decrease feedability 1 2 2x 4 Parts Replacement and Cleaning 112 ...

Page 121: ...3 CAUTION Because the spring is easy to come off be careful about its loss 4 Assembling the DADF Separation Pad 1 4 Parts Replacement and Cleaning 113 ...

Page 122: ...2 3 4 4 Parts Replacement and Cleaning 114 ...

Page 123: ...Reader Unit on page 93 4 Separating the DADF Unit Reader Unit on page 96 Procedure CAUTION Be sure to place the removed Copyboard Glass on a cloth etc to avoid damaging the bottom sheet When removing the Copyboard Glass be careful not to touch the glass surface If the surface becomes dirty clean it with lint free paper 4 Parts Replacement and Cleaning 115 ...

Page 124: ...1 2 2x 3 4 4 Parts Replacement and Cleaning 116 ...

Page 125: ...s of the Contact Image Sensor Unit Do not touch the document reading part A of the Contact Image Sensor Unit A Removing the Contact Image Sensor DADF Model Preparation 1 Removing the Cartridge on page 77 4 Parts Replacement and Cleaning 117 ...

Page 126: ...board Glass DADF Model on page 115 Procedure CAUTION Do not lose the 2 spacers of the Contact Image Sensor Unit Do not touch the document reading part A of the Contact Image Sensor Unit A Grease is applied on the shaft of the Contact Image Sensor so be careful not to let a hand or part come in contact with the shaft 1 4 Parts Replacement and Cleaning 118 ...

Page 127: ...2 3 4 2x 1x 5 4 Parts Replacement and Cleaning 119 ...

Page 128: ... Installing the Contact Image Sensor 1 2 NOTE If the two Springs have been removed install them to the Contact Image Sensor Holder 4 Parts Replacement and Cleaning 120 ...

Page 129: ...3 4 2x 1x 5 6 4 Parts Replacement and Cleaning 121 ...

Page 130: ... the DADF Unit Reader Unit on page 93 4 Separating the DADF Unit Reader Unit on page 96 5 Removing the Copyboard Glass DADF Model on page 115 Procedure CAUTION Do not lose the 2 spacers of the Contact Image Sensor Unit Do not touch the document reading part A of the Contact Image Sensor Unit A 1 4 Parts Replacement and Cleaning 122 ...

Page 131: ...2 CAUTION Grease is applied on the shaft of the Contact Image Sensor so be careful not to let a hand or part come in contact with the shaft 3 4 1x 4 Parts Replacement and Cleaning 123 ...

Page 132: ...5 2x 4 Parts Replacement and Cleaning 124 ...

Page 133: ...NOTE When the Contact Image Sensor unit has been removed go through the following steps to install it 1 2 3 If spacers have been removed install them 4 Parts Replacement and Cleaning 125 ...

Page 134: ...Feed System SADF Model Removing the SADF Unit Reader Unit Preparation 1 Removing the Cartridge on page 77 2 Removing the Left Cover on page 80 Procedure 1 2x 2x 3x 2 2x 1x 1x 3 1x 1x 4 Parts Replacement and Cleaning 126 ...

Page 135: ...4 CAUTION When opening or closing the Hinge Arm move it slowly because the pressure is strong 4 Parts Replacement and Cleaning 127 ...

Page 136: ...5 CAUTION When placing the units do NOT damage the Flat Cable and the Harness NOTE The following shows how to route the harness 4 Parts Replacement and Cleaning 128 ...

Page 137: ...ng the Left Cover on page 80 3 Removing the SADF Unit Reader Unit on page 126 Procedure CAUTION Do not damage the White Sheet and White Guide Plate 1 NOTE Be sure to put a piece of paper and place the Control Panel Unit on it carefully so as not to damage it 4 Parts Replacement and Cleaning 129 ...

Page 138: ...2 1x 3 1x 4 4 Parts Replacement and Cleaning 130 ...

Page 139: ...e Harness 5 Removing the SADF Upper Cover Unit Preparation 1 Removing the Cartridge on page 77 2 Removing the Left Cover on page 80 3 Removing the SADF Unit Reader Unit on page 126 4 Separating the SADF Unit Reader Unit on page 129 4 Parts Replacement and Cleaning 131 ...

Page 140: ... Procedure 1 2 4 Parts Replacement and Cleaning 132 ...

Page 141: ...3 4 NOTE How to Install the SADF Front Cover When installing the SADF Front Cover Align the 2 SADF Front Cover Claws with the holes A A 4 Parts Replacement and Cleaning 133 ...

Page 142: ...ving the Cartridge on page 77 2 Removing the Left Cover on page 80 3 Removing the SADF Unit Reader Unit on page 126 4 Separating the SADF Unit Reader Unit on page 129 5 Removing the SADF Upper Cover Unit on page 131 4 Parts Replacement and Cleaning 134 ...

Page 143: ...e 1 5x 1x Removing the SADF Motor Preparation 1 Removing the Cartridge on page 77 2 Removing the Left Cover on page 80 3 Removing the SADF Unit Reader Unit on page 126 4 Separating the SADF Unit Reader Unit on page 129 4 Parts Replacement and Cleaning 135 ...

Page 144: ... Procedure 1 2 3 2x 4 Parts Replacement and Cleaning 136 ...

Page 145: ...emoving the SADF Unit Reader Unit on page 126 4 Separating the SADF Unit Reader Unit on page 129 5 Removing the SADF Upper Cover Unit on page 131 Procedure CAUTION Do not touch the surface of the roller with bare hands as doing so will attach skin oil on it and decrease feedability 1 1x 2 4 Parts Replacement and Cleaning 137 ...

Page 146: ...3 4 4 Parts Replacement and Cleaning 138 ...

Page 147: ...5 4 Parts Replacement and Cleaning 139 ...

Page 148: ...rection of the 2 bushings Align the gear and the D cut of the SADF Pickup Roller Shaft Removing the SADF Pickup Roller Preparation 1 Removing the Cartridge on page 77 2 Removing the Left Cover on page 80 3 Removing the SADF Unit Reader Unit on page 126 4 Separating the SADF Unit Reader Unit on page 129 4 Parts Replacement and Cleaning 140 ...

Page 149: ...kin oil on it and decrease feedability 1 2 Removing the SADF Separation Roller Preparation 1 Removing the Cartridge on page 77 2 Removing the Left Cover on page 80 3 Removing the SADF Unit Reader Unit on page 126 4 Separating the SADF Unit Reader Unit on page 129 5 Removing the SADF Upper Cover Unit on page 131 6 Removing the SADF Pickup Roller Unit on page 137 4 Parts Replacement and Cleaning 141...

Page 150: ...face of the roller with bare hands as doing so will attach skin oil on it and decrease feedability 1 2 CAUTION Be careful not to lose the Parallel Pin during installation removal as it comes off easily 3 4 Parts Replacement and Cleaning 142 ...

Page 151: ...oving the SADF Unit Reader Unit on page 126 4 Separating the SADF Unit Reader Unit on page 129 5 Removing the SADF Upper Cover Unit on page 131 Procedure CAUTION Do not touch the surface of the roller pad with bare hands as doing so will attach skin oil on it and decrease feedability 1 4x 4 Parts Replacement and Cleaning 143 ...

Page 152: ...2 3 4 CAUTION Because the spring is easy to come off be careful about its loss Assembling the SADF Separation Pad 4 Parts Replacement and Cleaning 144 ...

Page 153: ...1 2 3 4 4 Parts Replacement and Cleaning 145 ...

Page 154: ...eader Unit on page 126 4 Separating the SADF Unit Reader Unit on page 129 Procedure CAUTION Be sure to place the removed Copyboard Glass on a cloth etc to avoid damaging the bottom sheet When removing the Copyboard Glass be careful not to touch the glass surface If the surface becomes dirty clean it with lint free paper 4 Parts Replacement and Cleaning 146 ...

Page 155: ...1 2 2x 3 4 4 Parts Replacement and Cleaning 147 ...

Page 156: ...s of the Contact Image Sensor Unit Do not touch the document reading part A of the Contact Image Sensor Unit A Removing the Contact Image Sensor SADF Model Preparation 1 Removing the Cartridge on page 77 4 Parts Replacement and Cleaning 148 ...

Page 157: ...yboard Glass SADF Model on page 146 Procedure CAUTION Do not lose the 2 spacers of the Contact Image Sensor Unit Do not touch the document reading part A of the Contact Image Sensor Unit A Grease is applied on the shaft of the Contact Image Sensor so be careful not to let a hand or part come in contact with the shaft 1 4 Parts Replacement and Cleaning 149 ...

Page 158: ...2 3 4 2x 1x 5 4 Parts Replacement and Cleaning 150 ...

Page 159: ... Installing the Contact Image Sensor 1 2 NOTE If the two Springs have been removed install them to the Contact Image Sensor Holder 4 Parts Replacement and Cleaning 151 ...

Page 160: ...3 4 2x 1x 5 6 4 Parts Replacement and Cleaning 152 ...

Page 161: ...the SADF Unit Reader Unit on page 126 4 Separating the SADF Unit Reader Unit on page 129 5 Removing the Copyboard Glass SADF Model on page 146 Procedure CAUTION Do not lose the 2 spacers of the Contact Image Sensor Unit Do not touch the document reading part A of the Contact Image Sensor Unit A 1 4 Parts Replacement and Cleaning 153 ...

Page 162: ...2 CAUTION Grease is applied on the shaft of the Contact Image Sensor so be careful not to let a hand or part come in contact with the shaft 3 4 1x 4 Parts Replacement and Cleaning 154 ...

Page 163: ...5 2x 4 Parts Replacement and Cleaning 155 ...

Page 164: ...NOTE When the Contact Image Sensor unit has been removed go through the following steps to install it 1 2 3 If spacers have been removed install them 4 Parts Replacement and Cleaning 156 ...

Page 165: ...board Model Removing the Copyboard Cover Procedure 1 Removing the Copyboard Cover Reader Unit Preparation 1 Removing the Cartridge on page 77 2 Removing the Left Cover on page 80 Procedure 1 1x 2x 1x 4 Parts Replacement and Cleaning 157 ...

Page 166: ...2 2x 1x 1x 3 1x 1x 4 Parts Replacement and Cleaning 158 ...

Page 167: ...4 CAUTION When opening or closing the Hinge Arm move it slowly because the pressure is strong 4 Parts Replacement and Cleaning 159 ...

Page 168: ...5 CAUTION When placing the units do NOT damage the Flat Cable and the Harness NOTE The following shows how to route the harness 4 Parts Replacement and Cleaning 160 ...

Page 169: ...er on page 157 4 Removing the Copyboard Cover Reader Unit on page 157 Procedure CAUTION Be sure to place the removed Copyboard Glass on a cloth etc to avoid damaging the bottom sheet When removing the Copyboard Glass be careful not to touch the glass surface If the surface becomes dirty clean it with lint free paper 1 4 Parts Replacement and Cleaning 161 ...

Page 170: ...2 2x 3 4 2x 4 Parts Replacement and Cleaning 162 ...

Page 171: ...sor Unit A Removing the Contact Image Sensor Copyboard Model Preparation 1 Removing the Cartridge on page 77 2 Removing the Left Cover on page 80 3 Removing the Copyboard Cover on page 157 4 Removing the Copyboard Cover Reader Unit on page 157 5 Removing the Platen Glass Copyboard Model on page 161 4 Parts Replacement and Cleaning 163 ...

Page 172: ...Image Sensor Unit Do not touch the document reading part A of the Contact Image Sensor Unit A Grease is applied on the shaft of the Contact Image Sensor so be careful not to let a hand or part come in contact with the shaft 1 4 Parts Replacement and Cleaning 164 ...

Page 173: ...2 3 4 2x 1x 5 4 Parts Replacement and Cleaning 165 ...

Page 174: ... Installing the Contact Image Sensor 1 2 NOTE If the two Springs have been removed install them to the Contact Image Sensor Holder 4 Parts Replacement and Cleaning 166 ...

Page 175: ...3 4 2x 1x 5 6 4 Parts Replacement and Cleaning 167 ...

Page 176: ...ng the Copyboard Cover on page 157 4 Removing the Copyboard Cover Reader Unit on page 157 5 Removing the Platen Glass Copyboard Model on page 161 Procedure CAUTION Do not lose the 2 spacers of the Contact Image Sensor Unit Do not touch the document reading part A of the Contact Image Sensor Unit A 1 4 Parts Replacement and Cleaning 168 ...

Page 177: ...2 CAUTION Grease is applied on the shaft of the Contact Image Sensor so be careful not to let a hand or part come in contact with the shaft 3 4 1x 4 Parts Replacement and Cleaning 169 ...

Page 178: ...5 2x 4 Parts Replacement and Cleaning 170 ...

Page 179: ...NOTE When the Contact Image Sensor unit has been removed go through the following steps to install it 1 2 3 If spacers have been removed install them 4 Parts Replacement and Cleaning 171 ...

Page 180: ...Controller System Removing the Control Panel Unit Procedure 1 2 4x 3 4 Parts Replacement and Cleaning 172 ...

Page 181: ...Wireless Lan PCB Preparation 1 Removing the Cartridge on page 77 2 Removing the Left Cover on page 80 Procedure 1 1x 1x Removing the Main Controller PCB Preparation 1 Adjustment at Parts Replacement on page 221 2 Removing the Cartridge on page 77 3 Removing the Left Cover on page 80 4 Parts Replacement and Cleaning 173 ...

Page 182: ... Procedure 1 DADF Model 11x SADF Model The machine configuration differs between with and without the FAX and or Wireless LAN 10x Copyboard Model 6x 4 Parts Replacement and Cleaning 174 ...

Page 183: ...2 4x 4 Parts Replacement and Cleaning 175 ...

Page 184: ...hine configuration differs between with and without the FAX and or Wireless LAN Copyboard Model 3 Actions after Parts Replacement Adjustment at Parts Replacement on page 221 Removing the Low Voltage Power Supply Unit Preparation 1 Removing the Cartridge on page 77 4 Parts Replacement and Cleaning 176 ...

Page 185: ...oving the SADF Unit Reader Unit on page 126 5 Removing the Toner Cover on page 86 6 Removing the Upper Cover on page 91 7 Removing the Duplex Door on page 90 8 Removing the Duplex Frame Unit on page 212 9 Removing the Speaker Fax Model on page 188 10 Removing the Front Cover on page 83 11 Removing the NCU PCB Fax Model on page 190 Procedure 1 If the Fax is installed 1x If the Fax is not installed ...

Page 186: ...2 3 If the Fax is installed 4x If the Fax is not installed 4x 4 Parts Replacement and Cleaning 178 ...

Page 187: ...4 If the Fax is installed 2x 4x If the Fax is not installed 2x 3x 5 If the Fax is installed 4 Parts Replacement and Cleaning 179 ...

Page 188: ... If the Fax is not installed 6 2x 1x 7 3x 8 2x 1x 4 Parts Replacement and Cleaning 180 ...

Page 189: ...ng the DADF Unit Reader Unit on page 93 Removing the SADF Unit Reader Unit on page 126 Removing the Copyboard Cover Reader Unit on page 157 5 Removing the Toner Cover on page 86 6 Removing the Upper Cover on page 91 7 Removing the Duplex Door on page 90 8 Removing the Duplex Frame Unit on page 212 9 Removing the Speaker Fax Model on page 188 10 Removing the Front Cover on page 83 11 Removing the N...

Page 190: ... when Installing the Engine Controller PCB Be sure that the Grounding Contact Spring A is in contact with the frame Be sure that the Grounding Contact Spring B is fitted in the groove on the plate 1x 1x A B 3 4 Parts Replacement and Cleaning 182 ...

Page 191: ...4 1x 5 1x 6 3x 4 Parts Replacement and Cleaning 183 ...

Page 192: ...g the Engine Controller PCB Be sure that the 3 Contact Springs are in the correct position Be sure to check that one Contact Spring on the left side is in contact with the wire rod Removing the Motor PCB Preparation 1 Removing the Cartridge on page 77 2 Removing the Right Cover on page 78 4 Parts Replacement and Cleaning 184 ...

Page 193: ... page 188 6 Removing the Front Cover on page 83 7 Removing the Toner Cover on page 86 8 Removing the Upper Cover on page 91 9 Removing the Main Fan on page 187 10 Removing the NCU PCB Fax Model on page 190 11 Removing the Laser Scanner Cover on page 192 Procedure 1 1x 6x Removing the Environment Pickup Sensor PCB Preparation 1 Removing the Cartridge on page 77 2 Removing the Separation Pad Unit on...

Page 194: ...it on page 93 Removing the SADF Unit Reader Unit on page 126 Removing the Copyboard Cover Reader Unit on page 157 6 Removing the Toner Cover on page 86 7 Removing the Upper Cover on page 91 8 Removing the Duplex Door on page 90 9 Removing the Duplex Frame Unit on page 212 Procedure 1 1x 2 1x 1x 3 4 Parts Replacement and Cleaning 186 ...

Page 195: ...f the following operation Removing the DADF Unit Reader Unit on page 93 Removing the SADF Unit Reader Unit on page 126 Removing the Copyboard Cover Reader Unit on page 157 5 Removing the Speaker Fax Model on page 188 6 Removing the Front Cover on page 83 7 Removing the Toner Cover on page 86 8 Removing the Upper Cover on page 91 Procedure 1 2 1x 4 Parts Replacement and Cleaning 187 ...

Page 196: ...3 4 1x Removing the Speaker Fax Model Preparation 1 Removing the Cartridge on page 77 2 Removing the Right Cover on page 78 4 Parts Replacement and Cleaning 188 ...

Page 197: ... Procedure CAUTION Do not directly touch the speaker Be sure not to damage the speaker 1 1x 1x 2 4 Parts Replacement and Cleaning 189 ...

Page 198: ...g the claws using a flat blade screwdriver be sure not to damage the speaker Removing the NCU PCB Fax Model Preparation 1 Removing the Cartridge on page 77 2 Removing the Left Cover on page 80 4 Parts Replacement and Cleaning 190 ...

Page 199: ... Procedure 1 3x 2x 4 Parts Replacement and Cleaning 191 ...

Page 200: ...the DADF Unit Reader Unit on page 93 Removing the SADF Unit Reader Unit on page 126 Removing the Copyboard Cover Reader Unit on page 157 5 Removing the Speaker Fax Model on page 188 6 Removing the Front Cover on page 83 7 Removing the Toner Cover on page 86 8 Removing the Upper Cover on page 91 9 Removing the Main Fan on page 187 10 Removing the NCU PCB Fax Model on page 190 Procedure 1 If the Fax...

Page 201: ... If the Fax is not installed 2 4x 3 4 Parts Replacement and Cleaning 193 ...

Page 202: ...epending on the model perform one of the following operation Removing the DADF Unit Reader Unit on page 93 Removing the SADF Unit Reader Unit on page 126 Removing the Copyboard Cover Reader Unit on page 157 5 Removing the Speaker Fax Model on page 188 6 Removing the Front Cover on page 83 7 Removing the Toner Cover on page 86 4 Parts Replacement and Cleaning 194 ...

Page 203: ...the Main Fan on page 187 10 Removing the NCU PCB Fax Model on page 190 11 Removing the Laser Scanner Cover on page 192 Procedure CAUTION Do not disassemble the Laser Scanner Unit because it requires adjustment 1 2x 4 Parts Replacement and Cleaning 195 ...

Page 204: ...Image Formation System Removing the Transfer Roller Preparation 1 Removing the Cartridge on page 77 Procedure 1 2 3 4 Parts Replacement and Cleaning 196 ...

Page 205: ... sure to install the bushing to the new Transfer Roller NOTE When installing it be sure to fit the boss to the spring Removing the Transfer Unit Preparation 1 Removing the Cartridge on page 77 4 Parts Replacement and Cleaning 197 ...

Page 206: ...Copyboard Cover Reader Unit on page 157 5 Removing the Toner Cover on page 86 6 Removing the Upper Cover on page 91 7 Removing the Duplex Door on page 90 8 Removing the Duplex Frame Unit on page 212 9 Removing the Speaker Fax Model on page 188 10 Removing the Front Cover on page 83 11 Removing the NCU PCB Fax Model on page 190 12 Removing the Low Voltage Power Supply Unit on page 176 Procedure 1 1...

Page 207: ...2 1x 1x A CAUTION Points to Note when Installing the Transfer Unit Be sure that the Grounding Contact Spring A is in contact with the frame 3 2x 4 Parts Replacement and Cleaning 199 ...

Page 208: ...4 4 Parts Replacement and Cleaning 200 ...

Page 209: ...shaft into the Shaft Support by aligning the Contact Spring with the Grounding Plate Be careful not to let the Contact Spring come off from the Grounding Plate The following shows the correct procedure for routing the TAG harness 1x 4 Parts Replacement and Cleaning 201 ...

Page 210: ...Unit on page 93 Removing the SADF Unit Reader Unit on page 126 Removing the Copyboard Cover Reader Unit on page 157 5 Removing the Speaker Fax Model on page 188 6 Removing the Front Cover on page 83 7 Removing the Toner Cover on page 86 8 Removing the Upper Cover on page 91 9 Removing the Main Fan on page 187 10 Removing the NCU PCB Fax Model on page 190 11 Removing the Laser Scanner Cover on page...

Page 211: ...3 2x 4 1x 4 Parts Replacement and Cleaning 203 ...

Page 212: ...t on page 126 Removing the Copyboard Cover Reader Unit on page 157 5 Removing the Toner Cover on page 86 6 Removing the Upper Cover on page 91 7 Removing the Duplex Door on page 90 8 Removing the Duplex Frame Unit on page 212 9 Removing the Speaker Fax Model on page 188 10 Removing the Front Cover on page 83 11 Removing the NCU PCB Fax Model on page 190 12 Removing the Low Voltage Power Supply Uni...

Page 213: ...2 3 4x 4 4 Parts Replacement and Cleaning 205 ...

Page 214: ...5 6 CAUTION Points to Note When Removing the Fixing Unit Be sure to handle the gear with care because it is not secured to the shaft 4 Parts Replacement and Cleaning 206 ...

Page 215: ...n of Fixing Shutter Link Be sure that the Fixing Shutter Link is positioned as shown in the figure Removing the Fixing Film Unit Preparation 1 Removing the Cartridge on page 77 2 Removing the Right Cover on page 78 3 Removing the Left Cover on page 80 4 Parts Replacement and Cleaning 207 ...

Page 216: ... 86 6 Removing the Upper Cover on page 91 7 Removing the Duplex Door on page 90 8 Removing the Duplex Frame Unit on page 212 9 Removing the Speaker Fax Model on page 188 10 Removing the Front Cover on page 83 11 Removing the NCU PCB Fax Model on page 190 12 Removing the Low Voltage Power Supply Unit on page 176 13 Removing the Transfer Unit on page 197 14 Removing the Fixing Unit on page 204 Proce...

Page 217: ...3 1x 1x 4 5 2x 6 4 Parts Replacement and Cleaning 209 ...

Page 218: ...7 8 9 4 Parts Replacement and Cleaning 210 ...

Page 219: ...e Cartridge on page 77 Procedure CAUTION Do not touch the surface of the roller with bare hands as doing so will attach skin oil on it and decrease feedability 1 2 Removing the Separation Pad Unit Preparation 1 Removing the Cartridge on page 77 4 Parts Replacement and Cleaning 211 ...

Page 220: ...he Right Cover on page 78 3 Removing the Left Cover on page 80 4 Depending on the model perform one of the following operation Removing the DADF Unit Reader Unit on page 93 Removing the SADF Unit Reader Unit on page 126 Removing the Copyboard Cover Reader Unit on page 157 5 Removing the Toner Cover on page 86 6 Removing the Upper Cover on page 91 7 Removing the Duplex Door on page 90 4 Parts Repla...

Page 221: ... Procedure 1 CAUTION Points to Note When Installing the Duplex Reverse Guide Be sure that the 2 hooks are fitted in the grooves of the Duplex Frame Unit 2 4x 4 Parts Replacement and Cleaning 213 ...

Page 222: ...s to Note when Installing Removing the Duplex Frame Unit Be careful not to touch the grease on the gear Be sure to handle the gear with care because it is not secured to the shaft 4 Parts Replacement and Cleaning 214 ...

Page 223: ...4 4 Parts Replacement and Cleaning 215 ...

Page 224: ...stalling the Duplex Frame Unit The following shows the correct procedure for routing the TAG harness 1x Pass the harness through the guide to prevent the harness from interfering with the gear 1x 4 Parts Replacement and Cleaning 216 ...

Page 225: ...on page 93 Removing the SADF Unit Reader Unit on page 126 Removing the Copyboard Cover Reader Unit on page 157 5 Removing the Speaker Fax Model on page 188 6 Removing the Front Cover on page 83 7 Removing the Toner Cover on page 86 8 Removing the Upper Cover on page 91 9 Removing the Main Fan on page 187 10 Removing the NCU PCB Fax Model on page 190 11 Removing the Laser Scanner Cover on page 192 ...

Page 226: ...r on page 78 3 Removing the Left Cover on page 80 4 Depending on the model perform one of the following operation Removing the DADF Unit Reader Unit on page 93 Removing the SADF Unit Reader Unit on page 126 Removing the Copyboard Cover Reader Unit on page 157 5 Removing the Toner Cover on page 86 6 Removing the Upper Cover on page 91 7 Removing the Duplex Door on page 90 8 Removing the Duplex Fram...

Page 227: ...el perform one of the following operation Removing the DADF Unit Reader Unit on page 93 Removing the SADF Unit Reader Unit on page 126 Removing the Copyboard Cover Reader Unit on page 157 5 Removing the Toner Cover on page 86 6 Removing the Upper Cover on page 91 7 Removing the Duplex Door on page 90 8 Removing the Duplex Frame Unit on page 212 Procedure 1 1x 1x 4 Parts Replacement and Cleaning 21...

Page 228: ...Adjustment 5 Adjustment at Parts Replacement 221 ...

Page 229: ...vice mode COPIER OPTION SERIAL SN MAIN 3 Turn OFF ON the main power 4 Set the Location from the following service mode Setting Value JAPAN USA KOREA CHINA TAIWAN EUROPE ASIA COPIER OPTION BODY LOCALE 5 Clear all data in the following service mode COPIER FUNCTION CLEAR ALL 6 Turn OFF ON the main power 7 Print out the Spec Report by the following service mode and check the serial number and Location...

Page 230: ...Troubleshooting 6 Test Print 223 Troubleshooting Items 226 Debug Log 228 Version Upgrade 231 ...

Page 231: ...xecuted and the test pattern as shown below is printed Table of Report Name Output Procedure Description Counter report COPIER FUNCTION MISC P OUTPUT CNTR To output number of printed and or scanned sheet and number of jam occurrence JAM ERR HISTORY RE PORT COPIER FUNCTION MISC P OUTPUT ERR LOG To output jam log and error error code log Spec report COPIER FUNCTION MISC P OUTPUT SPEC To output the c...

Page 232: ... the log information of toner drum cartridge stored in the equipment Do not provide users with the cartridge log report for servicing because it contains detailed information that is not disclosed to end users Cartridge Log Report for servicing SERVICE MODE COPIER FUNCTION MISC P OUTPUT CRG LOG Cartridge log report for users Menu Output Reports Print List Cartridge Log Report 5 line Control Panel ...

Page 233: ...999 7 Left The remaining life of the cartridge when it was last used 0 to 100 New cartridge 100 f Toner The remaining life of the toner when it was last used 127 to 100 New 100 Indefinite g Drum The remaining life of the drum when it was last used 127 to 100 New 100 Indefinite h Parts The remaining life of the Developing As sembly when it was last used 127 to 100 New 100 Indefinite Number of detec...

Page 234: ...ller Occurs Occurs Approx 63 mm Photosensitive Drum Occurs Occurs Approx 26 mm Developing Roller Occurs Occurs Approx 57 mm Fixing Film Occurs Occurs Occurs Approx 45 mm Pressure Roller Occurs Occurs Occurs Confirming Nip Width Overview Although the nip width of the Fixing Unit cannot be adjusted with this machine it can be checked By checking the nip width when fixing failure occurs it is possibl...

Page 235: ...e the widths of the glossy part of the toner on the printed paper and check that they are within the range as follows Center a 5 8 0 8 mm Edge b and c 5 8 0 8 mm each b c Center of sheet a 6 Troubleshooting 227 ...

Page 236: ... NOTE If the procedure for reproducing the failure is clear and the Support Dept of sales company and CINC can reproduce it collection of debug log is not necessary Firmware Log Collection Using Log Collection Tool Overview The log collection tool LogCollector is used to collect the firmware log of the machine This tool runs on a PC connected to the machine with a USB Cable and collects operationa...

Page 237: ...e PC CanonLogCollector exe is extracted in the decompressed folder 3 Double click to start CanonLogCollector exe NOTE It is not necessary to install this tool and it can be executed in any location The CanonLogCollector screen appears and There is one connected device is displayed 4 Press the Start button Receiving log is successfully finished is displayed CAUTION If the machine is in sleep mode t...

Page 238: ...nnected machine has not been started The USB Cable is not connected properly The setting of USB connection is not correct There are more than one connected device is displayed More than one machines are connected to the PC with the USB cable Disconnect the machines other than the target machine Receiving log is finished Receive timeout is displayed If this message is displayed after pressing the S...

Page 239: ...aining UST is extracted by decompressing the file When executing UST on the PC connected to the machine with a USB Cable the firmware can be upgraded by downloading it from the PC to the machine For the detailed procedure refer to User Support Tool Operation Guide stored in the decompressed folder User Support Tool Operation Guide is also available on the website of CINC Firmware PC USB cable Netw...

Page 240: ...L NUMBER 1ZZ99999 FIRMWARE VERSION BOOT 03 01 CheckSum 0x0000AAAA SCNT 04 01 CheckSum 0x0000BBBB Procedure for Upgrading the Firmware via Internet 1 Select the following menu to upgrade the firmware via Internet Menu System Management Settings Update Firmware Via Internet Menu Printer Settings Paper Settings for Adjustment Maintena System Management S System Mngt Settings Displ Consmbls In Google ...

Page 241: ...CAUTION This function does not support the operations from remote UI Update Firmware does not exist in the System Management Settings menu of the remote UI 6 Troubleshooting 233 ...

Page 242: ...Error Jam Alarm 7 Overview 235 Error Code 238 Jam Code 241 Alarm Code 243 ...

Page 243: ...og report etc Version information Debug log Occurrence status Error Jam Log Indication Control Panel Jam Log SERVICE MODE COPIER DISPLAY JAM 0908311624䕧3 1234 1 02 Year Month Day Time Minute Jam Code Paper Size Code Location code Paper feed position 䕧is space Error Log SERVICE MODE COPIER DISPLAY ERR 090831䕧1624䕧E100 0200 Year Month Day Time Minute Error Code 䕧 is space 䕧 is space Location Pickup ...

Page 244: ...TION MISC P OUTPUT ERRLOG History Log Up to 20 jam and error error code logs each are printed Item Description Remarks JAM Number Reference number Date Date of jam occurrence YYYY MM DD Time Time of jam occurrence HH MM 24 hour notation Time Time of jam recovery HH MM 24 hour notation Source Pickup position of paper when a jam occurs 00 Multi purpose Tray 01 Pickup Tray 07 2 sided Mode Size Paper ...

Page 245: ... Date Date of error occurrence YYYY MM DD Time Time of error occurrence HH MM 24 hour notation Code Error code Example Notation when Eaaa bbbb occurs 0aaa Total Printed Pages The number of total printed pages when a error occurs 7 Error Jam Alarm 237 ...

Page 246: ...ive circuit error Detection Description A frequency failure was detected in the Fixing Assembly Remedy 1 Check the harness connector of the Fixing Unit 2 Replace the Fixing Film Unit 3 Replace the Fixing Unit 4 Replace the Engine Controller PCB E015 0001 Developing Disengagement error Detection Description A developing disengagement error was detected Remedy 1 Check the harness connector between t...

Page 247: ... although the power is turned OFF and then ON for several times execute the following remedies 1 Check the connection of Flat Cable between the Main Controller PCB and the Contact Image Sensor 2 Replace the Flat Cable between the Main Controller PCB and the Contact Image Sensor 3 Replace the Contact Image Sensor 4 Replace the Main Controller PCB E225 0001 Light intensity of a lamp is less or equal...

Page 248: ...dy 1 Check the version of the Engine Controller PCB 2 Update the Engine Controller PCB 3 Update the set of the controller firmware 4 Check the model code because this error occurs also when the model code and the engine code are mismatched E744 6000 Wireless LAN communication error Detection Description Communication error between the Main Controller PCB and the Wireless Lan PCB Remedy 1 Check the...

Page 249: ...very Sensor PS4 000B 2 sided re pickup delay Jam TOP Sensor PS3 000C Wrapping Jam Fixing Delivery Sensor PS4 000E Internal residual Jam TOP Sensor Fixing Delivery Sensor Fixing Paper Width Sensor PS3 PS4 PS5 000F Door open Jam TOP Sensor Fixing Delivery Sensor Fixing Paper Width Sensor PS3 PS4 PS5 Table of Jam Code ADF In the case of DADF PS6 In the case of SADF PS8 Jam Code Jam Type Sensor Name S...

Page 250: ...ionary Jam Document End Sensor DADF PS6 SADF PS8 0071 Sequence Jam abnormal timing Document End Sensor DADF PS6 SADF PS8 0094 Internal residual Jam Document End Sensor DADF PS6 SADF PS8 0095 Others Document End Sensor DADF PS6 SADF PS8 7 Error Jam Alarm 242 ...

Page 251: ...Alarm Code This machine does not have any Alarm Code 7 Error Jam Alarm 243 ...

Page 252: ...Service Mode 8 Overview 245 COPIER Service mode for printer 246 FEEDER ADF service mode 265 FAX FAX service mode 266 TESTMODE Service mode for test print operation check etc 274 ...

Page 253: ...Overview Entering Service Mode For information on how to enter service mode contact the Support Dept of the sales company 8 Service Mode 245 ...

Page 254: ...ion of boot ROM Use Case When upgrading the firmware Adj Set Operate Method N A Display only Display Adj Set Range 00 00 to 99 99 LANG Display Language pack version Detail To display the version of Language pack Use Case When upgrading the firmware Adj Set Operate Method N A Display only Display Adj Set Range 00 00 to 99 99 ECONT Display Engine Controller version Detail To display the version of t...

Page 255: ...d N A Display only Display Adj Set Range 128 to 384 Related Service Mode COPIER ADJUST CCD FBTAR BW DF TARGET B Display shading target value B ADF Detail To display the shading target value of BLUE at ADF stream reading Use Case At scanned image failure Adj Set Operate Method N A Display only Display Adj Set Range 128 to 384 Related Service Mode COPIER ADJUST CCD DFTAR B Supplement Memo ADF model ...

Page 256: ... Paper present ADJUST Adjustment mode ADJ XY COPIER Service mode for printer ADJUST Adjustment mode ADJ XY ADJ X Adjust the reading start position Detail Decrease the setting value when non image width is larger than the standard value Increase the setting value when area outside the original is copied As the setting value is incremented by 1 the image reading start position moves toward the trail...

Page 257: ...Adj Set Operate Method Enter the setting value and then press OK or Apply key Display Adj Set Range 7000 to 9999 Default Value 8988 W PLT Z Stdrd White Plt white lvl data Z entry Detail To enter the Standard White Plate white level data Z Adj Set Operate Method Enter the setting value and then press OK or Apply key Display Adj Set Range 7000 to 9999 Default Value 9176 FBTAR R Shading target value ...

Page 258: ...ted Service Mode COPIER DISPLAY CCD DF TARGET G Supplement Memo ADF model only DFTAR B Shading target value B entry ADF Detail To enter the shading target value of BLUE at ADF stream reading Adj Set Operate Method Enter the setting value and then press OK or Apply key Display Adj Set Range 128 to 384 Default Value 334 Related Service Mode COPIER DISPLAY CCD DF TARGET B Supplement Memo ADF model on...

Page 259: ...rtridge log Detail To clear the cartridge log Adj Set Operate Method 1 Select the item and then press OK or Start key 2 Turn OFF ON the main power switch ALL Clear setting information Detail The following data are cleared User data Service data JOB ID Various Log Key log CRG LOG All counter information items of COPIER COUNTER Use Case When replacing the Main Controller PCB Adj Set Operate Method 1...

Page 260: ...Method Select the item Caution When executing report output be sure to load paper in the Pickup Tray and remove paper on the Multi purpose Tray If there are papers on the Multi purpose Tray report will not be output even papers are placed in a cassette SYS DAT Output system data list Detail Service software switches and parameters which are used for FAX function are mainly output as a report Adj S...

Page 261: ...the current machine specifications such as country model information ROM version Adj Set Operate Method Select the item Caution When executing report output be sure to load paper in the Pickup Tray and remove paper on the Multi purpose Tray If there are papers on the Multi purpose Tray report will not be output even papers are placed in a cassette KEY HIST Output key log report Detail To output th...

Page 262: ...ation inspection mode SPLMAN TOP MPT Adj lead edg mar pickup from MP Tray Detail As the value is changed by 1 the margin on the leading edge of paper is changed by 0 1 mm Leading edge margin becomes larger An image moves to the trailing edge Leading edge margin becomes smaller An image moves to the leading edge Use Case When adjusting the leading edge margin of the paper being picked up from the M...

Page 263: ... mm Leading edge margin becomes larger An image moves to the trailing edge Leading edge margin becomes smaller An image moves to the leading edge Use Case When adjusting the leading edge margin at the time of pickup from the Pickup Tray Adj Set Operate Method Enter the setting value and then press OK or Apply key Display Adj Set Range 50 to 150 Unit 0 1 mm Default Value 100 TOP DUP CST Adj lead ed...

Page 264: ...ix Default Value 0 SPL27354 PC less update RMDS env setting Detail To set the PC less update and RMDS environment setting Adj Set Operate Method Enter the setting value and then press OK or Apply key Display Adj Set Range 0 to 5 0 Production environment Release environment 1 Production environment Staging environment 2 Maintenance environment 1 Release environment 3 Maintenance environment 1 Stagi...

Page 265: ... value and then press OK or Apply key Display Adj Set Range 0 to 9999 Supplement Memo Fax model only SPL78148 Mode to execute new B W processing of PCL Detail To make the density gradation characteristics of halftone the same as those of conventional B W machines Use Case When setting the density gradation characteristics in line with those of conventional machines Resolution Further increase the ...

Page 266: ...fault Value 0 Additional Functions Mode Menu Timer Settings Auto Sleep Time NS CMD5 Restrict CRAM MD5 at SMTP auth Detail To restrict the use of CRAM MD5 authentication method at SMTP authentication Adj Set Operate Method Enter the setting value and then press OK or Apply key Display Adj Set Range 0 1 0 Dependent on the SMTP server 1 Not used Default Value 0 Supplement Memo Fax model only NS PLN R...

Page 267: ...ly key 2 Turn OFF ON the main power Display Adj Set Range 0 1 0 Allow weak cryptographic algorithm 1 Do not allow weak cryptographic algorithm secure mode Default Value 1 CLP DSP Cartridge log print menu display setting Detail To set whether to display the cartridge log printing menu Use Case To set display hide of the cartridge log printing menu Display Adj Set Range 0 1 0 Hide the menu 1 Display...

Page 268: ...backed up in step 1 in Location Caution Since the above Location is only temporarily used to store data Therefore back up the data before input and enter it again after writing is completed Related Service Mode COPIER FUNCTION MISC P OUTPUT SPEC Additional Functions Mode RUI Settings Registration Menu System Management Settings Device Information Settings Location LUI Menu System Manager Settings ...

Page 269: ...ge size does not apply to this machine TTL Total counter Detail To count up the total number of output sheets Copy Printer Fax Adj Set Operate Method N A Display only Display Adj Set Range 0 to 999999 Unit Sheet Default Value 0 Related Service Mode COPIER FUNCTION CLEAR ALL COPY Total copy counter Detail To count up when the copy is delivered outside the machine after execution of copy operation A...

Page 270: ... Value 0 Related Service Mode COPIER FUNCTION CLEAR ALL Supplement Memo Blank paper is also counted Large size does not apply to this machine 2 SIDE 2 sided copy print counter Detail To count up the number of sheets passing through the Duplex Path at copying printing when a paper is delivered outside the machine Large size 1 Small size 1 Adj Set Operate Method N A Display only Display Adj Set Rang...

Page 271: ...Display only Display Adj Set Range 0 to 999999 Unit Sheet Default Value 0 FEEDER COPIER Service mode for printer COUNTER Counter mode FEEDER FEED Total pickup counter ADF Detail To count up the number of sheets picked by ADF Adj Set Operate Method N A Display only Display Adj Set Range 0 to 999999 Unit Sheet Default Value 0 JAM COPIER Service mode for printer COUNTER Counter mode JAM TOTAL Total j...

Page 272: ...the number of jams occurred in the Multi purpose Tray The counter is advanced even in the case of paper size mismatch and misprint Adj Set Operate Method N A Display only Display Adj Set Range 0 to 999999 Unit Number of times Default Value 0 C1 Pickup Tray jam counter Detail To count up the number of jams occurred in the Pickup Tray The counter is advanced even in the case of paper size mismatch a...

Page 273: ...ion Adj Set Operate Method Enter the setting value and then press OK or Apply key Display Adj Set Range 30 to 30 Unit 0 1 Default Value 0 FUNCTION Operation inspection mode FEEDER ADF service mode FUNCTION Operation inspection mode FEED CHK Set read mode for ADF ppr feed chck Detail To check paper feed of ADF only Display Adj Set Range 1 2 1 SADF 2 DADF Related Service Mode FEEDER FUNCTION FEED ON...

Page 274: ...anually Bit 7 CED is not sent when receiving manually SW 05 Standard function related to DIS signal settings Bit 0 to Bit 1 Not used Bit 2 Millimeter inch conversion text photo mode photo mode Bit 3 Prohibit sending bit33 and after of DIS Bit 4 Declaration of cut paper Bit 5 to Bit 7 Not used SW 06 Settings for reading condition Bit 0 to Bit 3 Not used Bit 4 Reading width 0 A4 1 LTR Bit 5 to Bit 7...

Page 275: ...function Bit 0 Put priority on received phone number over dialing number Bit 1 to Bit 7 Not used SW 26 Bit 0 to Bit 7 Not used SW 27 Bit 0 to Bit 7 Not used SW 28 Bit 0 Prohibit V 8 procedure at the caller side Bit 1 Prohibit V 8 procedure at the receiver side Bit 2 Prohibit V 8 late start at the caller side Bit 3 Prohibit V 8 late start at the reception side Bit 4 Prohibit fallback start from the...

Page 276: ...08 Upper limit for V 34 modulation speed 0 to 5 0 3 429 BAUD 1 3 200 BAUD 2 3 000 BAUD 3 2 800 BAUD 4 2 743 BAUD 5 2 400 BAUD 009 Upper limit for V 34 data speed 0 to 13 0 33 6 kbps 1 31 2 kbps 2 28 8 kbps 3 26 4 kbps 4 24 0 kbps 5 21 6 kbps 6 19 2 kbps 7 16 8 kbps 8 14 4 kbps 9 12 0 kbps 10 9 6 kbps 11 7 2 kbps 12 4 8 kbps 13 2 4 kbps 010 Pseudo CI signal frequency 0 to 2 0 50 Hz 1 25 Hz 2 17 Hz ...

Page 277: ...used 015 Threshold between hooking and on hook 0 to 999 016 Time until a primary response is obtained when switch ing FAX TEL 0 to 9 017 Pseudo RBT cadence ON time 0 to 999 018 Pseudo RBT cadence OFF time short 0 to 999 019 Pseudo RBT cadence OFF time long 0 to 999 020 Pseudo RBT cadence ON time 0 to 999 021 Pseudo CI cadence OFF time short 0 to 999 022 Pseudo CI cadence OFF time long 0 to 999 023...

Page 278: ...ot used 064 Not used 065 Not used 066 Not used 067 Not used 068 Not used 069 Not used 070 Not used 071 Not used 072 Not used 073 Not used 074 Not used 075 Not used 076 Not used 077 Not used 078 Not used 079 Not used 080 Not used NCU NCU parameter setting mode TONE Parameter No Function Setting range 001 Tone signal sending time PSTN 10 to 9 999 msec 002 Minimum pause time PSTN 10 to 9 999 msec PUL...

Page 279: ... Numeric value parameter Parameter No Function Setting range 001 T0 timer 0 to 9 999 x10 msec 002 T1 timer 0 to 9 999 x10 msec 003 T2 timer 0 to 9 999 x10 msec 004 T3 timer 0 to 9 999 x10 msec 005 T4 timer 0 to 9 999 x10 msec 006 Signal detection table 0 to 16 007 Signal detection level 0 to 7 008 Number of signal frequency 0 to 9 999 2ND DLTN 2nd DIAL TONE Not used BUSTONE0 BUSY TONE 0 Bit switch...

Page 280: ... signal frequency 0 to 9 999 REORDRTN REORDER TONE Bit switch Bit No Function 1 0 Bit 0 Bit 1 Bit 2 Bit 3 Bit 4 Bit 5 Bit 6 Bit 7 Signal detection Yes No Numeric value parameter Parameter No Function Setting range 001 002 T1 timer 0 to 9 999 x10 msec 003 T2 timer 0 to 9 999 x10 msec 004 T3 timer 0 to 9 999 x10 msec 005 T4 timer 0 to 9 999 x10 msec 006 Signal detection table 0 to 21 007 Signal dete...

Page 281: ... At F T switching CNG MIN ON time 0 to 9 999 x10 msec 002 CNG MAX ON time 0 to 9 999 x10 msec 003 Not used 004 Not used 005 Not used 006 007 At direct connection to an swering machine CNG MIN ON time 0 to 9 999 x10 msec 008 CNG MAX ON time 0 to 9 999 x10 msec 009 Tolerable time of instantaneous inter ruption 0 to 9 999 x10 msec 010 Not used 011 Number of detection 0 to 9 999 times 012 Hit ratio 0 ...

Page 282: ...d entry tone is generated once Supplement Memo Fax model only MIN Check speaker Detail To check speaker Adj Set Operate Method When MIN is selected entry tone is generated once Supplement Memo Fax model only No minimum sound is generated MAX Check speaker Detail To check speaker Adj Set Operate Method When MAX is selected entry tone is generated once Supplement Memo Fax model only No maximum sound...

Page 283: ...ing edge margin becomes smaller An image moves to the leading edge Leading edge margin becomes larger An image moves to the trailing edge Adj Set Operate Method Enter the setting value and then press OK or Apply key Display Adj Set Range 30 to 30 Unit 0 1 mm Default Value 0 Supplement Memo Same as FEEDER ADJUST DOCST ADFTEST TESTMODE Service mode for test print operation check etc SCAN SCAN Test M...

Page 284: ...or test print operation check etc SCAN SCAN Test Mode BOOKFEED PAGE No of scanned orgnl Start to STOP Detail To display number of scanned originals at copyboard reading Adj Set Operate Method N A Display only Unit Number of times Default Value 0 Related Service Mode TESTMODE SCAN BOOKFEED SPEED TESTMODE SCAN BOOKFEED START TESTMODE SCAN BOOKFEED STOP SPEED Specify reader motor rotation speed Detai...

Page 285: ...ange 300bps 2400bps 4800bps 7200bps 9600bps TC7200 TC9600 12000bps 14400bps Supplement Memo Fax model only DTMFTX TX DTMF by DTMF send func of Modem Detail To close DC circuit and send the DTMF signal using DTMF sending function of modem Adj Set Operate Method Select the item Supplement Memo Fax model only V34G3TX TX img sgl at the selected speed V 34 Detail To close DC circuit and send the image ...

Page 286: ...ing character is hidden in response to the key operation Caution Only the keys controlled by the Main Controller PCB are checked The Power Switch is not checked Display Adj Set Range Corresponding character is displayed on the key LED CHECK START LED check Detail To check for any failure of the LEDs Adj Set Operate Method LED at the Control Panel is turned ON after items are selected LED is turned...

Page 287: ...APPENDICES Service Tools 280 General Circuit Diagram 281 Backup Data 283 ...

Page 288: ...ice Tools Special Tools No special tools are required when servicing the machine Solvents and Oil List No Type Purpose Remark 1 Ethyl alcohol Cleaning Purchase locally Keep away from flame Service Tools 280 ...

Page 289: ... 3 1 1 2 1B3 Main Fan 9 9 9 9 9 9 9 3 1 3 1 3 1 3 1 3 1 3 8362 962 3 3 6762 Duplex Reverse Solenoid Developer Disengagement Solenoid Pickup Solenoid Main Controller PCB 1 2 Low Voltage Power Supply Unit 6 1 9 21 5 4616 65 5 90 21 3 1 3 1 8 8 8 8 8362 962 6762 8 0753 0 03 0 3 9616 Main Motor 6 1 6 1 6 1 9 1 875 0 6 6 9616 1 2 121 Motor PCB 3 1 3 6 6 3 1 Developer Disengagement Switch Scanner Motor ...

Page 290: ...6 B 83 6 2B 6 2B 6 2B Wireless Lan PCB 1 LQH RU LQ RQO RU RQO DADF Document Sensor 1 9B21 B 287 B6 1 0B6 1 1 5 1 5 22 8 2B 1 Multi purpose Tray Sensor 9287 9287 Speaker 9287 9287 DADF Document End Sensor B6 1 1 5 Main Controller PCB 8 5 02 0B5 6 7 02 0B 17 5 1 02 0B 76 02 0B7 02 0B5 RU LQ RQO DADF Motor B 287 B 287 B 287 B 287 02 0B576 1 02 0B 02 0B 6 9B0 0 1 3 B 1 3 B5 1 3 B3 521 NCU PCB RU LQ RQ...

Page 291: ...r Clear Clear Clear Clear Clear Clear No No Fax Set tings Clear Clear Clear Clear Clear Clear Clear No No Scan Settings Clear Clear Clear Clear Clear Clear Clear No No Printer Settings Clear Clear Clear Clear Clear Clear Clear No No Adjust ment Mainte nance Clear Clear Clear Clear Clear Clear Clear No No System Man age ment Settings Clear Clear Clear Clear Clear Clear 3 Clear 3 No No Output Rprt N...

Reviews: