


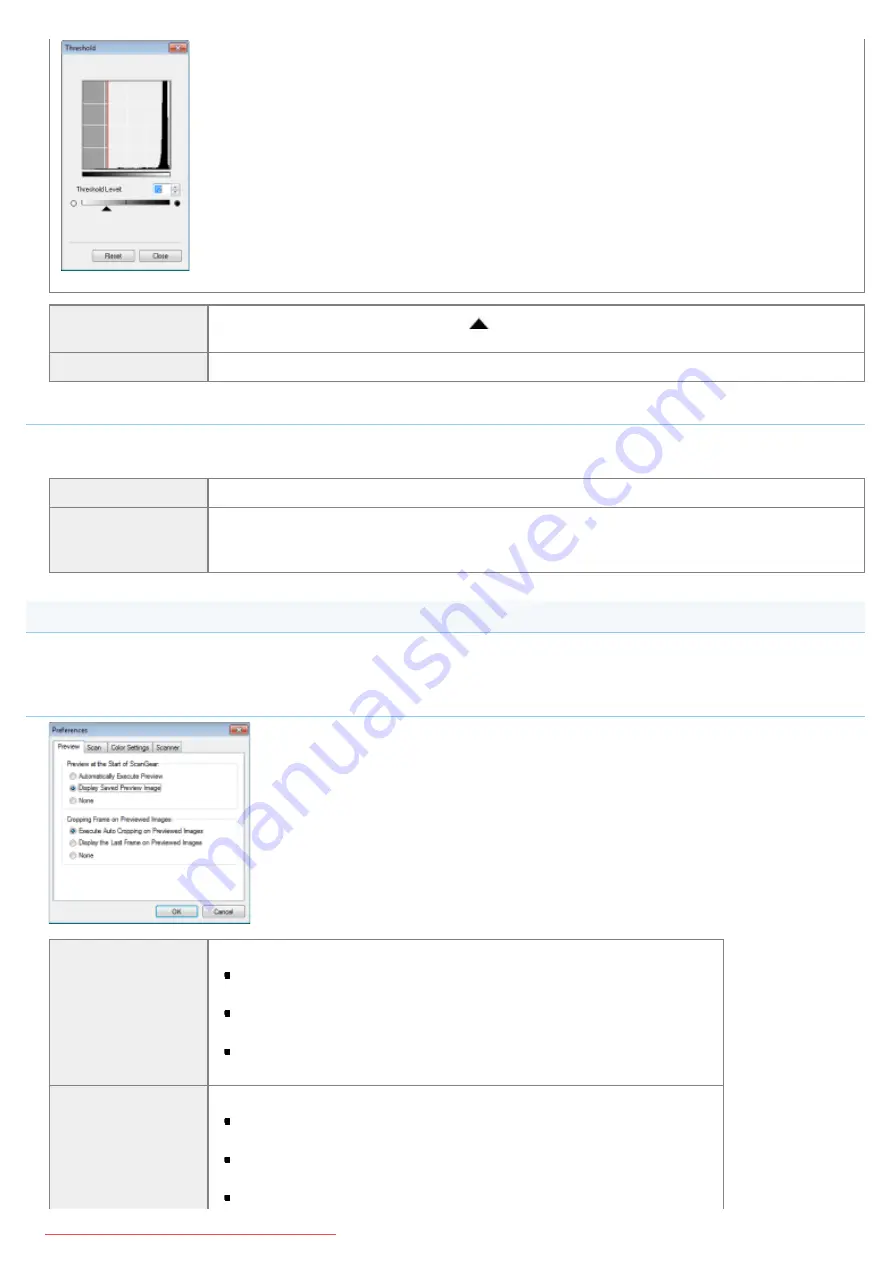
[Threshold Level]
Adjust the threshold level by moving [
] on the slider or manually entering a value from 0 up
to 255.
[Reset]
Resets the current setting to the default value.
Tone curve/threshold drop-down list
You can save color settings in a cropping frame. If there are no cropping frames, settings for the whole preview area is
saved. You can also read the saved settings to apply them to the selected cropping frame.
[Custom]
You can specify each setting value. The settings can be changed even after applying them.
[Add/Delete]
Opens the [Add/Delete Tone Curve Settings] dialog box ([Add/Delete Threshold Settings] dialog
box for when [Black and White] is selected in [Color Mode]). This dialog box enables you to
name and register a set of color settings.
Preferences
Clicking [Preferences] in the [Advanced Mode] tab displays the [Preferences] dialog box. You can change the settings for
scanning and previewing.
[Preview] tab
[Preview at the Start
of ScanGear]
Selects the preview operation when you open the ScanGear MF.
[Automatically Execute Preview]
The preview starts automatically when you open the ScanGear MF.
[Display Saved Preview Image]
Displays the image last previewed.
[None]
The preview image is not displayed.
[Cropping Frame on
Previewed Images]
Sets how the cropping frame is displayed when you preview images.
[Execute Auto Cropping on Previewed Images]
The image will be automatically cropped to match the document size.
[Display the Last Frame on Previewed Images]
Displays the last frame.
[None]
㻠㻢㻜㻌㻛㻌㻥㻢㻠
Summary of Contents for i-SENSYS MF6140dn
Page 1: ...㻝㻌㻛㻌㻥㻢㻠 Downloaded from ManualsPrinter com Manuals ...
Page 49: ...The entry is complete 㻠㻥㻌㻛㻌㻥㻢㻠 Downloaded from ManualsPrinter com Manuals ...
Page 57: ...㻡㻣㻌㻛㻌㻥㻢㻠 Downloaded from ManualsPrinter com Manuals ...
Page 64: ...㻢㻠㻌㻛㻌㻥㻢㻠 Downloaded from ManualsPrinter com Manuals ...
Page 118: ...5 Press Menu to close the menu screen 㻝㻝㻤㻌㻛㻌㻥㻢㻠 Downloaded from ManualsPrinter com Manuals ...
Page 121: ...5 Press Menu to close the menu screen 㻝㻞㻝㻌㻛㻌㻥㻢㻠 Downloaded from ManualsPrinter com Manuals ...
Page 124: ...5 Press Menu to close the menu screen 㻝㻞㻠㻌㻛㻌㻥㻢㻠 Downloaded from ManualsPrinter com Manuals ...
Page 129: ...6 Press Menu to close the menu screen 㻝㻞㻥㻌㻛㻌㻥㻢㻠 Downloaded from ManualsPrinter com Manuals ...
Page 135: ...6 Press Menu to close the menu screen 㻝㻟㻡㻌㻛㻌㻥㻢㻠 Downloaded from ManualsPrinter com Manuals ...
Page 137: ...6 Press Menu to close the menu screen 㻝㻟㻣㻌㻛㻌㻥㻢㻠 Downloaded from ManualsPrinter com Manuals ...
Page 147: ...5 Press Menu to close the menu screen 㻝㻠㻣㻌㻛㻌㻥㻢㻠 Downloaded from ManualsPrinter com Manuals ...
Page 149: ...Press Menu to close the Menu screen 㻝㻠㻥㻌㻛㻌㻥㻢㻠 Downloaded from ManualsPrinter com Manuals ...
Page 151: ...5 Press Menu to close the menu screen 㻝㻡㻝㻌㻛㻌㻥㻢㻠 Downloaded from ManualsPrinter com Manuals ...
Page 153: ...5 Press Menu to close the menu screen 㻝㻡㻟㻌㻛㻌㻥㻢㻠 Downloaded from ManualsPrinter com Manuals ...
Page 244: ...5 Press Start 㻞㻠㻠㻌㻛㻌㻥㻢㻠 Downloaded from ManualsPrinter com Manuals ...
Page 249: ...Select Yes using and press OK 㻞㻠㻥㻌㻛㻌㻥㻢㻠 Downloaded from ManualsPrinter com Manuals ...
Page 277: ...6 Press Start to receive fax es 㻞㻣㻣㻌㻛㻌㻥㻢㻠 Downloaded from ManualsPrinter com Manuals ...
Page 366: ...To print documents using AirPrint 㻟㻢㻢㻌㻛㻌㻥㻢㻠 Downloaded from ManualsPrinter com Manuals ...
Page 378: ...Printing begins 㻟㻣㻤㻌㻛㻌㻥㻢㻠 Downloaded from ManualsPrinter com Manuals ...
Page 509: ...The scanned file is sent 㻡㻜㻥㻌㻛㻌㻥㻢㻠 Downloaded from ManualsPrinter com Manuals ...
Page 577: ...6 Click OK 7 Click Close 㻡㻣㻣㻌㻛㻌㻥㻢㻠 Downloaded from ManualsPrinter com Manuals ...
Page 587: ...㻡㻤㻣㻌㻛㻌㻥㻢㻠 Downloaded from ManualsPrinter com Manuals ...
Page 607: ...8 Click OK 㻢㻜㻣㻌㻛㻌㻥㻢㻠 Downloaded from ManualsPrinter com Manuals ...
Page 628: ...㻢㻞㻤㻌㻛㻌㻥㻢㻠 Downloaded from ManualsPrinter com Manuals ...
Page 639: ...Press Menu to close the menu screen 㻢㻟㻥㻌㻛㻌㻥㻢㻠 Downloaded from ManualsPrinter com Manuals ...
Page 643: ...5 Press Menu to close the menu screen 㻢㻠㻟㻌㻛㻌㻥㻢㻠 Downloaded from ManualsPrinter com Manuals ...
Page 661: ... 2 Click OK 㻢㻢㻝㻌㻛㻌㻥㻢㻠 Downloaded from ManualsPrinter com Manuals ...
Page 664: ...4 Click Generate Key 5 Specify the keys 㻢㻢㻠㻌㻛㻌㻥㻢㻠 Downloaded from ManualsPrinter com Manuals ...
Page 673: ...㻢㻣㻟㻌㻛㻌㻥㻢㻠 Downloaded from ManualsPrinter com Manuals ...
Page 679: ...Click Register 㻢㻣㻥㻌㻛㻌㻥㻢㻠 Downloaded from ManualsPrinter com Manuals ...
Page 734: ...4 Click Edit 5 Specify SNMPv3 㻣㻟㻠㻌㻛㻌㻥㻢㻠 Downloaded from ManualsPrinter com Manuals ...
Page 834: ...The machine is ready to print 㻤㻟㻠㻌㻛㻌㻥㻢㻠 Downloaded from ManualsPrinter com Manuals ...
Page 965: ...㻝㻌㻛㻌㻣㻢 Downloaded from ManualsPrinter com Manuals ...
Page 1004: ...8 Close the dialog box 㻠㻜㻌㻛㻌㻣㻢 Downloaded from ManualsPrinter com Manuals ...
Page 1013: ...The icon is added to the printer folder 㻠㻥㻌㻛㻌㻣㻢 Downloaded from ManualsPrinter com Manuals ...
Page 1018: ...㻡㻠㻌㻛㻌㻣㻢 Downloaded from ManualsPrinter com Manuals ...
Page 1020: ...㻡㻢㻌㻛㻌㻣㻢 Downloaded from ManualsPrinter com Manuals ...
Page 1031: ... Installing the MF Drivers and MF Toolbox 㻢㻣㻌㻛㻌㻣㻢 Downloaded from ManualsPrinter com Manuals ...


