Note
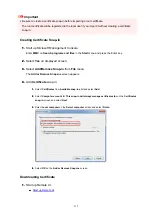
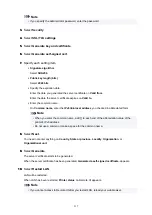
• If you specify the administrator password, enter the password.
3.
Select
Security
.
3.
4.
Select
SSL/TLS settings
.
4.
5.
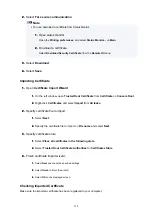
Select
Generate key and certificate
.
5.
6.
Select
Generate self-signed cert
.
6.
7.
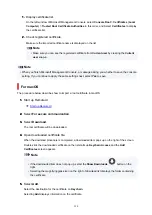
Specify each setting item.
7.
•
Signature algorithm
•
Select
SHA256
.
•
Public key length (bits)
•
Select
2048 bits
.
• Specify the expiration date.
•
Enter the date you generated the server certificate on
Valid from
.
Enter the date the server certificate expires on
Valid to
.
• Enter the common name.
•
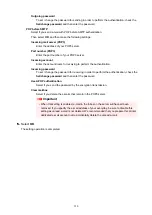
On
Common name
, enter the
IPv6 link-local address
you checked in abbreviated form.
Note
• When you enter the common name, add [ ] to each end of the abbreviation value of the
printer's IPv6 address.
• Do not use a comma or make a space for the common name.
8.
Select
Next
.
8.
You need not enter anything on
Country
,
State or province
,
Locality
,
Organization
, or
Organizational unit
.
9.
Select
Generate
.
9.
The server certificate starts to be generated.
When the server certificate has been generated,
Generated a self-signed certificate.
appears.
10.
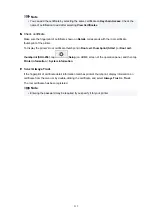
Select
Restart LAN
.
10.
LAN will be restarted.
When LAN has been restarted,
Printer status
on Remote UI appears.
Note
• If you cannot access to Remote UI after you restart LAN, reload your web browser.
217
Summary of Contents for GP200
Page 1: ...GP 300 GP 200 GP 5300 GP 5200 Online Manual English ...
Page 17: ...B20A 876 B510 877 ...
Page 50: ...Optional accessories Stand Roll Holder Set 50 ...
Page 59: ...Start printing Important Do not move the release lever during printing 59 ...
Page 68: ...Note The screen may differ slightly depending on the model you are using 68 ...
Page 70: ...Pausing Printing Pausing Printing 70 ...
Page 86: ...86 ...
Page 117: ...5 Tap ON 5 117 ...
Page 127: ...127 ...
Page 128: ...Basket Using the Basket 128 ...
Page 192: ...Data on the hard disk are erased 192 ...
Page 222: ...3 Select OK 3 The resending setting is completed 222 ...
Page 282: ...Adjusting Feed Amount Adjusting Feed Amount Adjusting Vacuum Strength 282 ...
Page 298: ...Note For instructions on replacing the ink tanks see Replacing Ink Tanks 298 ...
Page 306: ...306 ...
Page 330: ...Cutter Blade Cutter Blade Replacing the Cutter Blade 330 ...
Page 338: ...Related Topic Cleaning the Print Heads 338 ...
Page 344: ...344 ...
Page 355: ...Specifications Specifications Print Area 355 ...
Page 411: ...Printing with ICC Profiles 411 ...
Page 430: ...Note Selecting Enlarged Reduced Printing changes the printable area of the document 430 ...
Page 487: ...Printing from Printer Printing Data Saved on USB Flash Drive 487 ...
Page 505: ...Printer Driver Windows Printer Driver macOS Printer Driver 505 ...
Page 519: ...In such cases take the appropriate action as described 519 ...
Page 567: ...3 Select Save in Job Box in Output Method 3 567 ...
Page 568: ...568 ...
Page 580: ...5 In the list select the target job 5 6 Select Edit 6 7 Select Delete 7 8 Select Yes 8 580 ...
Page 595: ...Media Type Selection does not Match Loaded Media Type 595 ...
Page 620: ...620 ...
Page 655: ...Cleaning the Printer Exterior 655 ...
Page 657: ...Move the printer to a different environment or let the paper dry before rolling it 657 ...
Page 728: ...1201 Cause The ink tank cover is open What to Do Close the ink tank cover 728 ...
Page 729: ...1210 Cause The ink tank cover is open What to Do Close the ink tank cover 729 ...
Page 755: ...1500 Cause The ink in the ink tank is running low What to Do Prepare a new ink tank 755 ...
Page 828: ...Contact your Canon dealer for assistance 828 ...


