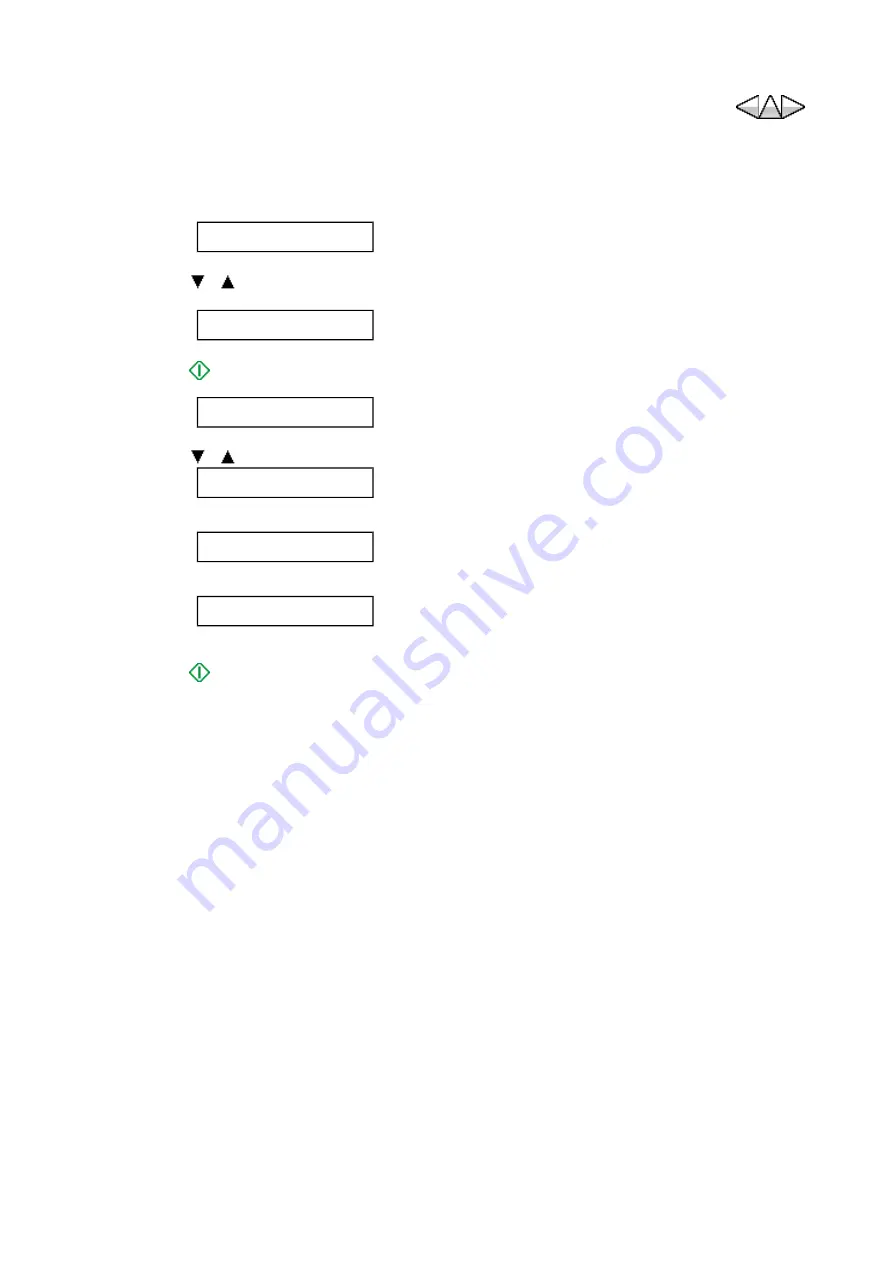
5-12-6 CLEAR
Select the TEL number data, the user registration data or the all clear. Clear the selected data.
Follow the procedure below.
1. Start the FAX service mode.
2. Press [ ][ ] key. Select
”
CLEAR
”
.
3. Press [
Start] key.
4. Press [ ][ ] keys to select an item.
5. Press [
Start] key. Execute the clear
#1 BIT SWITCH
Standby
↓
CLEAR
↓
TEL
TEL
Clears the TEL number data.
↑
↓
USER SW
Clears the user registration data
↑
↓
ALL
Clears all data.
*Perform the TYPE setting after the all clear.
Part 1 - 69
Summary of Contents for FAX-JX500
Page 4: ...Blank Page FAX JX500 JX300 JX200 JX201 Service Manual ...
Page 8: ...Blank Page FAX JX500 JX300 JX200 JX201 Service Manual ...
Page 9: ...Part 1 Maintenance R2 Confidential Part 1 1 ...
Page 10: ...Blank Page FAX JX500 JX300 JX200 JX201 Maintenance Part 1 2 ...
Page 14: ...Blank Page FAX JX500 JX300 JX200 JX201 Maintenance Part 1 6 ...
Page 34: ...Blank Page FAX JX500 JX300 JX200 JX201 Maintenance Part 1 26 ...
Page 82: ...Blank Page FAX JX500 JX300 JX200 JX201 Maintenance Part 1 74 ...
Page 116: ...Install the timing slit disk to the clearance of the paper feed sensor board ass y Part 1 108 ...
Page 124: ...Blank Page FAX JX500 JX300 JX200 JX201 Maintenance Part 1 116 ...
Page 126: ...Blank Page FAX JX500 JX300 JX200 JX201 Maintenance Part 1 118 ...
Page 127: ...Part 2 Technical Reference R2 Confidential Part 2 1 ...
Page 128: ...Blank Page FAX JX500 JX300 JX200 JX201 Technical Reference Part 2 2 ...
Page 138: ...Blank Page FAX JX500 JX300 JX200 JX201 Technical Reference Part 2 12 ...
Page 139: ...Part 3 Appendix R2 Confidential Part 3 1 ...
Page 140: ...Blank Page FAX JX500 JX300 JX200 JX201 Appendix Part 3 2 ...
Page 142: ...Blank Page FAX JX500 JX300 JX200 JX201 Appendix Part 3 4 ...
Page 144: ...Blank Page FAX JX500 JX300 JX200 JX201 Appendix Part 3 6 ...
Page 154: ...Blank Page FAX JX500 JX300 JX200 JX201 Appendix Part 3 16 ...


