background image

29

Problem 8

Each scanned image of a multi-page document is 
saved as a separate document.

Solutions

With CaptureOnTouch, you can scan multiple pages 
into one image file when TIFF or PDF file format is 
selected. To do this, select [File type], click the [Detail 
Settings] button, and select [Save all pages as one file] 
in the displayed dialog box.
When you select [Scan Batch to File] from the [Scan] 
menu in CapturePerfect, a dialog box appears with a 
pull-down menu at the bottom that allows you to select 
[Single Page], [Multi Page (All Pages)], or [Multi Page 
(Specified Pages)]. If you select [Single Page], each 
page of a multi-page document is saved as a separate 
image file. To save multiple pages to a single image file, 
select [Multi Page (All Pages)] or [Multi Page (Specified 
Pages)].

Problem 9

Documents feed, but no scanned images are saved.

Solutions

When Panel-Feeding is selected as the feeding method 
on the scanner driver’s setting screen, after a document 
is fed, scanning does not occur until the scan button is 
clicked on the scan panel. 

Problem 10 Scanned images of multiple pages cannot be saved 

in a single JPEG or BMP file.

Solutions

Multiple scanned images cannot be saved in a single 
JPEG or BMP file. Save the images in either TIFF or 
PDF format.

Problem 11 An error message is displayed.

Solutions

Confirm the nature of the error, and resolve the problem. 
Press the STOP button to clear the error message. The 
solution for each error is as follows.

Problem 12 Cannot perform ADF scanning.

Solutions

Scanning cannot be performed from the feeder when 
the business card feeder is open. Close the business 
card feeder if it is open.

Problem 13 Auto start does not function.

Solutions

The document detection sensor on the feeder does not 
function when the business card feeder is open. 
Therefore, even if documents are placed in the feeder, 
scanning will not begin automatically if the business 
card feeder is open. Close the business card feeder.

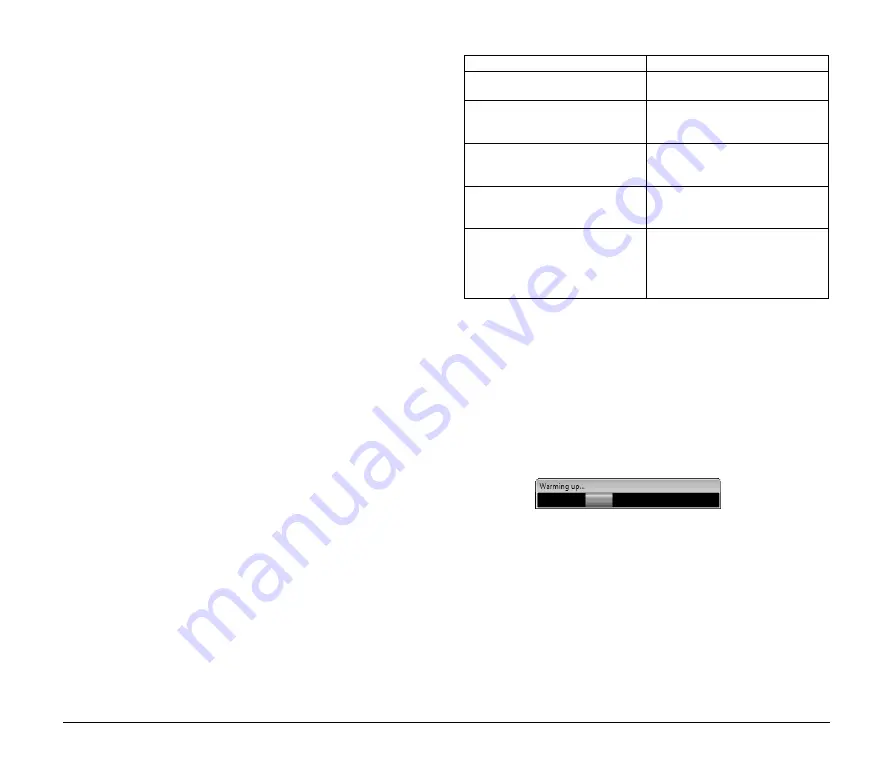
Problem 14 The “Warming up” message appears.

Solutions

If this procedure is performed immediately after turning 
the scanner ON or while the power indicator is not lit, the 
following appears on the computer display. In this case, 
scanning begins after the scanner finishes warming up. 
Warm up may take up to 30 seconds.

Error Message

Solution

Paper jammed in scanner; clear 
paper and push STOP button.

A paper jam has occurred. Remove 
the jammed paper. (See p. 30.)

The scanner cover or upper unit is 
open. Remove jammed paper, and 
push STOP button.

Close the scanner cover or upper 
unit.

Release the lock switch. After 
releasing the lock switch, press the 
STOP button.

The lock switch is locked. Unlock the 
lock switch. 

Feeder is not Connected.

The ADF connector on the rear panel 
of the scanner is disconnected. Insert 
the ADF connector all the way. 

A double paper-feed has occurred. 
Please check the document and the 
scanned image on the display and 
scan the document again.

Scanning has stopped due to 
document double-feed. Check the 
scanned images to confirm how much 
of the document was scanned, and 
continue scanning accordingly.

Summary of Contents for DR-2020U - imageFORMULA - Document Scanner

Page 1: ...Reference Guide Please read this manual before using the scanner After you finish reading this manual keep it in a safe place for future reference ...

Page 2: ... from the date you purchased the same as evidenced by a receipt or otherwise The limited warranty does not apply if the failure of the diskette resulted from accident abuse or misapplication of the SOFTWARE and shall not extend to anyone other than the original user of the SOFTWARE CANON CANON S AFFILIATE THEIR DISTRIBUTOR OR DEALER DISCLAIMS ALL IMPLIED WARRANTIES INCLUDING ANY WARRANTY OF MERCHA...

Page 3: ...pter Power Cord Connected length 2 6 m Before Use Application Software Disc Adobe Acrobat Setup Disc Setup Disc Contents of Application Software CD ROM The following applications are included on the supplied Application Software CD ROM For details on installation refer to the Readme txt file Presto BizCard Reader 5 SE Business card management software from NewSoft Technology Corp with multi langua...

Page 4: ... before installing the software If you connect the scanner and turn it ON before you install the software the following wizard screen will appear If this wizard is displayed click the Cancel button to exit the wizard and turn the scanner OFF Power indicator Turning the Scanner ON PC Power Link Function The scanner s power can be linked to the computer allowing it to be turned ON OFF in accordance ...

Page 5: ...e disposed of with your household waste according to the WEEE Directive 2002 96 EC and your national law This product should be handed over to a designated collection point e g on an authorized one for one basis when you buy a new similar product or to an authorized collection site for recycling waste electrical and electronic equipment EEE Improper handling of this type of waste could have a poss...

Page 6: ...may be reproduced or transmitted in any form or by any means electronic or mechanical including photocopying and recording or by any information storage or retrieval system without the prior written permission of CANON ELECTRONICS INC Disclaimers The information in this document is subject to change without notice CANON ELECTRONICS INC MAKES NO WARRANTY OF ANY KIND WITH REGARD TO THIS MATERIAL EIT...

Page 7: ...ns of Parts 10 Feeding Methods 13 Placing Documents 15 Placing Documents into the Feeder 15 Placing Documents on the Flatbed 15 Placing Cards into the Business Card Feeder 16 Supplied Software 17 Scanning with CaptureOnTouch 18 What is CaptureOnTouch 18 Starting CaptureOnTouch 19 Scan First 20 Select Scan Job 24 Troubleshooting 28 Common Problems and Solutions 28 Clearing a Paper Jam 30 Appendix 3...

Page 8: ...ntion to these cautions IMPORTANT Indicates operational requirements and restrictions Be sure to read these items carefully to operate the scanner correctly and avoid damaging the scanner Hint Indicates a clarification of an operation or contains additional explanations for a procedure Reading these notes is highly recommended Manuals for the Scanner Documentation for this scanner consists of the ...

Page 9: ...ve dust Avoid warm or humid locations such as in the vicinity of a water faucet water heater or humidifier and avoid locations where the fumes from ammonia paint thinner or other volatile chemicals may be present 110 mm or more AMMONIA Avoid locations that are unstable or subject to vibration Avoid exposing the scanner to rapid changes in temperature If the room in which the scanner is installed i...

Page 10: ...g so is dangerous Do not place objects on or step on the AC adapter or power cord Do not use the power cord while it is coiled Do not pull directly on the power cord When disconnecting the power cord grasp the power plug and remove it from the power outlet Keep the area around the power plug clear of objects so that the power cord can be disconnected easily in an emergency Use only the AC adapter ...

Page 11: ...adapter provided with this scanner Do not attempt to dismantle the scanner or modify it in any way as this is dangerous and may lead to a fire or electric shock Never attempt to dismantle or modify the AC adapter in any way as doing so is dangerous Do not use flammable aerosol spray products near the scanner When cleaning the scanner turn the power switch OFF and disconnect the power cord from the...

Page 12: ...l benzene paint thinner etc to spill into the scanner as this may result in a fire or electric shock Turn OFF the power switch for safety when not using the scanner for a long period of time such as overnight Also turn OFF the power switch and disconnect the AC adapter from the scanner and disconnect the power cord from the power outlet for safety when the machine will not be used for an extended ...

Page 13: ...ring the image even when storing a document of irregular size Auto Color Detection The scanner detects whether the scanned document is in color or black and white and saves the image accordingly Deskew The scanner straightens scanned images when it detects that the document was placed askew Text Enhancement Modes The scanner is equipped with the Advanced Text Enhancement Mode for enhancing the tex...

Page 14: ...if documents scanned through the feeder hang over the edge of the eject tray F Operation Panel Buttons for operating the scanner and an LCD are located here See p 11 G Business Card Feeder Open and use this when scanning business cards H Pressure Board This presses documents placed on the flatbed against the glass I Scanning Glass Feeder J Lock Switch Use this to lock the inner parts of the scanne...

Page 15: ...nctions Executes jobs selected with the user defined job buttons or scroll keys Starts scanning when an application is used and the Feeding Option is set to Panel Feeding Launches the application configured with the Windows Events function G STOP Button Press this button to stop scan procedures or clear error displays such as those for paper jams H POWER Button Press this button to turn the scanne...

Page 16: ...nector The feeder will stop functioning if the ADF connector is disconnected C Power Connector Connect the supplied AC adapter here Communication error with computer When an error occurs a message indicating the nature of the error appears You can use the scroll keys to scroll longer messages For details on the error messages and their solutions see page 29 B A C ...

Page 17: ...ges on the reverse side of the page may bleed through onto the scanned image In this case adjust the brightness under the scanning conditions Always make sure to check that paper clips staples and similar objects are not mixed in with a document before loading it into the feeder The presence of such objects may result in damage to documents paper jams and damage to the scanner Do not wear loose cl...

Page 18: ... be careful not to cut your fingers when loading documents Documents That Cannot Be Scanned with the Feeder Use the flatbed platen glass to scan the following types of documents Using the feeder may result in paper jams and damage to the scanner Wrinkled or creased paper Carbon backed paper Curled paper Coated paper Torn paper Extremely thin paper Paper with clips or staples ...

Page 19: ...Placing Documents on the Flatbed 1 Place the document on the flatbed with the scanning side facing down and align the upper left corner of the document with the positioning guide on the flatbed IMPORTANT Do not place objects other than the document to be scanned onto the flatbed platen glass Doing so may result in damage or personal injury Open and close the feeder gently Excessive force may resul...

Page 20: ...the business card feeder gently Excessive force may result in damage to the business card feeder Precautions for using the business card feeder are the same as those for the feeder See p 13 Close the business card feeder when it is not in use Business cards are ejected in reverse order after scanning from the business card feeder Scan plastic cards on the flatbed When the Scanner Is in Sleep Mode ...

Page 21: ...d specifically for use with this scanner allows you to scan using easy to follow on screen instructions For details on operation see page 18 This scanning application designed for advanced users includes a variety of scanning methods and processing functions for scanned images For details on operation refer to the CapturePerfect 3 0 Operation Guide electronic manual Hint ISIS TWAIN drivers are ins...

Page 22: ...ut method after a document is scanned and then configure the necessary settings Select Scan Job This method allows you to register scanning conditions and output methods as jobs and then select a job that matches your intended purpose to begin scanning This is useful for repeating specific scanning operations multiple times Save to folder Save to a specified folder Print Print to a specified print...

Page 23: ...nu Click Start point to All Programs point to Canon DR 2020U and then click CaptureOnTouch Quitting CaptureOnTouch Click CaptureOnTouch in the notification area of the taskbar and click Exit in the menu The application no longer resides on the system and the taskbar icon disappears Restarting CaptureOnTouch Press any job button on the scanner to restart CaptureOnTouch CaptureOnTouch starts and the...

Page 24: ... on scanner setting items refer to the Help When you are finished configuring click the OK button to close the Scanner setting dialog box 4 Click the Start button The document is scanned While scanning is in progress the number of pages scanned is displayed in addition to the scanner settings When scanning is finished the Output method screen appears in the main window Scan document Select output ...

Page 25: ...the output method and you click Open storage folder the folder in which the scanned image files are stored will open Continuous Scanning When you want to scan multiple documents as a single scanned image or when you want to scan a multi page document in sections select the Enable continuous scanning check box in the main screen You can do this in Scan First and Select Scan Job In such cases a conf...

Page 26: ...ging Application Programming Interface e mail applications Open scanned images with a specified application When this method is selected you must click the Browse button and specify the executable file exe for an application that can open the image file In addition configure settings for the image file to be saved When Using PaperPort The PaperPort application supplied with this unit uses the Docu...

Page 27: ...ify the orientation in which documents are fed into the scanner portrait or landscape Dots per inch Specify the scanning resolution Scanning Side Specify whether to scan only one side of a document or both sides If you select Skip blank page and a blank page is detected within the document while scanning the blank page is skipped Deskew When a document is scanned at an angle the slant is detected ...

Page 28: ...ect a registered job and click Job list edit the Job editing dialog box appears allowing you to edit the settings of the selected job 3 Configure the job settings A Select an Unconfigured job number from the job list If you select a job that is already registered the title bar display changes to Job editing B Enter the job name C Specify the output method D Configure the job settings Job settings ...

Page 29: ...he e mails to which the scanned images are attached For details on settings refer to the User Manual Scanner setting tab Configure scan conditions Button assignment tab Configure settings to assign the job to a job button on the scanner If Assign scanner button 1 to Scan First is selected in the main screen assignment to job button 1 is not available Confirming Output In Select Scan Job scanned im...

Page 30: ...ears in the job list To confirm the settings of a registered job or to change the settings click the Job list edit button Selecting Scan Jobs 1 Place the document in the scanner See p 15 2 Click the Select Scan Job tab The main screen for Select Scan Job appears 3 Click a job in the Job list ...

Page 31: ...elect Scan Job with the Job Buttons The following jobs are pre assigned to the job buttons on the operation panel Three preset jobs are assigned to the job buttons and the respective scanning procedures will be processed automatically when these buttons are pressed Registered jobs can be assigned to the user defined job buttons When you press a user defined job button and then press the START butt...

Page 32: ...ures Problem 4 Both sides are not scanned even when the Duplex scanner driver setting is enabled Solutions In CaptureOnTouch or CapturePerfect 3 0 executing a job for which single sided simplex scanning is registered will always result in simplex scanning regardless of scanner driver settings For example if Simplex is selected under the Scanner setting tab of the Job Register dialog box in Capture...

Page 33: ...ror is as follows Problem 12 Cannot perform ADF scanning Solutions Scanning cannot be performed from the feeder when the business card feeder is open Close the business card feeder if it is open Problem 13 Auto start does not function Solutions The document detection sensor on the feeder does not function when the business card feeder is open Therefore even if documents are placed in the feeder sc...

Page 34: ... the underside of the feeder or the eject outlet 3 If the jammed document does not appear wrinkled or otherwise damaged close the feeder cover and press the STOP button The jammed document is ejected and the error message is cleared on the display 4 If the document is jammed at an angle or wrinkled carefully remove the document without tearing it IMPORTANT Remove the document carefully and do not ...

Page 35: ...31 6 Press the STOP button to clear the error message on the display Hint After clearing the paper jam confirm whether the last document was scanned before you continue scanning ...

Page 36: ...ration pad are located inside the feeder cover Be sure to remove the roller unit and separation pad as shown below before cleaning them Removing the Roller Unit and Separation Pad 1 Open the document feed tray and feeder cover 2 Raise the roller unit s lock lever Gently bend the lock lever inward then raise it 3 Remove the roller unit Hold the center of the roller unit roller portion lift the lock...

Page 37: ...wipe the rollers and separation pad clean Attaching the Roller Unit and Separation Pad 1 Attach the separation pad Press the separation pad down gently until it snaps into place and make sure it is securely attached 2 Attach the roller unit Insert the shaft pin of the roller unit into the notch on the scanner A and attach the lock lever vertically B A B ...

Page 38: ...th 100 mm to 356 mm Thickness 52 to 128 g m2 0 06 mm to 0 15 mm Capacity 50 sheets or stacked to a height of 5 0 mm including curling Flatbed Width 216 mm Length 297 mm Business Card Feeder Width 49 mm to 55 mm Length 85 mm to 91 mm Thickness 128 to 300 g m2 0 15 mm to 0 3 mm Capacity 15 sheets or stacked to height of 3 8 mm including curling Feeding Method Automatic Scanner Element CCD Charge Cou...

Page 39: ...mber MG1 4314 Input AC 100 V 240 V 50 60 Hz 1 2 A 100 V 0 7 A 240 V Output DC 24 V 2 2 A Weight Approx 0 4 kg Specifications are subject to change without notice Replacement Parts Roller Unit Product Code 4048B001 Separation Pad Product Code 4048B002 For details on replacing the roller unit and separation pad see Cleaning the Roller Unit and Separation Pad on p 32 For further details on replacemen...

Page 40: ...ETHERLANDS CANON LATIN AMERICA INC 703 WATERFORD WAY SUITE 400 MIAMI FLORIDA 33126 U S A CANON AUSTRALIA PTY LTD 1 THOMAS HOLT DRIVE NORTH RYDE SYDNEY N S W 2113 AUSTRALIA CANON SINGAPORE PTE LTD 1 HARBOUR FRONT AVENUE 04 01 KEPPEL BAY TOWER SINGAPORE 098632 CANON HONGKONG COMPANY LTD 19TH FLOOR THE METROPOLIS TOWER 10 METROPOLIS DRIVE HUNGHOM KOWLOON HONG KONG CANON KOREA BUSINESS SOLUTIONS INC 1...

Reviews: