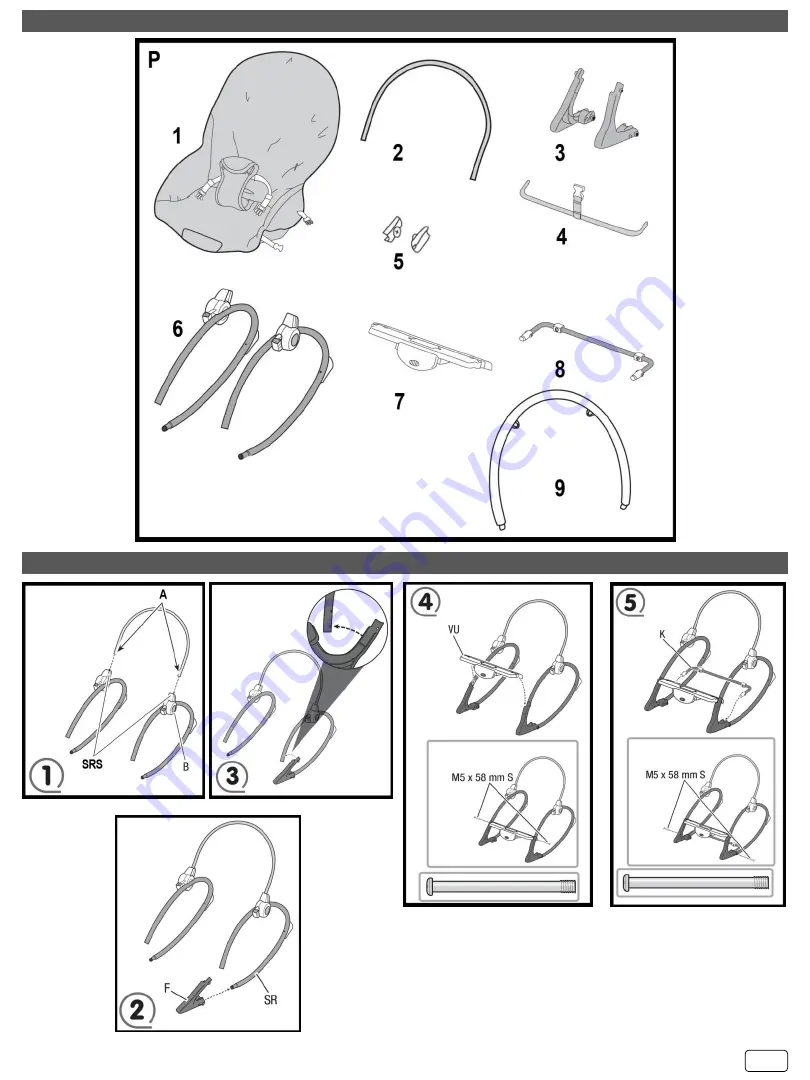
ЧАСТИ/ PARTS
СТЪПКИ НА СГЛОБЯВАНЕ/ ASSEMBLY STEPS
2
Page 1: ...N THE ASSEMBLY CORRECT USE AND MAINTENANCE OF THE PRODUCT WARNING THE SHEMES AND FIGURES IN THIS INSTRUCTIONS ARE FOR ILLUSTRATIVE PURPOSE ONLY THE PRODUCT YOU HAVE BOUGHT MAY DIFFER FROM THEM 0 18 Fo...
Page 2: ...PARTS ASSEMBLY STEPS 2...
Page 3: ...3...
Page 4: ...2 3 4 5 9 6 18 7 8 9 10 11 12 13 14 15 16 17 18 19 0 18 EN71 1 BG 4...
Page 5: ...20 21 22 23 24 25 26 27 28 29 P 1 2 3 4 5 6 7 8 9 5 1 1 B SRS 2 2 F SR 3 3 4 4 M5 38 5 5 M5 x 58 mm 6 6...
Page 6: ...7 7 M5 X 30 mm 8 8 8 9 9 10 10 11 11 12 12 13 13 1 2 3 6...
Page 7: ...7 4 B 14 1 1 5V D LR20 1 2 1 1 5V D LR20 3 D LR20 1...
Page 8: ...ouncer on uneven surfaces 9 Do not place the bouncer close to stairs or staircases slippery and wet surfaces close to pools heat sources heating appliances cookers and open fires and other dangerous p...
Page 9: ...he back tube Position each of the side rail so that the buttons B are facing outward While pressing the tabs at the ends of the seat back tube insert it into the sockets SRL on the side rails Press ca...
Page 10: ...r body in order to sit up straight without tilting forwards Check in order to make sure that the restraint system is safely attached by pulling it slightly sideways from your child The restraint syste...
Page 11: ...t and afterwards they should be charged under adult supervision only Never shorten the terminals of the battery Protect the environment by not throwing this product with the household waste For consul...