background image

EN 12

A

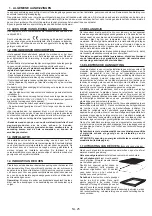
1- Remove the knurled nuts by turning them counter clockwise.
2- Remove the wire racks by pulling them towards yourself.
3- To clean the wire racks either put them in the dishwasher or use
a wet sponge, ensuring that they are dried afterwards.
4- After the cleaning process install the wire racks in reverse order.
5- Replace the knurled nuts.

Removing and cleaning wire racks

All

ovens feature the

function.

This allows a management of the distribution of moisture
and temperature. It reduces the loss of humidity of the 50
%, which guarantees the food remains tender and tastes
better. This a delicate cooking is recommended for the
baking of the bread and pastry.

Ovens have an electronic control of the fan speed, called

and patented VARIOFAN. During the cooking, this system changes
automatically the speed of the fan (in multifunction mode) in order to
optimize the air flow and the internal temperature in the cavity of the
oven.

2. USEFUL TIPS

2.1 SHELF SAFETY SYSTEM

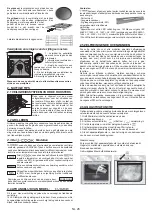
The oven features a new shelf safety
system.
This allows you to pull out the oven
shelves when inspecting the food
without danger of food spillages or
shelves falling accidentally out of the
oven.
To remove the shelves pull out and lift.

2.2 GRILLING

Grilling makes it possible to give food a rich brown colour quickly.
For browning we recommend that you insert the grill onto the
fourth level, depending on the proportions of the food (see fig.
page 7).
Almost all food can be cooked under the grill except for very lean
game and meat rolls.
Meat and fish that are going to be grilled should first be lightly
doused with oil.

2.3 The                          MODELS

It reduces the time of preheating of ovens: only 8 minutes
to reach 200 degrees Celsius.

Some ovens are equipped with the new doorj " WIDE DOOR " which
has a bigger window area, this allows better maintenance and a
improved thermal insulation.

It gives the possibility of setting level and intensity of
grilling, up to 50 % more power in comparison with a
traditional multifunction oven.

Advantages :

System, besides providing excellent illumination inside the

oven, lasts longer than the traditional light bulb its easier and to
maintain and most of all saves energy.
• Optimum view
• Long life illumination
• Very low energy consumption, -95% in
comparison with the traditional
illumination High

“Appliance with white light LED of the 1M Class according to IEC
60825- 1:1993 + A1: 1997 + A2: 2001 (equivalent to EN 60825-1: 1994
+ A1: 2002 + A2: 2001); the maximum light power emitted

459nm <

l

150uW.
Not observed directly with optical instruments. “

2.4 According to the model

Is an illumination system which replaces the traditional « light bulb ».
14 LED lights are integrated within the door. These produce white high
quality illumination which enables to view the inside of the oven with
clarity without any shadows on all the shelves.

2.5 SELF-CLEANING OVEN WITH CATALYTIC

Special self-cleaning panels covered in a micro-porous coating are
available as optional extras for all models. If they are fitted, the oven
no longer needs to be cleaned by hand.
The fat that is splattered onto the sides of the oven during roasting is
eliminated by the microporous coating which breaks the fat down by
catalysis and transforms it into gas.
Excessive splattering may nevertheless block the pores and therefore
hinder self-cleaning. The self-cleaning capacity may be restored by
switching on the empty oven to maximum for about 10-20 minutes.
Do not use abrasive products, metal cleaning wads, sharp objects,
rough cloths, or chemical products and detergents that may
permanently damage the catalytic lining.
It is a good idea to use deep roasting trays to roast fatty foods such as
joints of meat etc. and to put a tray underneath the grill to catch surplus
fat.If the walls of the oven are so thickly coated in grease that the
catalytic lining is no longer effective remove surplus grease with a soft
cloth or sponge soaked in hot water.
The lining must be porous for self-cleaning to be effective.

N.B.:

All catalytic linings currently on the market have a working life of

about 300 hours. They should therefore be replaced after about 300
hours.

2.6 AQUACTIVA FUNCTION

The Aquactiva procedure uses steam to help remove remaining fat
and food particles from the oven.
1. Pour 300 ml of water into the Aquactiva container at the bottom of
the oven.
2. Set the oven function to Static (

)or Bottom (

)heater

3. Set the temperature to the Aquactiva icon
4. Allow the program to operate for 30 minutes.
5. After 30 minutes switch off the program and allow the oven to cool
down.
6. When the appliance is cool, clean the inner surfaces of the oven
with a cloth.

Warning:

Make sure that the appliance is cool before you touch it.

Care must be taken with all hot surfaces as there is a risk of burns.
Use distilled or drinkable water.

Lateral wire grid if included.

Summary of Contents for FCS600XE

Page 1: ...TICE D EMPLOI ET D INSTALLATION FR OVEN GEBRUIKSAANWIJZING NL FORNOS MANUAL DE INSTRUÇÕES DE UTILIZAÇÃO PT ФУРНИ ИНСТРУКЦИИ ЗА ПОТРЕБИТЕЛЯ BG 09 CANDY HOOVER GROUP S R L Via Comolli 16 20861 Brugherio MB Italy 02 16 PIEKARNIKI DO ZABUDOWY INSTRUKJA OBS UGI Ł PL 50 TROUBY NÁVOD K OBSLUZE CZ 57 NAVODILO ZA UPORABO VEČNAMENSKE VGRADNE PEČICE SL 63 30 37 23 43 69 ...

Page 2: ... Forno secondo Modello 1 7 2 1 Griglie Forno Sistema Di Arresto 2 2 La Cottura Al Grıll 2 3 Secondo Modello Led Vision 2 4 Tempı Di Cottura 2 5 Pulizia E Manutenzione 2 6 AQUACTIVA La Funzione 2 7 Pulızıa E Manutenzıone 2 8 Garanzie Consigli Utili 5 3 1 Uso Del Contaminuti 3 2 Uso Del Temporizzatore 3 3 Regolazione Ora 3 4 Timer Elettronico A Sfioramento Contaminuti 7 Istruzioni Per L uso 8 IT 02 ...

Page 3: ...richiedere ad un tecnico specializzato di sostituire la presa con un altra di tipo compatibile La spina e la presa devono essere conformi alle normative attuali del paese di installazione Il collegamento alla rete di alimentazione può essere effettuato anche collocando un interruttore automatico onnipolare tra l elettrodomestico e la rete di alimentazione in grado di supportare il carico massimo c...

Page 4: ...un qualsiasi apparecchio elettrico comporta l osservanza di alcune regole fondamentali In particolare non tirare il cavo di alimentazione per staccare la spina dalla presa di corrente non toccare l apparecchio con mani o piedi bagnati o umidi non usare l apparecchio a piedi nudi in generale è sconsigliabile l uso di adattatori prese multiple e prolunghe In caso di guasto e o di cattivo funzionamen...

Page 5: ...e la leccarda quando si esegue la cottura al grill Qualora per particolari condizioni di sporco non fosse sufficiente l azione precedente si consiglia di intervenire asportando i grassi con un panno morbido od una spugna inumiditi con acqua calda La porosità dello smalto è fondamentale per garantire l azione autopulente N B Tutti i pannelli autopulenti in commercio hanno un efficacia di rendimento...

Page 6: ... le parti estetiche La pulizia del forno è molto importante e deve essere effettuata ogni volta che questo viene usato Infatti sulle pareti si depositano grassi sciolti durante la cottura che potrebbero alla successiva accensione produrre odori sgradevoli che nuocerebbero al buon esito della cottura Per la pulizia usare acqua calda e detersivo sciacquando accuratamente Per eliminare questo fastidi...

Page 7: ...i per regolare la durata Lasciare i tasti Selezionare la funzione di cottura con la manopola commutatore Al termine della durata impostata il forno si spegne da solo se deve essere fermato prima si deve portare la manopola commutatore in posizione O oppure portare a 0 00 la durata della cottura tasti SELECT e Permette di impostare la durata della cottura del cibo inserito nel forno Per visualizzar...

Page 8: ...re impostata tramite l apposita manopola Il termine della fase di preriscaldamento è indicato tramite la spia del termostato C che si spegne Una volta conclusa questa fase è possibile selezionare la funzione di cottura desiderata ed inserire le pietanze da cucinare Prestare attenzione a non inserire alimenti nel forno durante la fase di preriscaldamento rischierebbero di subire danni SOFT COOK a S...

Page 9: ...7 Oven Equipment according To The Model 2 1 Shelf Safety System 2 2 Grilling 2 3 The U Cook Models 2 4 U See 2 5 Self cleaning Oven With Catalytic 2 6 AQUACTIVA Function 2 7 Cleaning And Maintenance 2 8 Service Centre Useful Tips 12 3 1 Using The Minute Timer 3 2 Using The End Of Cooking Timer 3 3 Setting The Correct Time 3 4 Use Of The Electronic Programmer Timer 13 Operating Instructions 15 ...

Page 10: ...ket must be suitable for the load indicated on the tag and must be having the earth contact connected and in operation The earth conductor is yellow green in colour This operation should be carried out by a suitably qualified professional In case of incompatibility between the socket and the appliance plug ask a qualified electrician to substitute the socket with another suitable type The plug and...

Page 11: ...ix the oven in position by screwing into place using the four fixing holes in the frame Fig on last page To locate the fixing holes open the oven door and look inside To allow adequate ventilation the measurements and distances indicated in the diagram on last page must be adhered to when fixing the oven Note For ovens that are combined with a hob unit the instructions contained in the manual for ...

Page 12: ...th white light LED of the 1M Class according to IEC 60825 1 1993 A1 1997 A2 2001 equivalent to EN 60825 1 1994 A1 2002 A2 2001 the maximum light power emitted 459nm l 150uW Not observed directly with optical instruments 2 4 According to the model Is an illumination system which replaces the traditional light bulb 14 LED lights are integrated within the door These produce white high quality illumin...

Page 13: ...to remove and dispose properly all pollutants and recover and recycle all materials Individuals can play an important role in ensuring that WEEE does not become an environmental issue it is essential to follow some basic rules WEEE shall not be treated as household waste WEEE shall be handed over to the relevant collection points managed by the municipality or by registered companies In many count...

Page 14: ...lease all the buttons When the set time as elapsed an audible alarm is activated this alarm will stop on its own however it can be stopped immediately by pressing the button SELECT Sounds an alarm at the end of the set time During the process the display shows the remaining time Allows to use the oven as alarm clock could be activated either with operating the oven or with out operating the oven P...

Page 15: ...oking time without compromising on taste It is particularly suitable for cooking meat roasted vegetables and omelettes The cycle of pulsed air keeps the humidity inside the oven and the moisture content of the food preserving the nutritional values and ensuring a rapid uniform cooking process Try all your recipes and reduce the amount of dressing you usually use and experience the lightness of thi...

Page 16: ...o Del Horno Según El Modelo 2 1 Rejillas Horno Sistema De Sujeción 2 2 La Coccıón Al Grill 2 3 Los Modelos U cook 2 4 Segùn Modelos U see 2 5 Horno Autolımpiante Catalítico 2 6 Función Aquactiva 2 7 Limpieza Y Mantenimiento 2 8 Asistencıa Técnica Consejos Útiles 19 3 1 Uso Del Mınutero 3 2 Uso Del Temporizador 3 3 Ajuste De La Hora 3 4 Temporizador Táctil Mınutero 20 Instrucciones De Uso 22 ES 16 ...

Page 17: ...ble con el enchufe del electrodoméstico pida a un electricista profesional que sustituya la toma por otra adecuada El enchufe y la toma deben cumplir las normas actuales del país donde se instala el electrodoméstico En la conexión con la fuente de alimentación también puede utilizarse un contactor omnipolar entre la fuente y el electrodoméstico Este debe soportar la carga conectada máxima y cumpli...

Page 18: ...los requisitos europeos en términos de seguridad salud y medio ambiente establecidos en la legislación de este producto 1 1 DECLARACIÓN DE CONFORMIDAD Para garantizar un correcto funcionamiento del aparato encastrable es necesario que el mueble tenga las características adecuadas Los paneles de los muebles adyacentes al horno deberán ser de un material resistente al calor En el caso de los muebles...

Page 19: ...na mayor área de cristal y permite un mejor aislamiento La función Supergrill dá la posibilidad de aumentar la intensidad del tostado La potencia Supergrill se incrementa un 50 respecto a un grill convencional Ventajas El sistema además de ofrecer una excelente iluminación dentro del horno duramucho más tiempo que la bombilla tradicional y consume mucho menos por lo que ahorra energía Visión óptim...

Page 20: ...ustancias contaminantes que pueden generar consecuencias negativas para el medio ambiente como componentes básicos que pueden reutilizarse Es importante someter los RAEE a tratamientos específicos con el fin de retirar y eliminar correctamente todos los contaminantes y reciclar todos los materiales Los usuarios pueden desempeñar una función importante para garantizar que los RAEE no representen un...

Page 21: ...ste a 0 00 el tiempo de la cocción teclas SELECT Permite seleccionar el tiempo de cocción del alimento introducido en el horno Para visualizar el tiempo restante pulse la tecla SELECT Para modificar el tiempo restante pulse la tecla SELECT Para detener la señal pulse cualquier tecla Pulse el botón central para volver a la función de reloj Pulse el botón central 3 veces Pulse las teclas para ajusta...

Page 22: ... asados Modalidad pizza El calor envolvente en esta modalidad genera un ambiente similar al de los hornos de leña de las pizzerías Mando selector Temperaturas predeterminadas y reglaje para el programador electrónico Type A Mando termostato FUNCIÓN Nivel 4 Nivel 4 Nivel 4 Sprinter Esta posición permite un precalentamiento rápido del horno Una vez seleccionada esta función se consigue un inmediato ...

Page 23: ...del 2 1 Veiligheidssysteem Voor De Roosters 2 2 Grilleren 2 3 De U cook Modellen 2 4 Afhankelijk Van Model u see 2 5 Zelfreinigende Ovenwanden 2 6 Aquactivafunctie 2 7 Schoonmaken En Onderhoud 2 8 Servıce Dienst Nuttige Tips 26 3 1 Gebruik Van De Kookwekker 3 2 Gebruik Van De Tımer Met Uitschakelfunctie 3 3 De Juiste Tijd Instellen 3 4 Elektronische Programma s Gebruiken Kookwekker 27 Instructies ...

Page 24: ...t u een gekwalificeerd elektricien vragen om het stopcontact te vervangen door een ander geschikt stopcontact De stekker en het stopcontact moeten conform de huidige normen zijn van het land waar het apparaat geïnstalleerd wordt Aansluiting op de stroombron kan ook tot stand worden gebracht door tussen het apparaat en de stroombron een omnipolaire stroomonderbreker aan te brengen die de maximaal a...

Page 25: ...an de inbouwope ning verwijderd te worden Het voetstuk dient een opening van minstens 45 mm te hebben 1 4 INBOUW VAN DE OVEN Plaats de oven in de daarvoor bestemde opening onder het aanrecht of in kolomopstelling De oven wordt vast gezet door de vier schroeven in de gaten in de rand vast te draaien U kunt de schroeven zien wanneer u de deur opent Voor een goede ventilatie dienen bij het inbouwen v...

Page 26: ...erd in de deur Deze produceren witte hoogwaardige verlichting welke er voor zorgt dat u goed in de oven kunt kijken helder en zonder schaduw 2 4 AFHANKELIJK VAN MODEL Voordelen Systeem afgezien van het perfect verlichten van de oven is de levernsduur langer makkelijk te onderhouden en bespaard het ook nog eens energie Perfect zicht Langere levensduur Erg laag energieverbruik 95 vergeleken met de t...

Page 27: ...UIK VAN DE KOOKWEKKER 3 KOOKWEKKER Dit apparaat is gemarkeerd volgens de Europese norm 2012 19 EU inzake Afval van elektrisch en elektronisch apparatuur WEEE WEEE bevat zowel verontreinigende substanties die negatieve gevolgen op het milieu kunnen hebben en basiscomponenten die hergebruikt kunnen worden Het is belangrijk om WEEE aan bepaalde behandelingen te onderwerpen om alle vervuilende onderde...

Page 28: ...DERSLOT Druk op Set gedurende een vijftal seconden e d display geeft STOP aan en stelt vooraf ingestelde tijd in als alternatief Alle functies zijn nu vergrendeld Druk opnieuw op Set gedurende een vijftal seconden Alle functies zijn nu opnieuw beschikbaar Hiermee kunt u de oven als alarmklok gebruiken zelfs indien u de oven niet gebruikt Druk 2 keer op de centrale knop Druk op de knoppen om de ver...

Page 29: ...en een kortere bereidingstijd zonder aan smaak in te boeten Het is bijzonder geschikt voor het bereiden van vlees geroosterde groenten en omeletten De cyclus van pulserende lucht behoudt de vochtigheid in de oven en het vochtgehalte van de levensmiddellen met behoud van de voedingswaarde en met zorg voor een snel en gelijkmatig kookproces Probeer al uw recepten met minder olie of vetten en ervaar ...

Page 30: ...chtig 1 6 Elektrischer Anschluß 1 7 Ofenausstattung je Nach Modell 2 1 Kippgesicherte Gitterroste 2 2 Grillen 2 3 The U_cook Models 2 4 Beleuchtungssystem U see Je Nach Modell 2 5 Katalytisches Selbstreinigungsset 2 6 Aquactiva Funktion 2 7 Reinigung Und Wartung 2 8 Technischer Kundendienst 3 1 Minutenzähler 3 2 Benutzung Des Timers Für Backzeitende 3 3 Einstellung Der Richtigen Uhrzeit 3 4 Touch ...

Page 31: ... zwischen Steckdose und Gerätestecker müssen Sie einen qualifizierten Elektriker bitten die Steckdose durch eine geeigneten Typ zu ersetzen Stecker und Buchse müssen zu den im Installationsland geltenden aktuellen Normen konform sein Zwischen Gerät und Stromquelle lässt sich auch ein allpoliger Schutzschalter zwischenschalten der für die maximale Anschlussleistung ausgelegt ist und aktuelle gesetz...

Page 32: ...u beachten die mit den Kochfeldern mitgeliefert sind 1 1 KONFORMITÄTSERKLÄRUNG Dieses Gerät entspricht der EU Vorschrift 89 109 für die Bereiche die mit Lebensmitteln in Berührung kommen Mit derAnbringung des Zeichens am Gerät zeigen wir an dass wir sämtliche für dieses Produkt geltenden und notwendigen europäischen Sicherheits Gesundheits und Umweltstandards einhalten und hierfür haftbar sind Dam...

Page 33: ... im Vergleich zu herkömmlichen Backofenlampen ist außerdem leicht zu reinigen und vor allem sehr sparsam im Energieverbrauch optimale Übersicht auf allen Backofenebenen zuverlässige Funktion und lange Lebensdauer hohe Helligkeit bei sehr niedriger Energieverbrauch bis zu 95 weniger alsherkömmliche Backofenbeleuchtung leicht zu reinigen Das Gerät ist ausgestattet mit weißem LED Licht der Klasse 1M ...

Page 34: ...htig dass elektrische und elektronische Altgeräte spezifischer Handhabung unterliegen damit alle Schadstoffe angemessen entfernt und entsorgt und alle Materialien wiederverwertet und recycelt werden Verbraucher spielen eine wichtige Rolle bei der Gewährleistung dass elektrische und elektronische Altgeräte nicht zu Umweltproblemen werden es ist wichtig einige grundlegende Regeln zu befolgen Elektri...

Page 35: ...tion O oder stellen Sie die programmierte Zeit auf 0 00 Knöpfe SELECT und Drücken Sie einen Knopf um das Signal zu beenden Drücken Sie den mittleren Knopf um zur Uhr Funktion zu gelangen BACKZEITENDE Drücken Sie den mittleren Knopf dreimal Die Knöpfe drücken um den Zeitpunkt zu wählen wenn Sie möchten dass der Ofen sich abschaltet Knöpfe loslassen Wählen Sie die Backfunktion mit dem entsprechenden...

Page 36: ...en auf den Geschmack erzielt Dies ist besonders zum Garen von Fleisch Braten von Gemüse und Omeletts geeignet Der pulsierende Luftkreislauf hält die Feuchtigkeit im Inneren des Ofens und den Feuchtigkeitsgehalt der Lebensmittel erhält die Nährwerte und erzielt einen gleichmäßigen raschen Garvorgang Probieren Sie alle Ihre Rezepte aus reduzieren Sie die Menge an Zutaten die Sie gewöhnlich nutzen un...

Page 37: ...7 Important 1 8 Equipement Du Four Equipement Different Selon Le Type De Four 2 1 Grilles Du Four Nouveau Système D arrêt 2 2 La Cuısson Au Gril 2 3 Selon Modèle Le Pack U cook 2 4 Selon Modèle U see 2 5 Four Autonettoyant Par Catalyse 2 6 Fonction Aquactiva 2 7 Conseils De Nettoyage Et D entretien 2 8 Assistance Technique 3 1 Sonore Utilisation Du Minuteur 3 2 Utilisation Du Mınuteur Coupe circui...

Page 38: ...et la prise d alimentation Le conducteur jaune et vert de mise à la terre ne doit pas être bloqué par le disjoncteur La prise d alimentation ou le disjoncteur multipolaire utilisé pour le branchement doit rester à tout moment accessible lors de l installation de l appareil Le débranchement doit se faire en accédant à la prise d alimentation ou en prévoyant un interrupteur sur le circuit électrique...

Page 39: ...troisième contact correspondant à la prise de terre Montez sur le fil une prise normaliséé capable de supporter la charge indiquée sur la plaquette Le fil conducteur de masse à la terre est identifié par les couleurs jaune et verte Veiller à ce que votre installation soit capable de supporter toute la puissance absorbée par le four Si votre installation électrique n est pas conforme faites la modi...

Page 40: ... programme et attendre que le four refroidisse 6 Une fois que le four est refroidi passer un linge propre pour éliminer les résidus Attention Ne pas toucher les parois tant qu elles n ont pas refroidies risque de brûlures N utiliser que de l eau potable ou distillée 300 ml FR 40 pores de l émail Pour détruire un surplus de graisse mettez en fonctionnement votre four à vide sur la position maximale...

Page 41: ...gler la dureé Relâcher les touches Pour arrêter le signal appuyer sur l une des touches au choix Appuyer sur la touche centrale pour retourner à la fonction horloge SECURITE ENFANT Vous activez la sécurité enfants en pressant la touche pendant au moins 5 secondes l écran affiche alternativement STOP et le temps programmé A partir de cet instant toutes les fonctions sont bloquées Vousdésactivezlasé...

Page 42: ...e de l air d air maintient l humidité à l intérieur du four et conserve les valeurs nutritionnelles des aliments en assurant un processus de cuisson rapide et uniforme Cette fonction est particulièrement adaptée pour la cuisson des viandes et des légumes grillés Essayer COOK LIGHT sur toutes vos recettes et laissez vous tenter par la légèreté de cette nouvelle fonction FR 42 Sole Utilisation de la...

Page 43: ...rgia 1 7 Equipamento Do Forno de Acordo Com Modelo 2 1 Sistema De Segurança Das Prateleiras 2 2 Grelhar 2 3 Os Models u cook 2 4 De Acordo Com O Modelo U see 2 5 Forno Auto limpante Com Revestimento Catalitico 2 6 Função de limpeza fácil AQUACTIVA 2 7 Limpeza E Manutenção 2 8 Assistêncıa Técnica 2 9 Condições De Garantia 3 1 Utilização Do Conta Mınutos 3 2 Utilização Do Programador De Fim De Cozed...

Page 44: ...s Use exclusivamente a sonda térmica recomendada para este forno Nunca utilize um sistema de limpeza a vapor para limpar este aparelho Ligue uma ficha com contacto de terra ao cabo de alimentação que suporte a tensão corrente e carga indicadas na etiqueta A tomada deve ser adequada para a carga indicada na etiqueta e deve ter um contacto de terra ligado e operacional O condutor de terra é de cor a...

Page 45: ... não poderá assegurar a segurança do forno Nunca forre as paredes do forno com papel de alumínio ou com o material descartável de protecção como o que se encontra à venda no mercado O papel de alumínio bem como qualquer outro tipo de protecção quando colocado em contacto directo com o esmalte quente corre o risco de se derreter e de deteriorar o esmalte do interior do forno 1 3 INSTALAÇÃO Compete ...

Page 46: ...sa que decompõe a gordura por meio de catálise e a transforma em gás No entanto um excesso de salpicos de gordura poderá entupir os poros e por isso impedir a auto limpeza Para repor a capacidade auto limpante basta ligar o forno vazio à temperatura máxima durante cerca de 10 a 20 minutos Nunca utilize produtos abrasivos esfregões de metal objectos afiados panos rugosos ou produtos químicos ou det...

Page 47: ...enos possível porque isso faz dispersar o calor Para uma economia significativa de energia desligue o forno entre 5 a 10 minutos antes do tempo de cozedura previsto para a receita e aproveite o calor residual que o forno continua a gerar Mantenha as borrachas de vedação limpas e funcionais para evitar qualquer dispersão de calor para fora da cavidade do forno Se tem um contrato eléctrico com tarif...

Page 48: ...e programar o tempo de cozedura desejado Para verificar quanto tempo falta pressione o botão SELECT 2 vezes Para mudar a programação efectuada pressione SELECT e as teclas e Pressione qualquer botão para parar o sinal Pressione o botão central para voltar para a função relógio Pressione o botão central 3 vezes Pressione as teclas ou para definer a hora a que pretende que o forno se desligue Deixe ...

Page 49: ...método é particularmente adequado para cozinhar carne legumes e omeletes ou tortilhas tostadas O ciclo de ar pulsado mantém a humidade no interior do forno e o teor de humidade dos alimentos preservando os valores nutricionais e garantindo um processo de confecção rápido e uniforme Experimente nas suas receitas e reduza a quantidade de gordura e condimentos que costuma utilizar experimente a levez...

Page 50: ...ystem blokady 2 2 Pieczenie Z Grillem 2 3 Modele U COOK 2 4 Zaleznie Od Modelu U SEE 2 5 Katalityczny Piekarnik Samooczyszczający Się 2 6 Funkcja Aquactiva 2 7 Czyszczenie I Konserwacja 2 8 Serwis Techniczny Użteczne Wskazówki 53 3 1 Korzystanie Z Minutnika 3 2 Korzystanie Z Wyłącznika Końca Pieczenia 3 3 Ustawianie Zegara 3 4 Zegar Dotykowy Regulator Czasowy 55 Instrukcje Użytkowania 56 PL 50 ...

Page 51: ...anego elektryka o wymianę gniazdka na inne odpowiedniego typu Wtyczka oraz gniazdko powinny być zgodne z obowiązującymi w danym kraju przepisami w zakresie instalacji elektrycznej Podłączenie do źródła zasilania można wykonać również poprzez umieszczenie pomiędzy urządzeniem a źródłem zasilania wielobiegunowego wyłącznika który wytrzyma maksymalne podłączone obciążenie i który będzie zgodny z obow...

Page 52: ...ści emaliowanych ścianek wnętrza piekarnika 1 1 1 1 2 1 3 1 4 1 5 Niniejsze urządzenie w części przeznaczonej do kontaktu ze środkami spożywczymi spełnia wymagania przepisów ustanowionych w Dyrektywie 89 109 EWG Poprzez umieszczenie oznaczenia na tym produkcie poświadczamy na własną odpowiedzialność przestrzeganie wszystkich wymogów europejskich dotyczących bezpieczeństwa ochrony zdrowia i środowi...

Page 53: ... przeciwnym do ruchu wskazówek zegara 2 Zdjąć drabinki pociągając w kierunku do siebie 3 Umyć drabinki w zmywarce lub ręcznie wilgotną gąbką Po umyciu wysuszyć 4 Po umyciu i wysuszeniu zamontować drabinki odwrotnie do sposobu montażu 5 Przykręcić nakrętki A PL 53 Boczne drutu siatki jeśli uwzględnione ...

Page 54: ...ważną rolę w zapobieganiu szkodliwemu oddziaływaniu zużytego sprzętu elektrycznego i elektronicznego na środowisko ważne aby przestrzegać kilku podstawowych zasad Zużyty sprzęt elektryczny i elektroniczny nie może być traktowany jako odpad komunalny Zużyty sprzęt elektryczny i elektroniczny przekazuje się do właściwych punktów zbiórki prowadzonych przez gminy lub koncesjonowane firmy W wielu kraja...

Page 55: ...oru funkcji na pozycję 0 lub ustawić czas pieczenia na 0 00 przyciskami SELECT Pozwala ustawić czas trwania pieczenia Aby pokazać czas pozostały do końca pieczenia należy wcisnąć przycisk SELECT 2 Razy Aby zmienić czas pozostały do końca pieczenia należy wcisnąć przycisk SELECET Aby wyłączyć sygnał alarm wcisnąć jakikolwiek przycisk Aby przywrócić działanie zegara wcisnąc przycisk śrdkowy centraln...

Page 56: ...o przygotowania mięs warzyw pieczonych i omletów Pulsacyjny przepływ powietrza utrzymuje stały poziom wilgoci w piekarniku a także wewnątrz potraw które zachowują dzięki temu wartości odżywcze w trakcie procesu szybkiego gotowania Wypróbuj wszystkie nasze przepisy używając mniej sosu do sałaty niż masz w zwyczaju i ciesz się lekkością potraw przygotowywanych przy pomocy nowej funkcji PL 56 DÓŁ Uży...

Page 57: ... 1 Bezpečnostní Systém Roštu 2 2 Grilování 2 3 U cook Modely 2 4 Podle Modelu Led Vision 2 5 Samočištění Trouby Pomocí Katalytické Vložky 2 6 Funkce Aquactiva 2 7 ištění A Údržba Č 2 8 Servisní Středisko Užitečné Tipy 60 3 1 Použití Minutky 3 2 Použití asovače Ukončení Vaření Č 3 3 Nastavení Správného Času 3 4 Využití asu Dotykové Ovládání Č Programmer Programování Č ěř č asom i 61 Pokyny K Použit...

Page 58: ...horké Udržujte děti mimo dosah spotřebiče Nepoužívejte drsné čističe ani ostré kovové předměty k čištění skla dvířek trouby neboť můžete poškrábat povrch Vypněte troubu před sejmutím ochrany a po očištění nasaďte ochranu v souladu s pokyny Používejte pouze tepelní sondu doporučenou pro tuto troubu K čištění nepoužívejte vysokotlaké parní čističe Připojte zástrčku k napájecímu kabelu který je schop...

Page 59: ...e nějaké pochybnosti nepoužívejte ji Kontaktujte kvalifikovaného servisního technika Uložte obalové materiály jako jsou plastové sáčky a polystyrén mimo dosah dětí neboť představují možné riziko Výrobce neodpovídá za nedodržení pokynů v návodu k použití Poznámka Právo na změnu funkcí vlastností a příslušenství trouby se může měnit v závislosti od modelu Části tohoto spotřebiče které mohou být v ko...

Page 60: ...átky nebo chemické produkty které můžou trvale poškodit katalytický povrch Na pečení tukový ch jídel je vhodné použít hluboké plechy a vložit nádobku pod gril pro zachycení přebytečného tuku Pokud jsou stěny trouby pokryté hrubou vrstvou tuku která znemožňuje práci katalytického čištění odstraňte nadbytečný tuk jemný m hadříkem nebo houbou namočenou v horké vodě Povrch musí bý t porézní pro efekti...

Page 61: ...aných míst je uveden na našich webových stránkách www candy hoover cz v sekci servis Dříve než budete kontaktovat servis poznačte si sériové číslo spotřebiče 3 ASOM İ Č ĚŘ Č 00 00 select UPOZORNĚNÍ Le four ne peut fonctionner qu après réglage de l heure Funkce Jak aktivovat MINUTKA DOBA PEČENÍ KONEC PEČENÍ Jak vypnout Co to dělá Výhody Stiskněte centrální tlačítko 1 krát Stisknutím tlačítka nastav...

Page 62: ...baby a gratinované pokrmy Bílé maso umístěte do bezpečné vzdálenosti od grilu doba grilování je delší ale maso bude chutnější Červené maso a rybí filety postavte na rošt a pod rošt vložte odkapávací mísu SUPER GRIL Trouba má úrovně grilování Gril 2200 W Gril SUPER 3000 W Gril s ventilátorem a turbo gril používejte se zavřený mi dví řky V provozu je horní topné těleso s ventilátorem Předhřev trouby...

Page 63: ...a Pečice odvisno Od Modela 2 1 Nekaj Korıstnıh Nasvetov 2 2 Žar 2 3 Modelı U cook 2 4 Odvisno Od Modela U see 2 5 Čiščenje In Vzdrževanje Pečice 2 6 Funkcija Aquactiva 2 7 Čiščenje In Vzdrževanje Pečice 2 8 Servisiranje Korıstnı Nasvetı 66 3 1 Uporaba Števca Mınut kuhınjske Ure 3 2 Nastavljanje Trajanja Pečenja 3 3 Nastavljanje Točnega Časa 3 4 Uporaba Programske Ure Nastavljanje 67 Funkcije 68 Vs...

Page 64: ...rati z aparatom Otroci lahko sodelujejo pri čiščenju in vzdrževalnih delih le pod nadzorom odraslih POZOR Dostopni deli se med uporabo zelo segrejejo Pazite da se majhni otroci ne približajo Ne uporabljajte grobih ali jedkih čistil ali ostrih kovinskih strgal za čiščenje vrat pečice saj bi lahko opraskali površino zaradi takih poškodb pa bi lahko steklo počilo Pred odstranjevanjem zaščite morate p...

Page 65: ...elo primerna za pripravljanje jedi na žaru Pod njo podstavite pekač za lovljenje maščobe Posebna oblika rešetko zagotavlja da ostanejo v vodoravnem položaju tudi če so delno izvlečene iz pečice tako ni nevarnosti da bi pekač zdrsnil z rešetke Globji pekač je namenjen lovljenju maščobe ki med peko na žaru ali ražnju odvisno od modela kaplja iz mesa Ne uporabljajte ga za peko pečenk saj bi se maščob...

Page 66: ...vostno osvetlitev celotne pečice brez senčnih delov Prednosti sistema so razen odlične osvetlitve pečice dolga življenjska doba lažje vzdrževanje in predvsem prihranek energije odlična vidljivost dolga življenjska doba zelo majhna poraba energije 95 v primerjavi z običajnim načinom osvetlitve Aparati z belimi LED razreda 1M skladno z IEC 60825 1 1993 A1 1997 A2 2001 enakovredno EN 60825 1 1994 A1 ...

Page 67: ...tiskom na srednjo tipko prikličete nazaj funkcijo ure 3 krat pritisnite na srednjo tipko S pomočjo tipk nastavite čas ko želite da se pečica izklopi Sprostite pritisk na vse tipke Izberite funkcjio pečenja s pomočjo stikala za izbiranje funkcij pečice Ob nastavljenem času se pečica izklopi Če želite predčasno prekiniti pečenje ali obrnite stikalo za izbiranje funkcij na 0 Omogoča vam da določite č...

Page 68: ...lec segreva zrak ki s pomočjo ventilatorja kroži okoli živila Za rdeče meso je potrebno predhodno ogrevanje pečice Ta funkcija je primerna za peko debelejših kosov mesa a pazite da živilo ni preblizu grelca Ta način je primeren za tudi za peko večje količine perutnine klobas rdečega mesa Postavite živilo na sredino rešetke v srednji višini ter podstavite pekač za lovljenje maščobe Na polovici pred...

Page 69: ...модела 2 1 Система за безопасност на рафтовете Грил 2 2 Модели 2 3 U Cook 2 4 U See 2 5 Самопочистваща се фурна с каталитични панели функция 2 6 AQUACTIVA Почистване и поддръжка 2 7 2 8 Сервизен център Полезни съвети 72 3 1 Използване на таймера 3 2 Използване на таймера за край на готвенето 3 3 Използване на електронния програматор 3 4 Настройка на точното време Таймер 73 Инструкции за работа 74 ...

Page 70: ...би с метални частици или стъргалки Те могат да надраскат повърхността което да доведе до напукване или дори счупване на стъклото Преди да почистите фурната трябва да махнете решетката при задължително изключен уред След почистването поставете отново решетката по начина описан в инструкциите Използвайте само такъв температурен датчик какъвто е препоръчан от производителя Не използвайте парочистачка...

Page 71: ...ставете фурната в пространството в кухнята то може да бъде монтирано под един работен плот или в един шкаф Фиксирайте фурната на мястото й като се използват четирите фиксиращи отвора в рамката фиг на последната страница За да намерите отворите за закрепване отворете вратата на фурната и погледнете вътре За да се позволи подходяща вентилация измерванията и разстоянията посочени в диаграмата на посл...

Page 72: ...о и да се поддържа и най вече пести енергия По добро осветяване Дълъг живот на осветление 5 Много ниска консумация на енергия 95 по ниска от консумация Уреда с бяла светлина LED на 1М Class според IEC 6082 1 1993 A1 1997 A2 2001 EN 60825 1 еквивалентен на 1994 A1 2002 A2 2001 максимално светлината излъчвана мощност λ459nm 150uW Не се наблюдава с оптични уреди Има осветителна система която заменя т...

Page 73: ...ни Аларма в края на времето По време на работа се показва ост време Позволява да използвате фурната като алармен часовник при включена и изключена фурна Натиснете централния бутон 2 пъти Натиснете бутони или за да изберете продължителност освободете всички бутони Изберете функция със селектора Натиснете някой бутон за да спрете сигнала Натиснете централния бутон за да се върнете до часовника 00 00...

Page 74: ...т Candy за оптимизиране на резултатите от готвенето VARIO FAN системата се активира сама и автоматично променя скоростта на вентилатора когато изберете определена функция Функциите на вентилатора са в ограденото поле на контролния панел Функцията Деликатно готвене ви позволява да готвите по здравословен начин като намалите количеството на необходимата мазнина Благодарение на използването на грил и...

Page 75: ...ba chladicí ventilátor vytvořte otvor 460 mm x 15 mm Če pečica nima hladilnega ventilatorja napravite ustrezno odprtino 460 mm x 15 mm BG DE NL PT Si le four n a pas de ventilateur de refroidissement créer une ouverture 460 mm x 15 mm FR Si le fond du meuble est doté d un panneau de fermeture prévoyez un orifice pour le passage du câble d alimentation GB ES If the furniture is coverage with a bott...

Page 76: ...odifier les produits en cas de nécessité même dans l intérêt de l utilisation sans causer de préjudices aux caractéristiques de fonctionnement de sécurité des appareils FR O fabricante declina toda e qualquer responsabilidade por gralhas erros tipográficos ou de transcrição tradução contidos neste manual Reservamo nos o direito de Introduzir alterações nos nossos produtos conforme necessário tendo...

Reviews: