background image

SETTING UP + INSTALLATION

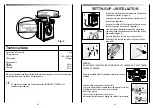
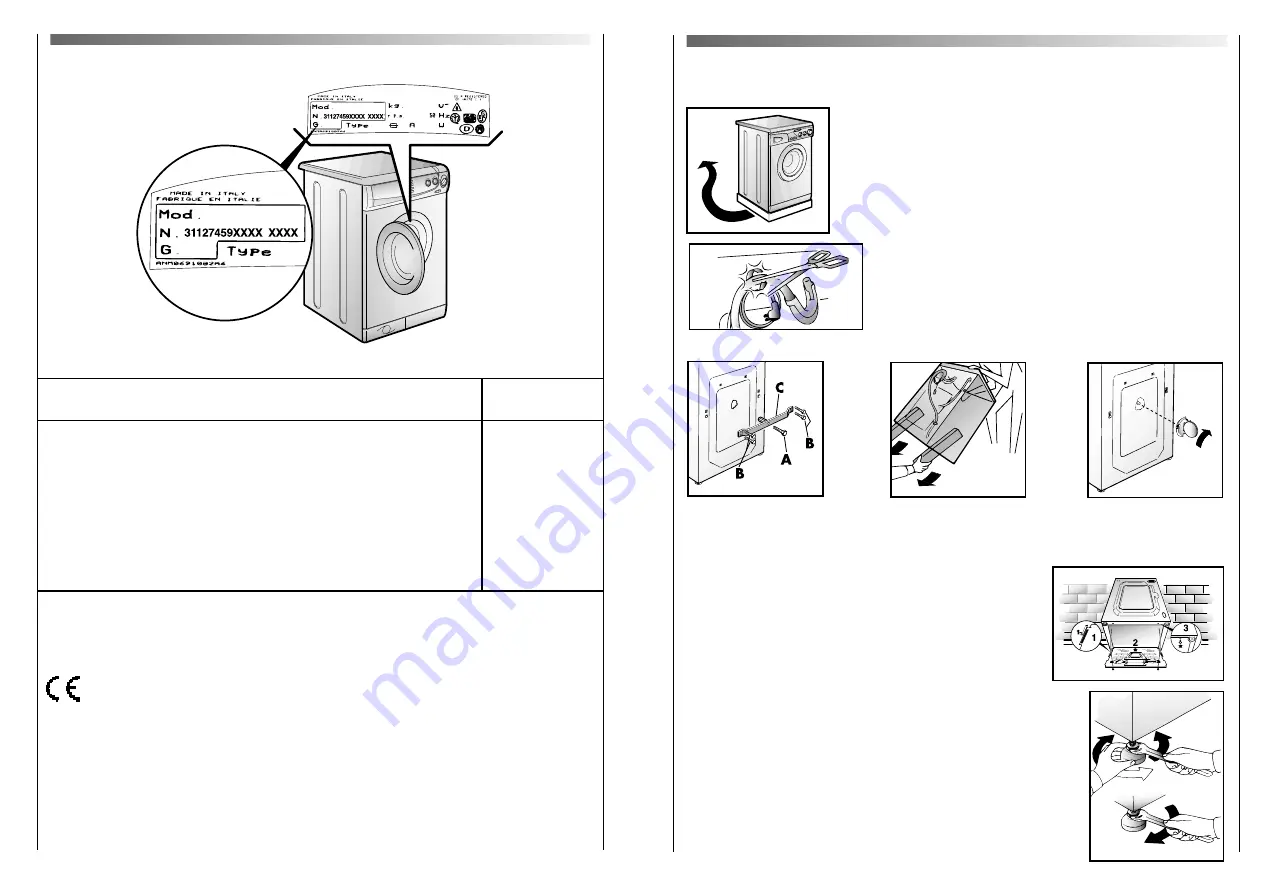
Remove the polystyrene base and place the machine near
its permanent position  (diagram 1).

Carefully cut through the hose retaining clip at the rear of
the appliance (diagram 2).

Unscrew the central bolt (A); unscrew the 4 lateral screws
(B) and remove the cross piece (C) (diagram 3).

Lean the machine forward and remove the plastic bags
containing the two polystyrene blocks at the sides, pulling
downwards (diagram 4).

Press the plug (to be found in the envelope with the
instructions) into the hole and rotate to lock into position
(diagram 5).

WARNING:
DO NOT LEAVE THE PACKAGING WITHIN REACH OF CHILDREN AS IT IS A POTENTIAL
SOURCE OF DANGER.

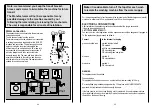
Apply the insulation sheet of corrugated material to the base
as shown.

Level the machine by means of the front feet.
a) Turn the nut clockwise to release the screw adjuster on the foot.
b) Rotate the foot to raise or lower it until it stands
firmly on the ground.
c) Lock the foot in position by turning the nut 
anti-clockwise until it comes up against the bottom of the machine.

A

B

C

1

2

3

4

5

EC Appliance complies with European Directive 89/336/EEC, 73/23/EEC and 
subsequent amendments.

Technical data

Max. load of dry laundry

Water pressure 

Spin speed

Measurements

Width

Depth

Height

NB: For specifications regarding electrical data, see the data panel on the front of the washing
machine (porthole area) - as shown in diagram above.

4,5 kg

0,05 ÷ 0,8 MPa

1200 rpm

60 cm
52 cm
85 cm

Fig. 2

22

23

Summary of Contents for AQ 110

Page 1: ...Washing machine Instructions for use AQUAVIVA 1200 AQ 120 ...

Page 2: ...y and all other information enclosed with the washing machine Keep all documentation in a safe place for future reference or for any future owners Note this machine is solely for domestic use Notes on disposal All packaging material used is environmentally friendly and recyclable Please help dispose of the packaging via environmentally friendly means Your supplier or local council will be able to ...

Page 3: ...ns rain direct sun etc L When moving the appliance never lift it by the controls or by the detergent drawer When in transit never rest the door against the trolley or transport the appliance without the polystyrene base 4 5 M N B If the appliance is installed on a carpeted floor ensure that the ventilation holes on the base of the appliance are not obstructed N If the appliance is not running prop...

Page 4: ... 15 are made by not selecting the prewash option for normal soiled laundry Which wash temperature should you choose Using stain removers before machine washing reduces the need to wash at temperatures over 60 C Energy savings of up to 50 can be made by using a 60 C wash temperature rather than 90 C 6 7 Description of controls On off button Press to start the appliance At the end of the cycle press...

Page 5: ...button means the cycle stops at the final rinse stage leaving the drum filled with water The garments thus stay immersed in the water preventing them from bunching up and forming creases that are difficult to remove When the button is reset the cycle ends with the water being pumped out followed by the spin stage If only pumping out is required without spin to minimise creasing you must switch off...

Page 6: ... reduction in the amount of water used and electricity needed to heat it to the minimum required without in any way compromising the washing and rinsing performance In fact the amount of water and electricity used will always be appropriate for the amount of washing The washing machine therefore ensures you achieve excellent washing results whilst respecting the environment and saving you money 11...

Page 7: ...only items which are machine washable with water and detergent and not dry clean items If you need to wash rugs bedspreads or other heavy items it is best not to spin them Sort the laundry according to fabric type degree of soiling and wash temperature Always follow the wash care advice on the garment label for the most suitable care and treatment of the laundry Laundry for hot wash Coloured easy ...

Page 8: ... can be washed in cold water simply by moving the dial to the tap symbol FAST WASH Programme The FAST WASH programme allows a complete washing cycle to be carried out in approximately 30 minutes with up to a maximum load of 2 kg and a the temperature of up to 50 C The washing temperature can be reduced by using the control knob I When selecting the Fast Wash programme please note that we recommend...

Page 9: ...ts washing aids and amounts to use Choice of detergent General purpose detergents Powder detergents for a thorough wash with bleaching agent particularly suitable for use in hot wash programmes 60 C and over for heavily soiled and stained laundry Liquid detergents particularly suitable for grease stains such as greasy skin marks cosmetics and oil These detergents are not suitable for washing stain...

Page 10: ...t firmly but without forcing them B Clean everything in the compartment under running water C Put everything back in its proper place Cleaning the filter The washing machine is fitted with a special filter for handling large deposits which could block the discharge hose coins buttons etc and which can therefore be easily retrieved We recommend that the filter be cleaned at least once a month The c...

Page 11: ...us page you believe the appliance is not working correctly please call our After Sales Service dept on telephone number 08705 990011 Investigating malfunctions What might be the cause of Defects you can remedy yourself Plug not in socket Not switched on Power failure Fuse blown Door open See cause 1 Tap turned off Programme selector not correctly positioned Kink in discharge hose Foreign bodies in...

Page 12: ...T IS A POTENTIAL SOURCE OF DANGER Apply the insulation sheet of corrugated material to the base as shown Level the machine by means of the front feet a Turn the nut clockwise to release the screw adjuster on the foot b Rotate the foot to raise or lower it until it stands firmly on the ground c Lock the foot in position by turning the nut anti clockwise until it comes up against the bottom of the m...

Page 13: ... the fuse cover is lost do not use the plug until it is replaced A correct replacement fuse cover obtainable from your local retailer must be the same colour as shown or named on the insert on the base of the plug Note we recommend you keep the transit bracket braces and screws to immobilise the machine for future transit The Manufacturers will not be responsible for any possible damage to the mac...

Page 14: ... NOTES 26 27 ...

Page 15: ... 28 29 ...

Page 16: ...r declines all responsibility in the event of any printing mistakes in this booklet The manufacturer also reserves the right to make appropriate modifications to its products without changing the essential characteristics ...

Page 17: ...02 03 41005034 Printed in Italy Imprimé en Italie EN ...

Reviews: