CT-MCL01 l User’s Manual
15
1.3 Central Processing Unit (CPU)
The motherboard comes with a surface mount LGA1151 socket designed for the Intel® Core™ i7/ i5/ i3
processor in the 1151-land package.
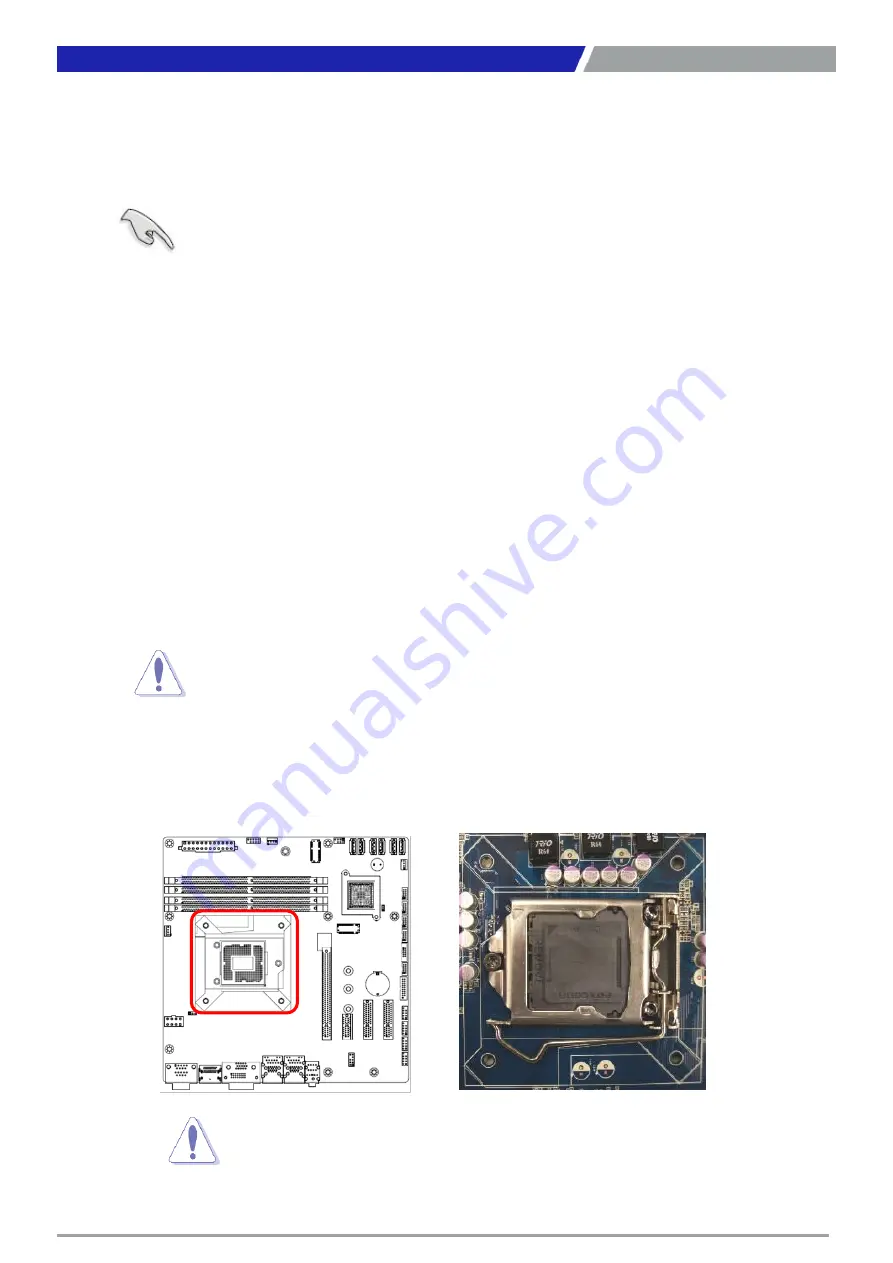
1.3.1 Installing the CPU
1. Locate the CPU socket on the motherboard.
Chapter 1: Product Introductions
Your boxed Intel® Core™ i7/ i5/ i3 LGA1155 processor package should
come with installation instructions for the CPU, fan and heatsink assembly.
If the instructions in this section do not match the CPU documentation,
follow the latter.
Upon purchase of the motherboard, make sure that the PnP cap is on the
socket and the socket pins are not bent. Contact your retailer immediately
if the PnP cap is missing, or if you see any damage to the PnP cap/socket
pins/motherboard components. ADVANSUS will shoulder the cost of repair
only if the damage is shipment/transit-related.
Keep the cap after installing the motherboard. ADVANSUS will process
Return Merchandise Authorization (RMA) requests only if the motherboard
comes with the cap on the LGA1151 socket.
The product warranty does not cover damage to the socket pins resulting
from incorrect CPU installation/removal, or misplacement/loss/incorrect
removal of the PnP cap.
Install the CPU fan and heatsink assembly before you install motherboard
to the chassis
.
If you purchased a separate CPU heatsink and fan assembly, make sure that you
have properly applied Thermal Interface Material to the CPU heatsink or CPU
before you install the heatsink and fan assembly.
Before installing the CPU, make sure that the socket box is facing towards
you and the load lever is on your left
.
Summary of Contents for CT-MCL01 Series
Page 1: ...CT MCL01 Series Micro ATX Industrial Motherboard...
Page 8: ...CT MCL01 l User s Manual 8 Block Diagram...
Page 9: ...Chapter 1 Product Introductions...
Page 12: ...CT MCL01 l User s Manual 12 1 2 3 Motherboards Layout Chapter 1 Product Introductions...
Page 45: ...CT MCL01 l User s Manual 45 Chapter 2 BIOS Setup...
Page 47: ...CT MCL01 l User s Manual 47 2 11 5 NCT6106D Super IO Configuration Chapter 2 BIOS Setup...
Page 48: ...CT MCL01 l User s Manual 48 Chapter 2 BIOS Setup...
Page 49: ...CT MCL01 l User s Manual 49 Chapter 2 BIOS Setup...
Page 50: ...CT MCL01 l User s Manual 50 Chapter 2 BIOS Setup...
Page 51: ...CT MCL01 l User s Manual 51 2 11 6 NCT6106D HW Monitor Chapter 2 BIOS Setup...
Page 52: ...CT MCL01 l User s Manual 52 Chapter 2 BIOS Setup 2 11 7 Trusted Computing...
Page 56: ...CT MCL01 l User s Manual 56 2 11 14 Network Stack Configuration Chapter 2 BIOS Setup...
Page 58: ...CT MCL01 l User s Manual 58 Chapter 2 BIOS Setup...
Page 59: ...CT MCL01 l User s Manual 59 Chapter 2 BIOS Setup 2 12 2 PCH IO Configuration...
Page 60: ...CT MCL01 l User s Manual 60 Chapter 2 BIOS Setup...
Page 61: ...CT MCL01 l User s Manual 61 Chapter 2 BIOS Setup...
Page 62: ...CT MCL01 l User s Manual 62 Chapter 2 BIOS Setup...
Page 63: ...CT MCL01 l User s Manual 63 Chapter 2 BIOS Setup...
Page 64: ...CT MCL01 l User s Manual 64 Chapter 2 BIOS Setup...
Page 65: ...CT MCL01 l User s Manual 65 2 13 Security 2 13 1 Secure Boot Chapter 2 BIOS Setup...
Page 66: ...CT MCL01 l User s Manual 66 Chapter 2 BIOS Setup 2 14 Boot...
Page 67: ...CT MCL01 l User s Manual 67 2 15 Save Exit Chapter 2 BIOS Setup...
Page 72: ...Copyright 2016 C T Solution Inc All Rights Reserved www candtsolution com...


