15
7.
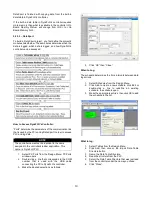
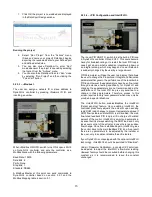
Under “Data Table Structure” select the name you
chose.
8.
Under “Table Name” you should see “Table 1”,
select “Table 1”.
9.
Select “Read the entire table”
10.
Select “MB to set” to “52”.
11.
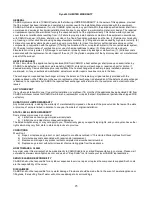
Click “Ok”. The table should now be listed in
“Tables”.
12.
Click “Close” to close the “Tables” window.
Finalizing the project
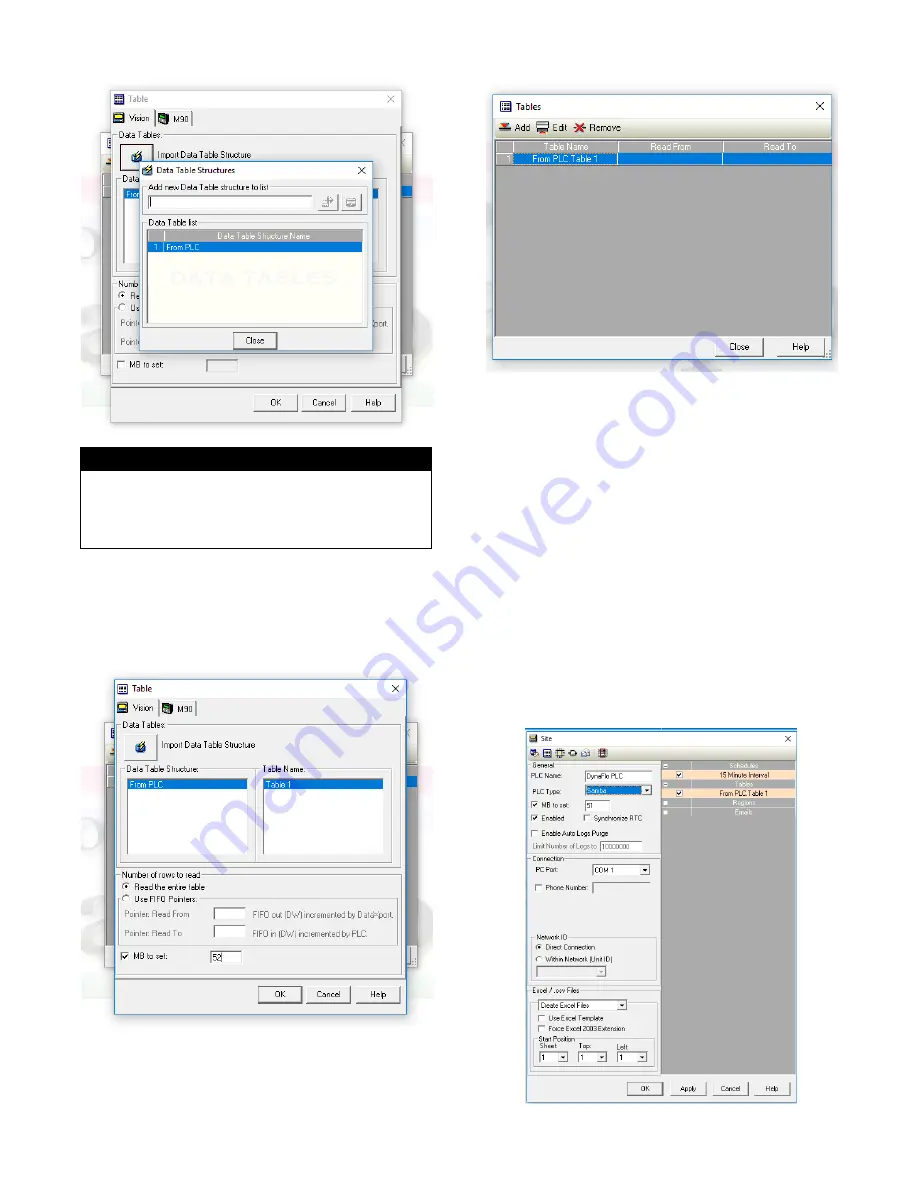
1. Once all the modules have been set up, select Add
Site from the Design Menu; the PLC window
opens.
2. In the left-
hand pane, for “PLC Name” enter:
DynaFLO PLC
3. Select the module parameters that you have
created displayed on the right-hand side of the
PLC window. Select desired schedules that you
have previously created.
4.
Select the “PLC Type” as: Samba
5.
Select “MB to Set” 51
6. Select the PC Port on your computer that is using
the USB cable connected to DynaFLO
’s controller.
7.
Select “Enabled” to include this project/site when
DataXport project is run.
8.
Select “Create Excel Files” so that DataXport
creates Excel files whenever a data log is created.
Note that DataXport creates a separate Excel file
for each data log.
NOTE
The controller name must be identical to the name
assigned in the controller’s ladder application as
describer in “How to access DynaFLO’s Controller”.
Otherwise the table will not be read from the controller in
this step.


