background image

8

E - UTILISATION

OPERATING PRECAUTIONS:

DO NOT install the appliance next to a wall, curtains or a 

sofa or armchair.

DO NOT cover the appliance with clothes or other objects.

DO NOT move the appliance when in operation.

The appliance must ALWAYS be directed to the centre of 

the room.

The appliance must be put in a dry place.

This appliance protecting grid is designed to prevent 

fire hazards or burns and no part shall be permanently 

removed.

THE GRID DOES NOT TOTALLY PROTECT YOUNG CHILDREN 

OR THE DISABLED.

E - 1 - Igniting the appliance:

Note: 

Gas opening and closing controls are located on gas 

bottle and/or on pressure reducing valve.

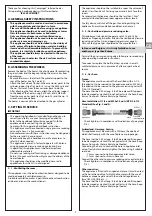
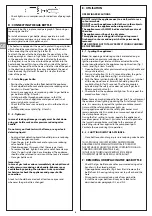
Ignition spark and gas inlet control are actuated from the 

control panel located in the appliance top right section. (fig. 1 

item 1) and (fig. 5 items A and B)

1.  Open bottle cock and/or pressure reducing valve handle and 

carry out a leak test.

2.  Press control button (A) for 10 seconds to allow the gas to 

reach the safety pilot burner (fig. 1 and 6 item 2).

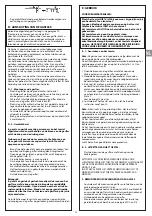
3.  Push the flame ignition button (B) next to the ( 

 ) symbol 

all the way down several times while holding down the 

control button (A) for 10 seconds. The thermocouple is 

activated and the safety valve does not cut off gas feed.

Release control button (A)

4.  Check whether the appliance did light up. If not, repeat the 

procedure from step 2.

Note: 

Some air may be trapped in the gas line. This will prevent 

the appliance from lighting up during the first attempt. In this 

case, it is necessary to repeat the ignition procedure several 

times until the safety pilot burner lights up.

During appliance operation, the safety pilot burner must 

remain permanently lit in order to ensure correct operation of 

the atmosphere analyser.

During the first setting to service, operate the appliance at 

maximum power for at least 15 minutes in order to eliminate 

the typical new appliance smell due to the presence of 

protecting substances applied to the component parts.

Ventilate the room during this operation.

E - 2 - SHUTTING DOWN THE APPLIANCE:

 - Close bottle cock and/or gas pressure reducing valve handle.

THIS APPLIANCE IS EQUIPPED WITH AN ATMOSPHERE 

ANALYSER DEVICE WHICH AUTOMATICALLY TURNS OFF 

THE APPLIANCE SHOULD THE ROOM CONTAIN TOO HIGH A 

CARBON DIOXIDE PERCENTAGE (Co2). 

IN THIS CASE, THOROUGHLY VENTILATE THE ROOM, 

OTHERWISE THE APPLIANCE WILL NOT RELIGHT.

F - REMOVING OR REPLACING THE GAS BOTTLE 

 - Check that gas bottle cock and/or pressure reducing valve 

handle is in the closed position.

 - Open appliance rear plate (fig. 4 item B) and remove the 

bottle from its housing, taking care not to pull or bend the 

hose.

 - Disconnect pressure reducing valve from gas bottle.

 - Install the new gas bottle and carry out a leak test as 

described under paragraphs D-1 and D-2. 

 - Check tightness in compliance with indications of paragraph 

D-2).

D - CONNECTING THE GAS BOTTLE

If an empty bottle is in place, read paragraph F- “Removing or 

replacing gas bottle”.

To install or remove a gas bottle, always operate in a well-

ventilated place and never in presence of a flame, spark or heat 

source (cigarette, electric appliance, etc.).

The heater is equipped with a panel to protect the gas cylinder, 

which should be mounted on three sides behind the heater 

after connecting the cylinder (fig.4 letter B).

To attach the panel to the heater, place the panel tabs in the 

body openings, as shown in fig.4 letter A, and insert the panel 

in the opposite direction to the one indicated by the arrow 

on the panel, in such a way as to lock the panel tabs into the 

heater body (repeat this step on the other side of the heater).

To remove the panel from the heater, slide the side of the panel 

in the direction indicated by the arrow and detach the panel 

from the body (fig.4 letter B). Repeat this step for the three 

sides of the panel.

D - 1- Installing gas bottle: 

 - Position the gas bottle on the floor behind the appliance.

 - Check whether bottle cock and/or pressure reducing valve 

handle is in “closed” position.

 - Screw in or engage pressure reducing valve to gas bottle or 

gas bottle cock (fig. 3 item B).

 - Install gas bottle through appliance rear so that the 

hose does not touch appliance metal panels and is not 

excessively bent or pinched.

 - Check that the hose runs normally and is neither bent nor 

pulled.

 - Install appliance rear plate (fig. 4 item A).

D - 2 - Tightness:

In case of leak, appliance gas supply must be shut down 

using gas bottle cock and/or pressure reducing valve 

handle. 

Do not carry out leak tests with a flame, use a gas leak 

detecting liquid. 

 - Apply gas leak detecting liquid to bottle/pressure reducing 

valve/hose/appliance unions. 

 - Open the gas inlet (bottle cock and/or pressure reducing 

valve handle) (fig. 4).

 - If bubbles appear, this means that there are gas leaks.

 - To remove the leak, tighten hose nuts and/or hose clamps 

if any. If a part is defective, have it replaced. The appliance 

should not be returned to service until the leak is removed.

 - Close gas bottle cock.

Important:

In case of gas leak or odour, immediately close bottle cock 

and/or pressure reducing valve handle. Enhance room 

ventilation by opening the windows. Ask a specialised 

technician to check the appliance and proper bottle 

connection.

A leak test should be carried out at least once a year and 

whenever the gas bottle is changed.

GB 

Summary of Contents for IR 3000 Comfort

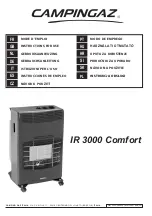
Page 1: ...A IR 3000 Comfort MODE D EMPLOI INSTRUCTIONS FOR USE GEBRUIKSAANWIJZING GEBRAUCHSANLEITUNG ISTRUZIONI PER L USO INSTRUCCIONES DE EMPLEO MODO DE EMPREGO GB NL DE IT ES PT FR INSTRUKCJA OBSŁUGI PL PRIROČNIK ZA UPORABO SI NÁVOD K POUŽITÍ CZ UPUTA ZA KORIŠTENJE HR HASZNÁLATI ÚTMUTATÓ HU NÁVOD NA POUŽITIE SK ...

Page 2: ...2 B A STAR T 3 A C B 1 2 ...

Page 3: ... 200 g t Cat I3B P G30 G31 30 mbar Kaasu ja paine Butaani30mbar G30 Propaani30mbar G31 Technische Daten Für Deuschland und Österreich Specifikationer for Danmark Wärmeleistung 2 8 kW Verbrauch 200 g h Cat I3B P G30 G31 50 mbar Gas und Druck Butan 50 mbar G30 Propan 50 mbar G31 Varmeydelse 2 8 kW Massemćngde 200 g h Cat I3B P G30 G31 30 mbar Gas og tryk Butan 30 mbar G30 Propan 30 mbar G31 Technisc...

Page 4: ...hauffage à infrarouge Campingaz Ce mode d emploi concerne le chauffage à infrarouge IR 3000 COMFORT A Consignes générales de sécurité L utilisation et l entretien de l appareil doivent être effectués conformément aux réglementations et normes en vigueur Lire cette notice avant d utiliser votre appareil L appareil ne doit pas être utilisé dans les appartements d immeubles tours dans les sous sols s...

Page 5: ...montage du nouveau réservoir de gaz et au test d étanchéité comme indiqué aux paragraphes D 1 et D 2 L étanchéité sera vérifiée en suivant les indications du paragraphe D 2 D Raccordement du réservoir de gaz Si un réservoir vide est en place lire le paragraphe F Démontage ou changement du réservoir de gaz Pour la mise en place ou le démontage d un réservoir de gaz opérer toujours dans un endroit a...

Page 6: ... périodicité indiquée dessus selon les pays En France si la date de péremption imprimée sur le tuyau flexible est atteinte il doit être remplacé par un tuyau souple conforme à la Norme XP D 36 112 Suivre les indications de montage fournies avec ces nouveaux ensembles dont la longueur doit être de 0 50 m et la manière de procéder décrite au paragraphe C 2 Si vous avez prévu de ne plus utiliser votr...

Page 7: ...iance is an infrared combustion heater designed to be used in adequately ventilated premises A suitable ventilation makes it possible to exhaust combustion residues and renew the combustion air The appliance should not be installed in a room the volume of which is less than 56 m3 for living rooms and 28 m3 for other rooms Air renewal ventilation area should not be less than 70 cm evenly distribute...

Page 8: ...bottle from its housing taking care not to pull or bend the hose Disconnect pressure reducing valve from gas bottle Install the new gas bottle and carry out a leak test as described under paragraphs D 1 and D 2 Check tightness in compliance with indications of paragraph D 2 D CONNECTING THE GAS BOTTLE If an empty bottle is in place read paragraph F Removing or replacing gas bottle To install or re...

Page 9: ...ight damage the paintwork For heavy repairs please call your vendor The appliance must be periodically checked more particularly concerning condition of the connecting hose 2 Hose between the pressure reducing valve and the appliance Periodically check hose for condition and replace it if it displays ageing signs or cracks The hose must be replaced by a new one of same length and equivalent qualit...

Page 10: ...nde geventileerde ruimte gebruikt moet worden Door een juiste ventilatie worden de verbrandingsproducten afgevoerd en wordt de voor de verbranding benodigde lucht aangevoerd NL Het toestel is niet geschikt om gebruikt te worden in een ruime met een volume van minder dan 56 m3 voor woonkamers en 28 m3 voor andere kamers Het ventilatieoppervlak voor de luchtverversing moet tenminste 70 cm bedragen r...

Page 11: ...l op gasdichtheid zoals beschreven in paragraaf D 1 en D 2 De gasdichtheid moet gecontroleerd worden volgens de aanwijzingen van paragraaf D 2 D AANSLUITING VAN DE GASFLES Indien de aangesloten gasfles leeg is zie paragraaf F Demonteren of vervangen van de gasfles Voor het installeren of demonteren van een gasfles dient u altijd te werk te gaan in een goed geventileerde ruimte en nooit in aanwezig...

Page 12: ...ingen Actie De brander gaat niet aan De brander hapert of gaat uit Instabiele blazende vlammen De veiligheidsvlam gaat niet aan Mogelijke oorzaak Actie Storing Gebrekkige gastoevoer Drukregelaar is defect Controleren of er gas in de gasfles zit Controleren of er gas in de gasfles zit Controleren of de slang goed is aangesloten Wend u tot de serviceafdeling Nieuwe gasfles Laat het toestel aanstaan ...

Page 13: ...rät ist eine Infrarotheizung für den Gebrauch in einem ausreichend belüfteten Raum Es darf nur in ausreichend belüfteten Räumen verwendet werden Durch eine einwandfreie Lüftung werden Verbrennungsrückstände abgeführt und die zur Verbrennung erforderliche Frischluft herangeführt Das Gerät darf nicht in einem Raum aufgestellt werden dessen Volumen kleiner als 56 m3 bei Wohnzimmern bzw kleiner als 28...

Page 14: ...sflasche einsetzen und anschließen danach die Dichtheitsprüfung nach D 1 und D 2 durchführen Die Dichtheit muss nach den Anweisungen in Abschnitt D 2 geprüft werden D ANSCHLIESSEN DER GASFLASCHE Wenn eine leere Gasflasche angeschlossen ist siehe Abschnitt F Ausbauen bzw Auswechseln der Gasflasche Beim Anschließen bzw Auswechseln der Gasflasche stets auf gute Lüftung des Raums achten und sicherstel...

Page 15: ...bene max Benutzungsdauer des Schlauchs je nach Land beachten In Frankreich muss der Schlauch nach Ablauf des aufgedruckten Enddatums durch einen Schlauch nach der Norm XP D 36 112 ersetzt werden Nach der zum Neugerät mitgelieferten Montageanleitung muss der Schlauch eine Länge von 0 50 m besitzen Seine Montage ist in Abschnitt C 2 beschrieben Bei längerer Stilllegung des Geräts die Gasflasche demo...

Page 16: ...pparecchio per il riscaldamento a combustione ad infrarossi il cui utilizzo è indicato per ambienti sufficientemente areati Una ventilazione corretta permette di evacuare i prodotti della combustione e di rinnovare l aria necessaria alla combustione stessa La stufa catalitica non deve essere installata in una stanza il cui volume sia inferiore a 56 m3 per un soggiorno e a 28 m3 per le altre stanze...

Page 17: ...ressione dalla bombola del gas Procedere al montaggio della bombola nuova ed ai test di tenuta come indicato ai paragrafi D 1 e D 2 La tenuta verrà verificata seguendo le istruzioni del paragrafo D 2 D COLLEGAMENTO DELLA BOMBOLA DEL GAS Se una bombola vuota è collegata alla stufa leggere il paragrafo F Smontare o sostituire la bombola del gas Per installare o smontare una bombola del gas agire sem...

Page 18: ...rancia se la data di scadenza stampata sul tubo flessibile è trascorsa bisogna sostituirlo con un tubo di gomma conforme alla Norma XP D 36 112 Seguire le indicazioni di montaggio fornite con questi nuovi insiemi la cui lunghezza deve essere di 0 50 m e la procedura indicata al paragrafo C 2 Se prevedete di non utilizzare più la vostra stufa catalitica per un periodo prolungato staccate la bombola...

Page 19: ...lizada en una habitación suficientemente ventilada Una aeración correcta permite evacuar los productos de combustión y renovar el aire necesario para la combustión El aparato no debe ser instalado en una habitación cuyo volumen sea inferior a 56 m3 para los cuartos de estar y 28 m3 para las otras habitaciones La superficie de ventilación para la renovación de aire no tiene que ser inferior a los 7...

Page 20: ...resión del depósito de gas Proceder al montaje del nuevo depósito de gas y a la prueba de estanqueidad como se indica en los párrafos D 1 y D 2 La estanqueidad se comprobará siguiendo las indicaciones del párrafo D 2 D CONEXION DEL DEPOSITO DE GAS Si un depósito vacío está en su lugar leer el párrafo F Desmontaje o cambio del depósito de gas Para la colocación o el desmontaje de un depósito de gas...

Page 21: ...riodicidad indicada en la parte de abajo según los países En Francia si se alcanza la fecha de caducidad impresa en el tubo flexible éste tiene que ser substituido por un flexible en conformidad con la Norma XP D 36 112 Seguir las indicaciones de montaje suministradas con esos nuevos conjuntos cuya longitud tiene que ser de 0 50 m y la manera de proceder descrita en el párrafo C 2 Si usted ha prev...

Page 22: ...í místnosti Tento přístroj je topení s infračerveným spalováním který smí být používán pouze v dostatečnì vìtrané místnosti Správné vìtrání zaručuje odvod spalin a přívod čerstvého vzduchu potřebného ke spalování Zařízení nesmí být instalováno v místnostech jejichž objem je u obývacích pokojù menší než 56 m3 a u ostatních místností menší než 28 m3 Ventilační plocha určená pro obnovu vzduchu nesmí ...

Page 23: ...pojte redukční ventil Pokračujte montáží nové plynové láhve a zkouškou tìsnosti v souladu s pokyny v odstavcích D 1 a D 2 G ULOŽENÍ ÚDRŽBA 1 Zařízení V případì že se zařízení nepoužívá je nutno je přikrýt a uložit na bezprašném místì Po vychladnutí zařízení odstraòte nečistoty mýdlovou vodou a utřete hadrem do sucha Zkouška tìsnosti se provede dle pokynù v odstavci D 2 D PŘIPOJENÍ PLYNOVÉ LÁHVE Je...

Page 24: ...é příslušnou hadici vymìnit za novou splòující normu XP D 36 112 Při montáži dodržujte pokyny uvedené na novém kompletu a postup popsaný v odstavci C 2 přičemž délka hadice musí být 0 50 m Nebudete li vaše zařízení používat po delší dobu odpojte plynovou láhev CZ Závady odstranìní Hořák se nezažehne Hořák vynechává nebo zhasne Dusící se a nestabilní plameny Zapalovací plamínek se nezažehne Možné p...

Page 25: ...ões para as quais não foi previsto C 1 Ventilação do local Este aparelho é um aquecedor de combustão infravermelho para ser utilizado em local suficientemente arejado Uma ventilação adequada permite evacuar os produtos da combustão e renovar o ar necessário para a combustão O aparelho não deve ser instalado numa sala com um volume inferior a à 56 m3 para as salas de estar e 28 m3 para as outras di...

Page 26: ...sligue o regulador de pressão da garrafa de gás Monte a nova garrafa de gás e verifique a estanquidade como indicado nos parágrafos D 1 e D 2 A estanquidade deve ser verificada segundo as orientações do parágrafo D 2 D LIGAÇÃO DA GARRAFA DE GÁS Se o aparelho tiver uma garrafa vazia instalada consulte o parágrafo F Desmontagem ou substituição da garrafa de gás Quando instalar ou desmontar uma garra...

Page 27: ...dade indicada no mesmo em conforme os países Em França se a data de limite de validade impressa no tubo flexível for atingida deve ser substituído por outro tubo flexível de acordo com a Norma XP D 36 112 Siga as indicações de montagem fornecidas com esses novos conjuntos cujo comprimento deve ser de 0 50 m consulte as instruções do parágrafo C 2 Se previu não utilizar o seu aparelho durante um lo...

Page 28: ...iségben uzemeltetendo infravoros égésu futoberendezès A megfelelő szellőzés lehetővé teszi az égéstermék távozását a levegőből ill az égéshez szükséges levegő cserélődését A készüléket nem szabad elhelyezni 56 m3 nél kisebb területu nappaliban és 28 m3 nél kisebb területu egyéb helyiségben A levegőcserét biztosító szellőztető felület nem lehet 70 cm nél kisebb és arányosan kell megoszlania a helyi...

Page 29: ...lakoztassa le a gázpalack nyomásszabályozóját Végezze el az új palack felhelyezését és a légmentes záródás ellenőrzését a D 1 és D 2 bekezdésben leírtak szerint A légmentes záródást a D 2 bekezdés utasításai szerint kell ellenőrizni D A GÁZPALACK CSATLAKOZTATÁSA Ha üres palack van felhelyezve olvassa el az F paragrafust A palack leszerelése és cseréje A gázpalack felhelyezését vagy leszerelését mi...

Page 30: ...e kell takarni és egy nem poros helyen elhelyezni Tisztítsa le a foltokat szappanos vízzel ha a készülék kihûlt Törölje le egy törlőkendővel Ne használjon súrolószert mert ez károsíthatja a festéket Fontos javítás alakítás stb esetén forduljon a viszonteladóhoz A készülék különösen a csatlakoztató cső állapotát rendszeres időszakonként ellenőrizni kell 2 A nyomásszabályozó és a készülék közti cső ...

Page 31: ...ejanje sa infracrvenim sagorevanjem namenjen korišćenju u nekoj dovoljno provetrenoj prostoriji Ispravno prozračivanje omogućuje odvod uzgrednih proizvoda izgaranja i obnavljanje zraka koji je nužan za izgaranje Uređaj ne smije biti postavljen u prostoriji čiji je volumen manji od 56 m ako je riječ o prostoriji za dnevni boravak i 28 m ako je riječ o drugim prostorijama Povrđina mjesta za prozrači...

Page 32: ...ropusnosti u skladu s uputama iz odlomaka D 1 i D 2 Nepropusnost se provjerava u skladu s uputama u odlomku D 2 D PRIKLJUČIVANJE SPREMNIKA ZA PLIN Ako je spremnik za plin prazan pročitajte odlomak F Demontiranje ili zamjena spremnika za plin Priključivanje ili promjenu spremnika za plin uvijek obavljajte na dobro prozračenome mjestu nikada u prisusutvu plamena iskre ili izvora topline cigareta ele...

Page 33: ...cuskoj ako je rok trajanja označen na cijevi istekao cijev mora biti zamijenjena mekanom cijevi u skladu s Normom XP D 36 112 Slijedite upute za montiranje koje se dostavljaju s novim cijevima čija duljina mora biti 0 50 m i postupak za montiranje opisan u odlomku C 2 Ako ste predvidjeli da više nećete koristiti uređaj tijekom duljega razdoblja otpojite spremnik za plin HR Nepravilnosti načini nji...

Page 34: ...namenjena C 1 Prezračevanje prostora Ta naprava je grelnik na infrardeče gorenje ki je namenjen uporabi v dovolj zračnih prostorih Pravilno prezračevanje omogoča odstranjevanje produktov izgorevanja in obnavljanja zraka ki je potreben za gorenje Naprava ne sme biti instalirana v prostoru katerega prostornina je manjša od 56 m3 za bivalne prostore in 28 m3 za druge prostore Prezračevalna povrðina z...

Page 35: ...ovo plinsko jeklenko in preskusite vodotesnost tako kot je opisano v točkah D 1 in D 2 Vodotesnost je treba preveriti v skladu z navodili v točki D 2 D SPOJ PLINSKE JEKLENKE Če je nameščena prazna plinska jeklenka preberite odstavek F Demontaža ali zamenjava plinske jeklenke Zamenjavo ali demontažo plinske jeklenke vedno izvajajte v dobro prezračenem prostoru in nikoli v prisotnosti plamena vira t...

Page 36: ... državo Za Francijo velja da morate ob prekoračitvi datuma veljavnosti natisnjenega na gibki cevi le to zamenjati z gibko cevjo ki ustreza standardu XP D 36 112 Ravnajte v skladu z navodili za montažo dobavljenimi z novimi sestavi katerih dolžina mora biti 0 50 m ter z opisom postopka v točki C 2 Če predvidevate da naprave dalj časa ne boste uporabljali odklopite plinsko jeklenko Napake ukrepi Gor...

Page 37: ... nepoužívajte ho na účely na ktoré nie je určený C 1 Vetranie priestoru Tento prístroj je vyhrievacie teleso s infračerveným horením určené na použitie v dostatočne vetraných priestoroch Správne vetranie umožňuje odstrániť produkty spaľovania a obnoviť vzduch potrebný na spaľovanie Prístroj sa nesmie inštalovať v miestnosti ktorej objem je menší ako 56 m3 pre obývacie izby a 28 m3 pre iné miestnos...

Page 38: ...y ste nepotiahli alebo neskrútili hadicu Odpojte automatický membránový regulátor tlaku plynu od plynovej nádrže Pristúpte k montáži novej plynovej nádrže a vyskúšajte nepriepustnosť tak ako je uvedené v odsekoch D 1 a D 2 Nepriepustnosť sa overuje podľa inštrukcií v odstavci D 2 D Pripojenie plynovej nádrže Ak je plynová nádrž prázdna prečítajte si odstavec F Demontáž alebo výmena plynovej nádrže...

Page 39: ...čenej navrchu Vo Francúzsku platí že po dosiahnutí dátumu vypršania lehoty vytlačeného na hadici musí byť táto nahradená hadicou podľa Normy XP D 36 112 Riaďte sa podľa návodu na montáž dodaného s týmito novými zostavami ktorých dåžka musí byť od 0 50 m a podľa spôsobu postupu opísaného v odseku C 2 Ak predpokladáte že prístroj nebudete dlhšie používať odpojte plynovú nádrž Anomálie odstránenie Ho...

Page 40: ...tkowania w wystarczająco przewiewnym lokalu Poprawna wentylacja pozwala na usunięcie produktów ubocznych spalania oraz na odświeżanie powietrza potrzebnego do spalania Urządzenie nie powinno być zainstalowane w pomieszczeniu którego powierzchnia jest mniejsza od 56 m3 dla salonów i 28 m3 dla pozostałych pokoi Powierzchnia wentylacji konieczna do odúwieýania powietrza nie powinna byã mniejsza niý 7...

Page 41: ...iornika na gaz Przystąpić do montażu nowego zbiornika na gaz i do testu na szczelność jak wskazano w rozdziałach D 1 i D 2 Szczelność można sprawdzić postępując zgodnie ze wskazówkami akapitu D 2 D PODŁĄCZENIE ZBIORNIKA NA GAZ Jeżeli zbiornik jest już podłączony a jest pusty należy przeczytać rozdział F Demontaż lub wymiana zbiornika na gaz Czynności podłączenia lub demontażu zbiornika na gaz nale...

Page 42: ...wnienia umieszczona na przewodzie została przekroczona przewód musi zostać wymieniony na inny elastyczny przewód odpowiadający Normie XP D 36 112 Postępować zgodnie z instrukcjami montażu dostarczonymi wraz z nowymi częściami długość przewodu nie powinna przekraczać 0 50 m i zgodnie z opisem przedstawionym w punkcie C 2 Jeżeli postanowili Państwo nie korzystać z urządzenia przez dłuższy czas należ...

Page 43: ...43 Note ...

Page 44: ......

Reviews: