5
Internet
or
Intranet
Installation and Connection
Basic Installation
(1) POWER – DC 12V 1A (No polarity) / AC24V 1A
(When PoE is used, the power is not necessary.)
(2) ETHERNET - LAN cable (RJ45 jack)
(Please, refer to the standard of “IEEE 802.3af”)
Expert Installation
(1) Audio In / Out: Ø 3.5mm stereo jack - RCA.
(2) Video loop throughout is for test after installation. (D1 output)
(3) Additional accessories on order should be used for Digital IN/OUT and RS485.
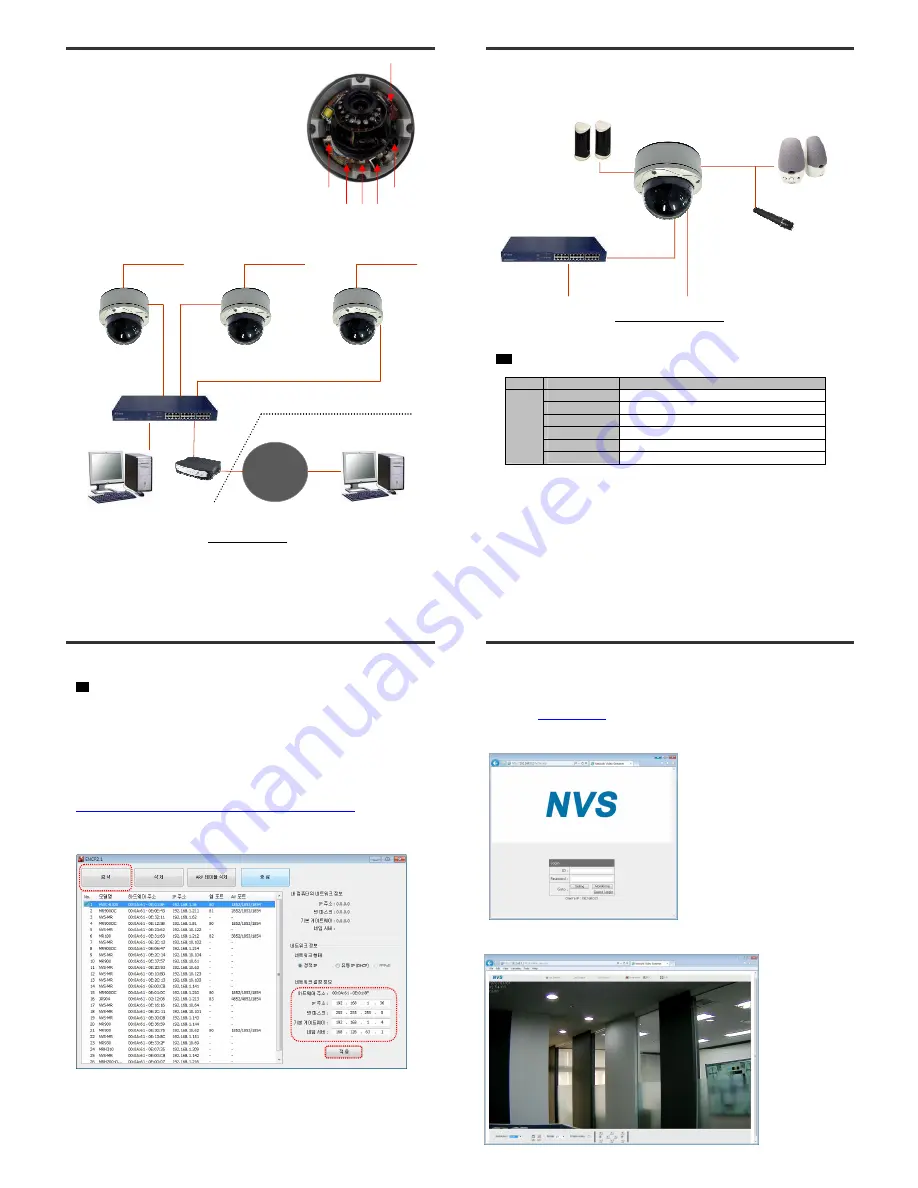
Power
Power
Power
CamPilot MRH310
····
····
····
1
2
N
HUB
General Connection
Monitoring PC
Monitoring PC
Local Network
Public Network
LAN (UTP) Cable
LAN (UTP) Cable
LAN Cable
Router
MRH310 - CP11MV - VF - IR
◀
◀
◀
◀
Pin connector for Power
Audio In / Out
Cable Hole
Factory Default
LAN (PoE)
DIO
6
Installation and Connection
External Device Connections
REF
Monitoring PC Requirements
Item
Specification
Monitoring
PC
Processor
Pentium Core2 Duo or more
RAM
2GB or more
Graphic Card
512MB or more
OS
Windows 2003 / XP / Vista / 7
Monitor Resolution
1024 X 768 pixels or more
Network
10/100 Base-T LAN
External Device Connection
Power
Sensor or Alarm
MIC
Network
Speaker
Audio Cable
Pin connector
LAN cable (UTP)
7
Network Setting
Setting an IP address of a CamPilot MRH310
TIP
If a monitoring PC is on 192.168.1.xxx network area, the connection is available without
any change on CamPilot MRH310.
The initial IP address on CamPilot MRH310 is
192.168.1.2
.
In case of the direct connection, the monitoring PC (Note Book) should be changed into
192.168.1.xxx
When changing the network setting, use ENCP program.
1. Download ENCP (Easy Network Configuration Program)
• Please, refer to the link as below
http://cellinx.co.kr/files/board.3/5_NVS4.1%20(2011.04.06%201121).zip
• After unzipping the downloaded file and executing “Setup.exe”, you can run ENCP.
(Windows start button / All Programs / NVS 4.1)
2. Assigning an IP address on CamPilot MRH310
• Click the button “
Scan
”, select an CamPilot MRH310
• Input the
IP address, Subnet Mask, Gateway
and
DNS Server IP address
, click the button
“
Apply
”
• If you don’t have a proper IP address, ask the network administrator or refer to User Manual.
▶
▶
▶
▶
Click for Scanning
▶
▶
▶
▶
Click
for Applying
8
Network Setting
3. Accessing to CamPilot MRH310 with a web browser
Open a web browser on a monitoring PC and enter the IP address assigned to a CamPilot
MRH310 as following
Example>
http://192.168.1.2
• The page as below shows up after the connection is completed.
ID / Password :
root / pass
(Initial Value)
Monitoring
button :
moves to Monitoring Page
Guest Login :
connects by “guest” account
(The guest has no setting permission)
< The Initial Page >
< Monitoring >


