background image


Section 1.  Introduction 

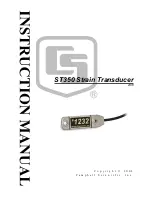
This manual provides information for interfacing the ST350 Strain Transducer 
to Campbell Scientific’s Dataloggers.  Unless otherwise specified, all part 
numbers are Campbell Scientific's.  

This manual contains information on sensor specifications, operating 
principles, installation, alignment, and calibration.  The multiplier and offset 
values given here are based on calibration data obtained from the Bridge 
Diagnostic’s Calibration Sheet (see example Appendix C).   

The most direct approach to quantifying live-load stresses in a structural 
member is to record the induced strain.  However, it can be tedious work 
installing foil strain gages in the field since careful surface preparation and 
soldering is often required.  Now, most field strain gage installations can be 
replaced with the highly accurate ST350 Strain Transducer.  These units are 
rugged and can be installed in any weather.  Since they are pre-wired and easy 
to mount, ST350 Strain Transducers will drastically reduce your field 
installation time.  

1.1  Typical Application 

This transducer is typically used for dynamic or event driven stress in structural 
members such as bridges or buildings.  The ST350 Strain Transducers have 
been designed for recording 

Live Load


strains only.  Hence it is assumed that 

there will be little to no temperature change during any short time-span testing 
sequence.   

When a transducer is attached to a structure, it is forced to have the same 
deformation as the structure.  However, if a temperature increase (or decrease) 
occurs, and since the ends of the sensor are "anchored", the transducer will 
expand between the end blocks and register compression.  The same goes for a 
drop in temperature which will register tension.  If the sensor is to be mounted 
on the structure for a long period of time, it will need to have its "zero" reset 
periodically as it drifts around with temperature changes. 


1-1 

Summary of Contents for ST350

Page 1: ...ST350 Strain Transducer 2 08 C o p y r i g h t 2 0 0 8 C a m p b e l l S c i e n t i f i c I n c...

Page 2: ...other warranties expressed or implied including warranties of merchantability or fitness for a particular purpose CAMPBELL SCIENTIFIC INC is not liable for special indirect incidental or consequential...

Page 3: ...ounting of Sensor to Various Surfaces 5 1 5 1 General 5 1 5 2 Mounting Information for Different Types of Surfaces 5 2 5 2 1 Steel 5 2 5 2 2 Reinforced Concrete 5 3 5 2 3 Pre stressed Concrete 5 6 5 2...

Page 4: ...ndex 1 Figures 3 1 Measurement Axis 3 1 3 2 Surface Preparation Location 3 2 3 3 ST350 Mounting Example 3 2 4 1 ST350 Electrical Wiring Diagram 4 1 7 1 ST350 Strain Transducer Test Output 7 1 7 2 Prop...

Page 5: ...ese units are rugged and can be installed in any weather Since they are pre wired and easy to mount ST350 Strain Transducers will drastically reduce your field installation time 1 1 Typical Applicatio...

Page 6: ...Section 1 Introduction 1 2...

Page 7: ...ted to NIST standards Strain Range Approximately 2000 Force req d for 1000 Approximately 17 lbs 76 N Sensitivity Approximately 500 mV V Weight Approximately 3 oz 85 g Environmental Built in protective...

Page 8: ...Section 2 Specifications 2 2...

Page 9: ...the mid span of a joist locate the midpoint between the supports and the center line of the joist The longitudinal mark should be about 8 inches long and the transverse mark about 4 inches long This...

Page 10: ...e transducer end opposite of the cable as been machined to a slight point This point along with the cable exit on the rear of the transducer should be aligned with the measurement axis line to ensure...

Page 11: ...a flat mounting surface If it has been determined neither of the above are causing the excessive offset proceed with the following steps 1 Determine which direction the offset is in 2 If the gage is t...

Page 12: ...Section 3 Sensor Alignment and Installation 3 4...

Page 13: ...n provides approximately 3 to 3 1 2 times the output of a standard 1 4 arm foil gage installation for a given strain level The connection sequence is shown in the following figure FIGURE 4 1 ST350 Ele...

Page 14: ...nts to the signal conditioning Before going to the field Campbell Scientific highly recommends that a simple validation be performed by the user to ensure that signal conditioning gains and calibratio...

Page 15: ...cleaned surface If attaching to concrete lightly grind the surface with the portable grinder to remove any scale and remove dust with a shop rag or paint brush 3 Using the portable grinder very light...

Page 16: ...ystems etc large mechanical equipment tower cranes mobile cranes cooling towers etc liquid tanks piles 2 Methods for attaching the ST350 to steel a Tab Glue See above b C clamps Place transducer on sp...

Page 17: ...orarily create a line while the gage is installed Temporarily hold the transducer extension assembly up to where it is to be mounted to ensure that there are no obstructions along the length of the un...

Page 18: ...apart along the axis of where the transducer extension assembly is to be mounted It can sometimes be difficult to align the marks on the bottom of concrete slab structures particularly if the structu...

Page 19: ...cantly more important If the area is difficult to access the transducers are going to be installed for an extended period of time or it is imperative that the measurements be taken at a specific time...

Page 20: ...to account for the height of the tab on the transducer end Slide a 3 8 deep wall socket over the stud and hold it against the nut Pound in the stud by hitting the end of the socket this will help prev...

Page 21: ...t the head of the screw does not sink into the transducer mounting hole Use a power screwdriver to drive the screw until it is 1 16 from the surface of the transducer then hand tightened with a standa...

Page 22: ...Section 5 Mounting of Sensor to Various Surfaces 5 8...

Page 23: ...be re calibrated on an annual to bi annual basis depending on the usage and number of times the transducers have been installed on a structure NOTE Based upon experience the ST350 transducers should b...

Page 24: ...Section 6 Calibration and Validation 6 2...

Page 25: ...ansducer Test Output 1 Ensure the Strain Transducer returns a smooth output Run a test at a sample frequency higher than 30 Hz and apply a smooth tension force gently pulling one each end followed by...

Page 26: ...A shop rag with mild soapy water can be used to remove other debris from the mounting feet Mounting tab inspection These tabs have been design to be reusable by simply dissolving the glue with acetone...

Page 27: ...xiting the transducer body This cable can be spliced to a new cable of the proper length If a transducer is damaged beyond repair the transducer will be replaced at a discounted price Please contact C...

Page 28: ...Section 7 Maintenance Replacement Parts and Repairs 7 4...

Page 29: ...2 Public FullBR 2 Units Batt_Volt Volts Units PTemp_C Deg C Units Temp_C Deg C Units FullBR mV Define Data Tables DataTable MFGTRUSS True 1 DataInterval 0 60 Min 10 Sample 1 PTemp_C FP2 Sample 1 Temp_...

Page 30: ...rval Units Lapses Sample 1 TEMP FP2 Sample Reps Source DataType Sampling Temperature by the gages Sample 2 BLK IEEE4 Sample Transducers Sample 1 BattVolt FP2 EndTable End of table MFGTRUSS Store zero...

Page 31: ...ult Offset BRFull BLK 2 4 2 VX1 2 5000 False True 4000 16670 MBLK OffsetVar FieldCal 0 MeasureVar 1 Multiplier OffSet Mode KnownVar Index 3 FieldCal 0 BLK 2 MBLK OffsetVar ZeroMode 0 1 10 Field Cal de...

Page 32: ...Section 8 Datalogger Programming 8 4...

Page 33: ...he gage length be short enough that the measured strains are not significantly affected by moment gradients An upper limit of 1 20th the span length L will usually maintain the gradient below 5 In gen...

Page 34: ...ee possible scenarios for mounting the transducer extension assemblies to the structure 1 Adhesive tabs on both ends If conditions are dry the concrete surfaces relatively smooth and testing will not...

Page 35: ...back of the extension to accept the protrusion on top of the gage This will ensure that the gage is positioned correctly 2 Hold the bolt in place and slide the extension over the extension bolt and t...

Page 36: ...ension Alignment Tab as seen below in FIGURE A 4 Insert the Tab into the hole marked with the desired gage length and the Extension Alignment Tab in to the hole next to it see FIGURE A 5 Screw on a 1...

Page 37: ...an provide custom gage covers that can be mounted temporarily After the test has been completed extreme care must be taken in removing the securing nuts from the tabs as often tabs will have a tendenc...

Page 38: ...Appendix A Special Instructions for using ST350 A 6 1965 57th Court North Suite 106 Boulder CO 80301 2826 Ph 303 494 3230 Fax 303 494 5027 www bridgetest com...

Page 39: ...kground These full Wheatstone bridge strain transducers were originally developed in about 1970 for use in the driven pile industry They were designed for recording strains on the side of a pile steel...

Page 40: ...ture induced strains particularly on statically indeterminate structures If the transducers are exposed to direct sunlight during live load tests such as on truss members or on top of a concrete slab...

Page 41: ...this setup since the specimen may be slightly bent to begin with and straightens out slightly Also since the transducers themselves have a small amount of stiffness they will cause a non symmetrical s...

Page 42: ...ery flexible geometry This enables large strains to be measured with little axial load being transmitted through the transducer Therefore when testing typical structural members the stiffness of the t...

Page 43: ...n the actual magnitude because possible electronic noise or other effects will immediately be apparent Furthermore the other sensors such as load cells and foil strain gages should all be recorded wit...

Page 44: ...Appendix B ST350 Accuracy Verification B 6...

Page 45: ...Appendix C Calibration Sheets C 1 Example of Calibration Sheet BDI Supplied FIGURE C 1 Bridge Diagnostics Calibration Sheet C 1...

Page 46: ...w to insure sustained accuracy and reliable performance Re Calibration Due Date Report of Calibration Standards Used Calibration Procedure Precision Laser Applied Displacement Make Model SN Calibratio...

Page 47: ...7 NIST Tracebility B 1 Mountings for Sensor ST350 5 1 Other Considerations B 4 Recording Data B 5 N Specimen Type and Size B 2 Temperature Effects B 2 NIST Tracebility B 1 Appendix C Calibration for...

Page 48: ...1 Temperature Range 2 1 Weight 2 1 Surface Preparation Locations 3 2 Typical Application 1 1 Typical Mountings 5 1 Wiring Diagram 4 1 Sensor ST350 Maintenance 6 1 Sensor ST350 Replacement Parts Detai...

Page 49: ...This is a blank page...

Page 50: ...L www campbellsci com br suporte campbellsci com br Campbell Scientific Canada Corp CSC 11564 149th Street NW Edmonton Alberta T5M 1W7 CANADA www campbellsci ca dataloggers campbellsci ca Campbell Sci...

Reviews: