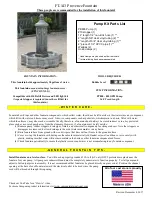


FT-143 Provence Fountain
Three people are recommended for the installation of this fountain!
Revised December 4, 2017
Assemble your fountain on a level surface capable of holding a minimum of 1069 pounds with an approximate 10.5 square foot
footprint.
FT-143E (550 lbs)
46”L x 46”W x 11”H
FT-143C (58 lbs)
13.5”L x 13.5”W x 8”H
FT-143B (150 lbs)
10”L x 10”W x 28”H
FT-143F (5 lbs)
4.5”L x 4.5”W x 5.5”H
FT-143A (46 lbs)
12”L x 12”W x 13”H
FT-134D (5 lbs)
5.75”L x 3.75”W x 5”H
1.
Place the basin (FT-143E) into position where the fountain will be installed,
ensuring that it is level.
2.
Assemble the pump kit
a.
NOTE: The screw on adapter for the pump needs to be attached before
assembling the pump kit.
b.
Fit the 3/4" clear end of the tubing assembly to pump outlet.
c.
Place the stopper around the pump cord about 8” from the pump.
3.
Feed the pump cord through the hole in the basin (FT-143E) and the channel.
4.
FIRMLY
press the stopper into the hole evenly.
a.
Note:
Using the handle of a screwdriver or hammer works best.
5.
Place the pump house (FT-143C) over the pump and in the center of the large
basin (FT-143E).
6.
Position the feature column (FT-143B) over the pump house (FT-143C).
7.
Insert the CPVC pipe connected to the tubing assembly into the pipe
protruding out of the bottom of the feature column (FT-143B).
8.
Place the water controller (FT-143F) over the pipe inside the feature column
(FT-143B).
9.
Place the fountain cap (FT-143A) over the feature column (FT-143B).
10.
Fit the pump house door (FT-34CC) into the pump house (FT-34C).
11.
Fill the fountain with water.


