background image

10

11

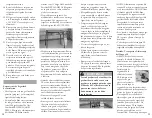
Replace damaged hose assembly 

before using appliance.  Use only  

valve/ hose / regulator specified by 

manufacturer. See product sheet 

for hose & regulator information.

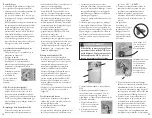
Cleaning The Burner

NOTE: Spiders and small insects 

can spin webs and build nests inside 

the burner.  This especially occurs 

in late summer and fall before frost 

when spiders are most active.  These 

nests can obstruct gas flow and 

cause a fire in and around the burner 

and orifice.  Such a fire can cause 

operator injury and serious damage 

to the appliance. To help prevent a 

blockage and ensure full heat output, 

clean and inspect burner tube often 

(once or twice a month).  NOTE: 

Water or air pressure will not 

normally clear a spider web.

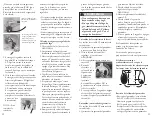
Steps for cleaning the Burner:

1. Remove orifice/valve from burner.
2.  Look inside the burner tube for 

nests, webs, or mud.

3.  To remove the above obstructions, 

use an accessory flexible venturi 

brush or bend a small hook on 

one end of a long flexible wire or 

use an air hose.

4.  Inspect and clean the burner  

if needed.

5. Reattach orifice/hose to burner.

Cleaning and Maintenance

Correct care and maintenance 

will keep your appliance operating 

smoothly.  Clean regularly as 

determined by the amount of use.  

NOTE:  Clean the entire appliance 

each year and tighten all hardware 

on a regular basis (1-2 times a 

year or more depending on usage).  

Cleaning should be done where 

detergents won’t harm patio, lawn, 

or the like.

Suggested Cleaning Materials

• Mild dish washing liquid detergent
• Wire brush
• Nylon cleaning pad
• Hot water
• Paper clip
• Soft brass bristled brush

Component Cleaning:

•  BURNER:  Wire brush loose 

corrosion from burner exterior.  

Clean clogged gas port holes with 

an opened paper clip.  Replace 

corroded or damaged burners that 

would emit excess gas.

•  COOKING SURFACES, POTS 

AND PANS: Clean the cooking 

surface with soapy water and a 

nylon cleaning pad.

•  After appliance has cooled, wipe 

areas where paint and finish have 

burned off to minimize rusting.

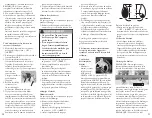
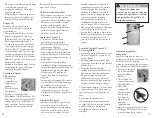
Using a Thermometer

Prior to lighting, position 

thermometer clip so that at least  

1/2” of thermometer tip is 

submerged  

in oil. Reposition thermometer  

as necessary to cook.  Continue to  

use thermometer until burner is 

turned off.

If Frying:

•  Follow instructions provided by 

the appliance manufacturer.

•  When cooking with oil or grease, a 

thermometer must be used.

•  Introduction of water from any 

source into the cooking oil or 

grease may cause overflow and 

severe burns from hot oil and water 

splatter. When frying with oil and 

grease, all food products MUST 

be completely thawed and towel 

dried to remove water before being 

immersed in the fryer.

•  Be sure thermometer is in good 

working condition. To check the 

thermometer, insert it into a pot 

of boiling water and ensuring that 

it registers approximately 212°F 

± 20°F (100°C ± 10°C). If it does 

not function properly, obtain a 

replacement thermometer specified 

by the manufacturer before using 

the appliance.

•  Do not over fill the pot with 

cooking liquid. Never fill appliance 

more than half full of cooking 

liquid or past the maximum fill line 

(a permanent marking on fryer). 

•  If cooking liquid has spilled 

and ignited, do not attempt to 

extinguish with water. Immediately 

turn gas supply OFF at the supply 

cylinder and:


•  Extinguish flames using a 

BC type fire extinguisher as 

recommended by the fryer 

manufacturer; or


•  Smother flames with dirt or 

sand.


•  In case there is a fire, call the  

local fire department or dial 

911.


•  To avoid accidental burns from 

burner flame or hot cooking 

liquid, turn the burner off 

before inserting or removing 

food from the fryer. 


•  When removing food from 

the fryer, be sure to avoid 

burns from hot cooking liquid 

drippings.

CAutION

All  cleaning  and  maintenance 

should  only  be  done  when  the 

appliance is cool and with the fuel 

supply turned off at the LP cylinder.  

DO NOT clean any part in a self-

cleaning  oven.    The  extreme  heat 

will damage the finish.

This appliance is not intended for 

use as a poultry fryer.

WARNING

Summary of Contents for TB90LW

Page 1: ...for future reference To consumer Keep this manual for future reference This instruction manual contains important information necessary for the proper assembly and safe use of this product Read and f...

Page 2: ...surface like bricks concrete or dirt Do NOT use this appliance on any surface that will burn or melt like wood asphalt vinyl or plastic 7 Keep the fuel supply hose away from any heated surfaces 8 To p...

Page 3: ...and inspect valve hose and regulator before continuing Perform a leak test The regulator may make a humming or whistling noise during operation This will not affect the safety or use of appliance Clea...

Page 4: ...tified LP dealers LP Tank Exchange Many retailers that sell appliances offer you the option of replacing your empty LP tanks through an exchange service Use only those reputable exchange companies tha...

Page 5: ...ow of air 2 Turn regulator control valve to OFF position 3 Fully open LP bottle valve 4 Light match and place it over burner Slowly turn ON the regulator control valve Do NOT stand with head or arms o...

Page 6: ...ance has cooled wipe areas where paint and finish have burned off to minimize rusting Using a Thermometer Prior to lighting position thermometer clip so that at least 1 2 of thermometer tip is submerg...

Page 7: ...pon the expiration of this warranty all such liability will terminate No other warranties are expressed or implied Keep all original sales receipts Proof of purchase is required to obtain Warranty ser...

Page 8: ...iter les feux accidentels s assurer avant d utiliser l appareil que le tuyau n est pas endommag et qu il n y a pas de fuite au niveau des joints et connexions en proc dant comme suit ouvrir le robinet...

Page 9: ...relatives au tuyau et au d tendeur Ne pas bloquer les trous situ s sur le bas ou les c t s de l appareil AVERTISSEMENT Les sous produits de combustion d coulant de l utilisation de cet appareil contie...

Page 10: ...ant de la bouteille de GPL S assurer que la bouteille est toujours debout pendant l utilisation le transport ou l entreposage V rifier s il y a des fuites dans la bouteille de GPL AVANT de la raccorde...

Page 11: ...de r glage du d tendeur en position OFF ARR T 3 Ouvrir compl tement la soupape Ne pas utiliser l appareil avant de s assurer qu il ne comporte pas de fuite Si on ne peut colmater la fuite de gaz ferme...

Page 12: ...e endommagea la finition tat de fonctionnement Pour v rifier le thermom tre le placer dans un chaudron d eau bouillante et s assurer qu il indique bien 100 C 10 C 212 F 20 F S il ne fonctionne pas cor...

Page 13: ...ricains contigus uniquement 0209 Trilingual Booklet indd Desde los fabricantes de Camp Chef y cubierto bajo una o m s de las siguientes patentes 328547 329162 356714 357610 358057 360803 364772 378646...

Page 14: ...as secas y hierba cepillo papel y lonas 6 Use SOLO sobre un nivel superficie no combustible estable como ladrillos concreto o barro NO use este aparato sobre ninguna superficie que se queme o funda co...

Page 15: ...a o regulador apague el suministro de gas inmediat amente Determine la causa corrija limpie e inspeccione la v lvula manguera y regulador antes de continuar Realice una prueba de fuga El regulador pue...

Page 16: ...rectorio telef nico bajo Compa as de gas para localizar distribuidores de licuado de petr leo certificados Cambio del Tanque LP Muchos comerciantes al por menor que venden aparatos le ofrecen la opci...

Page 17: ...cierre la v lvula del tanque de licuado de petr leo realizando la B La boquilla tiene que centrarse en la v lvula del tanque LP C Sostenga la tuerca de acople y regulador como se muestra para una con...

Page 18: ...el uso La limpieza se deber a hacer donde los detergentes no da en el patio c sped o similares Materiales de limpieza sugeridos Detergente suave l quido para lavar platos Cepillo de alambre Almohadill...

Page 19: ...e cada uso para mantener el acabado y prolongar la duraci n de su producto Quite frotando toda grasa y ceniza Mantenga los productos met licos libres de humedad sales cidos y fluctuaciones violentas d...

Reviews: