www.imc-multimedia.com
18
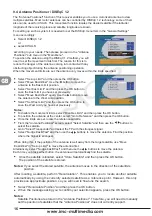
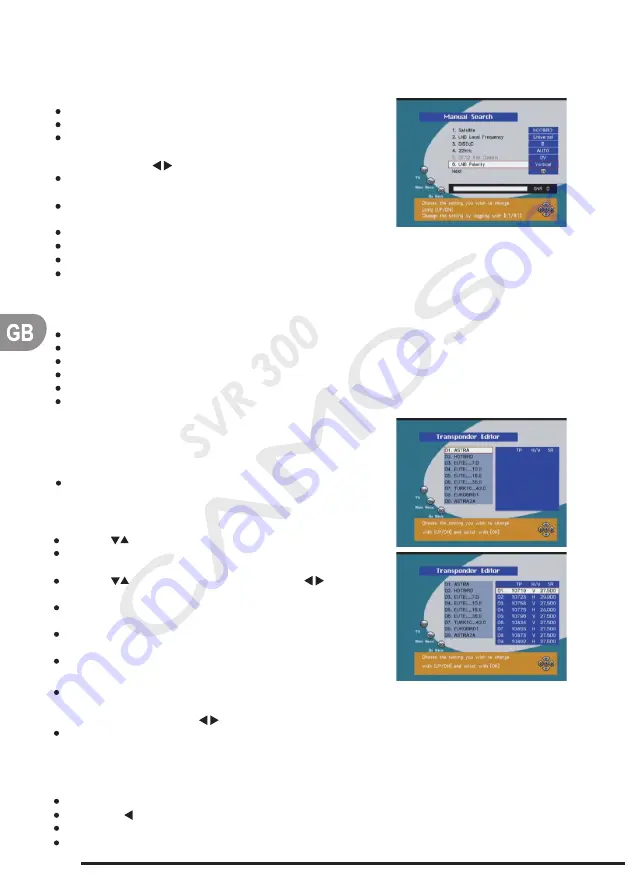
9.7 Manual Search Function
Use this channel search by entering the TP information manually to the receiver. This channel
search is often used to search for a particular channel or those channels that "Auto Search" has
missed, but it requires comparatively more expertise.
Select "Manual Search" and then press the OK button.
Select the satellite you want to track.
Set the LNB information and DiSEqC information for the
satellite. You can use the existing setting. To change the
setting, use the buttons.
Set the LNB polarization of the TP to "Horizontal" or
"Vertical".
After the settings are completed, select "Next" and then
press the OK button.
Set the Down Frequency of the TP.
Set the Symbol Rate of the TP.
Select the type of channels to search: FTA, Scrambled, ALL or Network.
Press the OK button to start searching using the above settings.
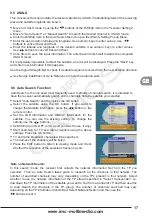
Another search method is "Advanced Search". Use this channel search to search for a
particular channel or channels ones that you couldn't find using "Manual Search". Enter the PID
of the channel you want to search.
Set the channel's Video PID.
Set the channel's Audio PID.
Set the channel's PCR PID.
Press the OK button at "Start Search"
The names of the channels will be listed.
Press the EXIT button to return to viewing mode and check that the reception of the selected
channel is good.
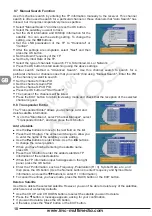
9.8 Transponder Editor
The "Transponder Editor" allows you to change, add, and
delete satellite information.
Go to the "Main Menu", select "Channel Manager", select
"Transponder Editor", and then press the OK button.
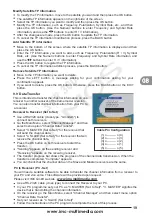
Add a Satellite
Use the buttons to move to the last field on the list.
Press the OK button. The screen will change to allow you
to enter the name of the satellite you are adding.
Use the buttons to enter letters. Use the buttons
to change the cursor position.
When you have finished entering the satellite name,
press OK.
Press the OK button to enter the added satellite's TP
information of the added satellite.
When the TP information input field appears in the right
panel, press the OK button.
Enter the TP information, such as Frequency, Polarization (H / V), Symbol Rate, etc., and
then press the OK button. (Use the Numeric buttons to enter Frequency and Symbol Rate
information, and use the buttons to enter H / V information).
To cancel the entries you have made, press the BACK button or the EXIT button.
Delete a Satellite
Use this to delete the selected satellite. However, you won't be able to delete any of the satellites,
which were set as factory defaults.
Use the CH UP and CH DOWN buttons to select the satellite you want to delete.
Press the button. A message appears, asking for your confirmation.
If you want to delete, press the OK button.
Otherwise, press the "Back" button or the EXIT button.
Summary of Contents for CSA-130P
Page 25: ...12 CM 1510 TM 1510 1 2 3 4 5 6 7 8...
Page 29: ......

