Actiwave User Guide - Issue 2.0.18
Page 17
4 Selecting an Actiwave and Viewing Status.
4.1
Selecting an
Actiwave
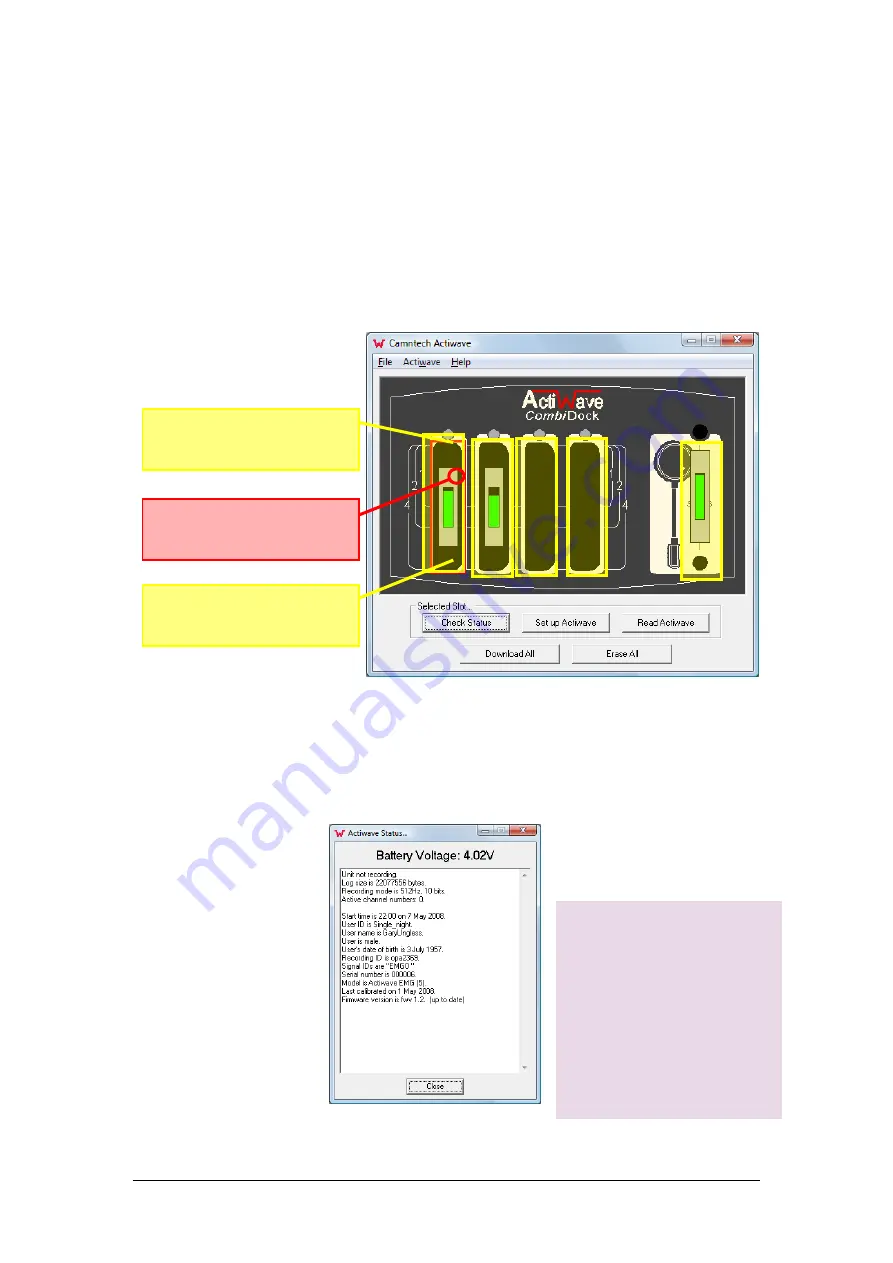
To select a docked Actiwave, click on the image of the
required device (see figure below). The selected Actiwave
will be outlined in red and the corresponding LED on the
dock will flash amber. The user may then either use the
options in the top menu bar, the buttons at the bottom of
the screen or right click to bring up a small menu.
4.2
Viewing
Actiwave
Status
Having selected the required Actiwave, click the
‘Check
status’ button (or right-click on the required Actiwave
image and select ‘Check
status’ from the pop-up
menu) will display
the
window below.
This window provides
information about the
battery voltage, details of
the current device settings,
details of the previous
recording and technical
information about the
Actiwave.
Click anywhere within the
highlighted area to select
the Actiwave
The selected Actiwave has
a red border
Right Click in this region
to display a pop-up menu
with more options


