1
door glass since they can scratch the surface, which may result in shattering of
the glass.
6. A steam cleaner should not be used.
7. Children should be supervised to ensure that they do not play with the appli
-
ance.
8. Oven must be switched off before removing the guard and that, after cleaning,
the guard must be replaced in accordance with the instructions.
9. If the supply cord is damaged, it must be replaced by the manufacturer, its ser
-
vice agent or a similarly qualified person in order to avoid a hazard.
Safety information
• Installation and service must be performed by a qualified installer.
• Save for local electrical inspector’s use.
• Do not remove spacers (if equipped) on the side walls and/or on the back of the
built-in oven. These spacers center the oven in the space provided. The oven
must be centered to prevent excess heat build up that may result in heat dam
-
age or fire.
• Base must be capable of supporting 80 kg.
important notes to the installer
• Read all installation instructions before installing the built-in oven.
• Remove all packing material from the oven compartments before connecting
the electrical supply to the wall oven.
• Observe all governing codes and ordinances.
• Be sure to leave these instructions with the consumer.
• Oven door may be removed to facilitate installation.
• These ovens are not approved for stackable or side–by installation.
Warning:
• Be sure your oven is installed and grounded properly by a qualified installer or
service technician.
• This oven must be electrically grounded in accordance with local codes.
• Warning: stepping, leaning or sitting on the door of this oven can result in serious
injuries and can also cause damage to the oven.
• Never use your oven for warming or heating the room. Prolonged use of the oven
without adequate ventilation can be dangerous.
• Warning: the electrical power to the oven must be shut off while line connections
are being made. Failure to do so could result in serious injury or death.
Installing
1. Inspect the connection with the power source. Check and ensure a current of
16 A from this power source. A special junction box must be provided and con
-
nected by a qualified person.
2. You can switch off the power of the oven after installation for maintenance pur
-
poses. The disconnection may be achieved by having the plug accessible or by
incorporating a switch in the fixed wiring (in accordance with the wiring rules).
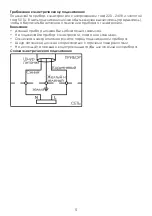
3. Carpentry: Refer to figure 1 or 2 for the appliance dimensions to your oven, and
the space necessary to install the oven. The oven support surface must be solid
plywood or similar material, and the surface must be horizontal from side to side,
left to right and front to rear.
inStAllAtion inStructionS
Summary of Contents for EO-930
Page 1: ...EO 930...
Page 2: ...CAMERON 1 2 3 4 5 6 7 8 9 10 11 12 13 14 15 16 17 18 19 20 21 22 23 24...
Page 3: ...25 26 27 28 29 30 31 32 33 34 75 C 85 C 35 3 1 2 3 4 5 6 7 8 80...
Page 4: ...1 16 2 3 50 120 C...
Page 5: ...220 240 50...
Page 6: ...1 2 3 4 5 6 7 8 9 10 11 12 13 14 15 16...
Page 7: ...1 2 3 6 1 2 3 4 5 6 1 2 3 4 OFF...
Page 10: ...10 1 2...
Page 11: ...11 1 2 3 25...
Page 12: ...12 1 2 2...
Page 13: ...13 220 240 50 3400 240 2900 220 A 50 250 C 597 x 597 x 540 57 36 18 148...
Page 14: ...14...
Page 15: ...Built in electric oven Instruction Manual EO 930...


