OEM U16S
Page 12 of 37
4.4. Connecting the OEM U16S to the Power Supply Unit
using Spade Connectors
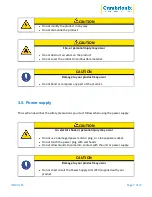
Having ensured the output voltage of the DC power supply is 5.0V +/-5%, and certainly does not
exceed 5.6 Vdc, connect the PSU to the OEM U16S using insulated copper cables of no less than
six mm2 cross-section and no longer than 150 mm. Longer cables or smaller cross-sections are
likely to cause a voltage drop across the cable and improper board operation.
With the mains power supply disconnected, the PSU should be connected to the input spade
terminals on the OEM U16S using the cable (described above) terminated (at the OEM U16S
end) with crimp connectors. The positive voltage spade terminal is closest to the OEM U16S
board edge, and Ground (GND) is marked on the OEM U16S board close to the innermost spade
terminal.
Taking appropriate safety precautions, turn the mains supply on. Periodic inspection should be
made to power supply cables and any USB cables for any signs of damage. If any damage is
found then replace damaged cord before further use.
4.5. Registration
You may register your product at
www.cambrionix.com/product-registration
4.6. Help and Support
FAQs and help can be found on the Help page here
l
www.cambrionix.com/help_pages/help
.
You can raise a support ticket for more in depth support here
l
https://cambrionix.atlassian.net/servicedesk/customer/portals
You can also download any of our manuals and keep up to date at the link here
l
www.cambrionix.com/product-user-manuals
When contacting support, please supply the product information for the hub in question. This
can be found on the Device Information Plate which is either on the underside or back of the
unit. Including serial and PO numbers, can help identify the product in question faster, and
speed up the process.


