background image

Power Supply

AC Operation 

(with AC adapter) 

Notes

Unplug the AC adapter from the DC socket when you are not using the device. 

Insert the DC plug, at the end of the AC adapter cord into the


» DC IN 4.5V                  « 

socket.

Plug the AC adapter into AC power outlet socket.

Caution: 

Only operate the device with the power supply provided. 

Battery Operation

Pull out the AC adapter cable. 

Open the lid of the battery compart ment on the bottom of the device. 

Insert two AA batteries in the battery compart ment observing the polarity.

Close the battery compartment carefully.

Notes

• The device display tells you about the state of the batteries when low in charge. If 

»          «

 flashes 

   in the display, this indicates that the batteries are losing their charge and they must be replaced.
• The batteries are switched off during AC operation. Remove the batteries when they are flat 
   or when you know that the device will not be used for a long period of time. The manufacturer 
   accepts no liability for damage resulting from leaking batteries. 

Environmental Note

Batteries, including those which contain no heavy metal, should not be disposed of with house hold 
waste. Please dispose of used batteries in an environmen tally responsible manner. Find out about the 
legal regulations which apply in your area. 

5

ON

OFF

HOLD

CLASS 1 LASER PRODUCT

KLASSE 1 LASER PRODUCT

CLASSE 1 APPAREIL LASER

CLASE 1 PRODUCTO LASER

OPEN

VOL —                       VOL +

PHONES

DCIN4.5V

DC IN 4.5V

Battery 
Compartment

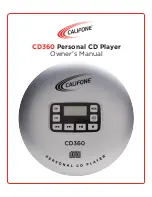
Summary of Contents for CD360

Page 1: ...CD360 Personal CD Player Owner s Manual...

Page 2: ...e taken place during transit Report any damage claim directly to the freight carrier immediately Save product s and packaging for inspection by the carrier s claim agent Notify your dealer of the pend...

Page 3: ...able of Contents 2 CD360 Overview Display 3 AC Battery Operation 5 General Information 6 Connecting Earphones Switching On Off Keylock Adjusting Volume Sound Effects Basic Functions 7 Additional Funct...

Page 4: ...3 Display MODE Sound Effects Maximum Volume Limiter STOP PLAY PAUSE Anti shock Protection DIRECTORY Skip Search Backward Skip Search Forward...

Page 5: ...r the current album Displays the elapsed playing time of the file MP3 The Maximum Volume Limiter is switched off A file or a track is re peated All tracks on the MP3 CD or all files on the CD DA are r...

Page 6: ...s The device display tells you about the state of the batteries when low in charge If flashes in the display this indicates that the batteries are losing their charge and they must be replaced The bat...

Page 7: ...tch off the Maximum Volume limiter To protect your hearing alter switching on the device only reduced volume is available You can switch off this Volume restriction 1 press and hold Display HIGH flash...

Page 8: ...D compartment CD playback The device automotically recognises the type of disc inserted CD DA CD R CD RW MP3 CD 1 Press the ull to switch on the device Playback of the disc inserted starts automatical...

Page 9: ...esumed it starts from the position at which it was ended 2 To start playback of the first track press once and start playback with ull Selecting another file or track 1 During playback keep pressing l...

Page 10: ...he introductions of tracks or files on the disc Intro 1 During playback press MODE so often until INTRO flashes in the display 2 To start this function press ull The first seconds of each track are pl...

Page 11: ...ayback begins with the first programmed file or track Deleting the track memory 1 In Stop mode press or open the CD compartment Note The track or file memory is also deleted if the power adapter is di...

Page 12: ...arings which must not be oiled or greased Condensation may Form on the lens if the device is taken into a warm room from the cold This prevents it from playing a Disc Never touch the lens on the devic...

Page 13: ...nal to Noise Ratio 80dB Power Can be operated by batteries or power adapter Power Adapter INPUT 100 240V 50 60Hz 0 3A OUTPUT 4 5V 0 6A Batteries 2x1 5V LR6 AM3 AA Dimensions 5 629 W x 5 590 D x 1 H Sa...

Page 14: ...eo headphone is ideal for casual listening Its adjustable headband on ear earcups and recessed wiring make it a convenient and comfortable headphone for multi purpose classroom applications computer l...

Page 15: ...he appliance Cleaning the appliance should be cleaned only as recommended by the manufacturer Non use periods unplug the appliance power cord from the outlet when left unused for a long period of time...

Reviews: