


8
8
AUDIO & BRIGHTNESS SETUP interface
10. To reset the player
When the monitor , the small LCD display or some buttons are not working or
sound is distorted, press the REL button and detach the front panel from the
main unit, then press the RESET button to reset the program to factory default.
11.General setup
Tap the icon setup to pop up GENERAL SETUP
interface as right image.
In the interface, select one of the function as the interface
show by tapping them, then change the setting by tapping
icons accordingly.
* MP5 SETUP :
What is MP5? We can say like that the MP4 player which
can watch television. Most type of the video, photo, audio
can be read automatically download by the internet.
(Such as rmvb, rm, vob, ogg and so on)
The MP5 SETUP only can be use in USB and CARD mode.
12.To calibrate the screen
During MP5 setting mode ,tap the to calibrate the screen.
3. Radio Operation
1. Enter RADIO mode
Press the MODE button at brief intervals or tap the radio
icon until you get to RADIO mode as the right.
In RADIO interface, tapping the icon will return to
Mode Menu; tapping the icon will pop up AUDIO &
BRIGHTNESS SETUP interface as right; the other
icons are same as ones in the unit panel or in the
Remote Control.
In the AUDIO & BRIGHTNESS SETUP interface, you
can adjust VOLUME, TREBLE, BASS, BALANCE,
FADER, BRIGHTNESS ; you can also turn on or off
DBAS, MBP, LOUD; you can still select your desired
transparency mode(by STD) and EQ mode(by EQ);
tapping the icon can return back to the previous
menu.
2. BAND BUTTON
In RADIO mode, press the BAND button on the remote controller or on the front
panel to select your desired radio band of FM1, FM2, FM3, MW1 and Mw2,
and the selected band will be displayed on the small monitor on the front panel.
GENERAL SETUP
RADIO interface
11
11
4. USB and MMC/SD Operation
4.1
Load/unload USB or Card
nsert an USB or MMC/SD Card into their slots
respectively, then the root menu will be displayed
on the monitor and it will play audio file
automatically if the USB or MMC/SD Card include
audio files.
uring playback, press the STOP button twice to
stop playback, then pull the USB out of the USB
socket; or push the card and then pull it out of the
card slot.
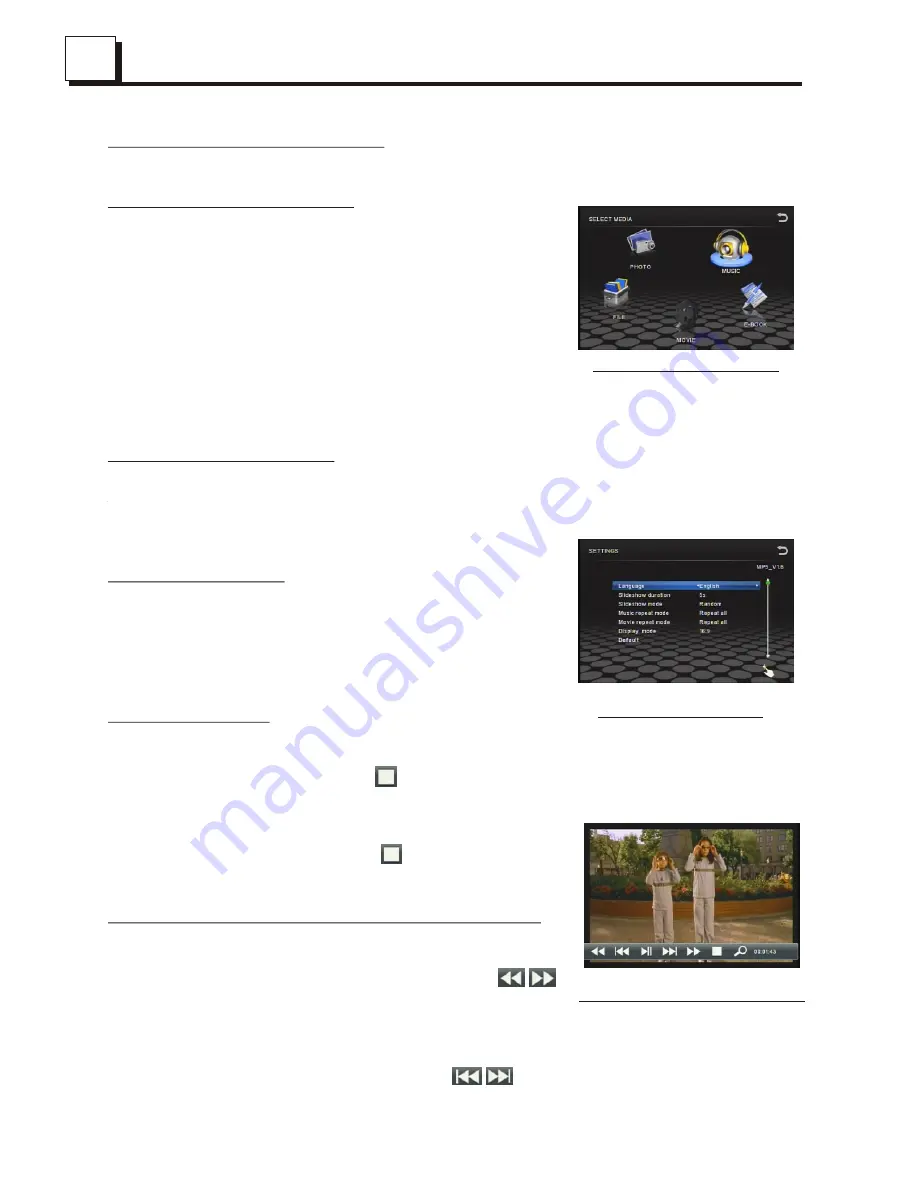
4.2
Setting during playing
During USB or CARD playback, press the
setup button to selecting the play mode as
the interface show .
4.3 Pause Playback
When playing MOVIE/MUSIC files, press
the PAUSE button to pause the playback,
press the PLAY button to resume normal
playback.
4.4 Stop Playback
When playing MOVIE/MUSIC files, press
the STOP button or tap the icon to
return to the select media mode.
In MOVIE mode, during playback, pressing
the STOP button or tap the icon can return
back to root menu.
4.5 Select Chapter/Track with the UP / DN Button
In MUSIC mode, during playback,
Press the UP / DN button or tap the icons
to select next or previous track to playback;
In MOVIE mode, during playback,
Press the >>I / I<< button or tap the
icons to select next or previous chapter to playback.
I
D
SETTING interface
MOVIE playback interface
USB &CARD interface