


EN-7
OPERATIONS
Turning the unit ON/OFF (
)
Press “
” button to turn on unit. To turn off, press the button again.
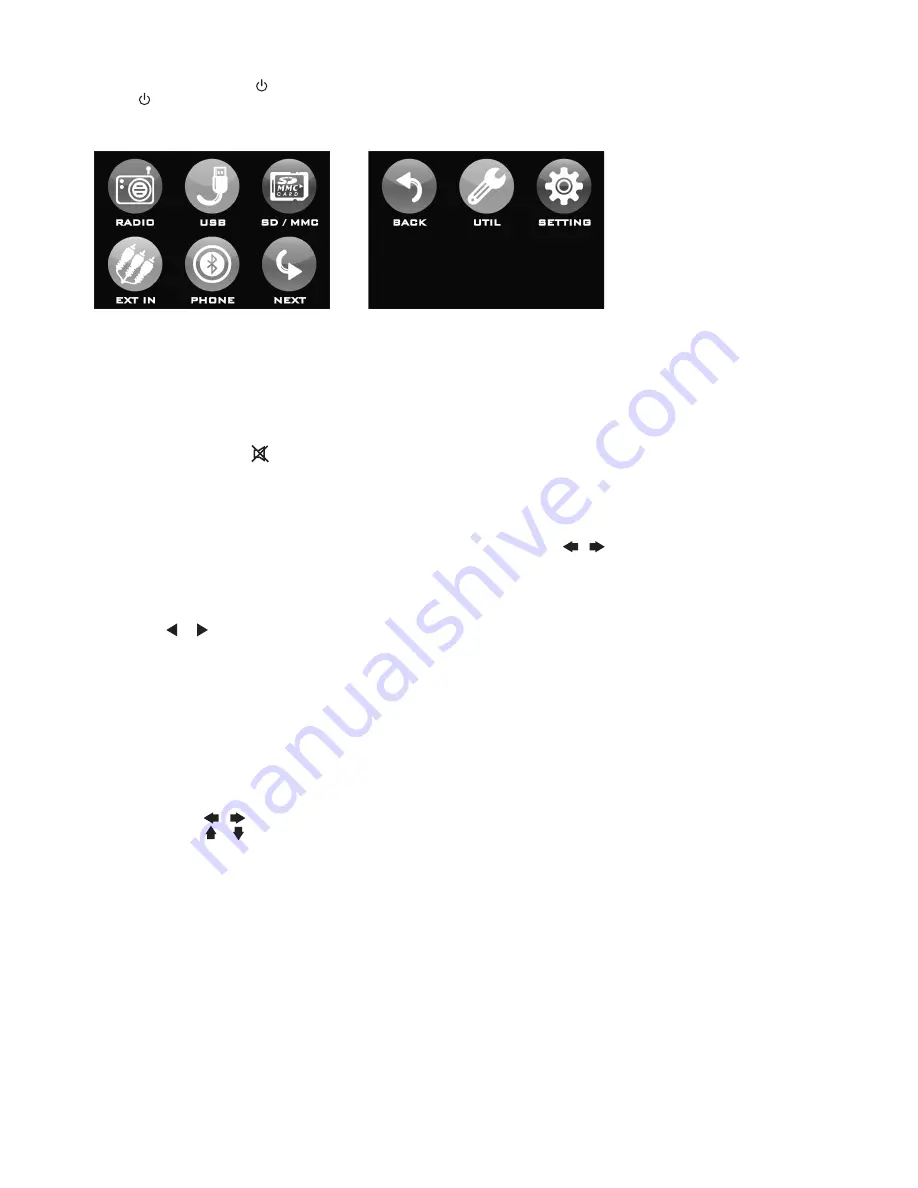
MAIN MENU
This is the root of the screen hierarchy and you can simply access all features by tapping on the touch screen buttons.
Selecting a source (MODE)
Press
MODE
repeatedly to switch between TUNER, AUX IN, USB, SD/MMC or BLUETOOTH (if Bluetooth is connected) mode.
Adjusting Volume
• Head Unit: Rotate
VOL
knob right or left to increase or decrease volume.
• Remote Control: Press
VOL+ or VOL-
to increase or decrease volume.
Mute Button
• Head Unit: Press
MUTE
button to mute the sound at once. Press again to return to previous volume level.
• Remote Control: Press
button.
Loud Button (LD)
Press and hold
LD
button to turn on/off LOUD feature.
Equalizer (EQ)
Main Unit: On main menu, touch
SETTINGS > EQ SETTINGS
. Under
Dsp-preset
, select by touching the desired EQ setting.
Remote: Press
EQ
button. Under
Dsp-preset,
select the desired EQ by pressing (
/
).
CLOCK
To show clock, switch to
RADIO
mode and press
CLK
on remote control.
How to Set Clock
1. Press UTIL on main menu.
. Press (
/
) to set the time.
. Press
X
to save and exit.
DUAL SETTINGS
DUAL
is a feature that lets user listen to radio while the passenger at the back can watch video. This unit supports connection of
external AV device such as portable TV through the AUDIO OUT and VIDEO OUT port.
1. Connect the AUDIO OUT and VIDEO OUT port at the back of head unit to the LINE IN of external AV device.
. Press and hold
MODE
. Select memory card or USB source.
. Press
DUAL
key on remote control to select which mode you want to control.
T = TUNER, C = CARD, U = USB
Note:
You will need to connect an external portable TV or monitor when using this feature.
VIEWING PHOTO
1. Insert disc, USB memory stick or SD/MMC card containing picture file format.
. Using remote
(
/
)
, select PHOTO function and press
ENTER
.
. Using remote
( / )
, select a file to view and press
ENTER
.
Note:
Press
MENU
on remote control to exit photo playback.
Press
MENU
on remote control will also go back one level or return to previous menu.
RESET
Reset button is placed on the housing. To reset, use a sharp point object and press and hold the
RESET
button for seconds.
The reset button is to be activated for the following reason:
• Initial installation of the unit when all wiring is completed.
• All the function buttons does not operate.
• Error symbol on the display.
LISTENING TO RADIO
Band (BD)
Pressing this key repeatedly will toggle cyclically between each band. FM1---FM---FM.
Automatic or Manual tuning (SEEK + / SEEK –)
When pressed short, these keys are operated as MANUAL tuning mode.
When pressed longer than 1 sec., they are operated as AUTOMATIC tuning mode.
Summary of Contents for RMD 310BT
Page 1: ......


