background image

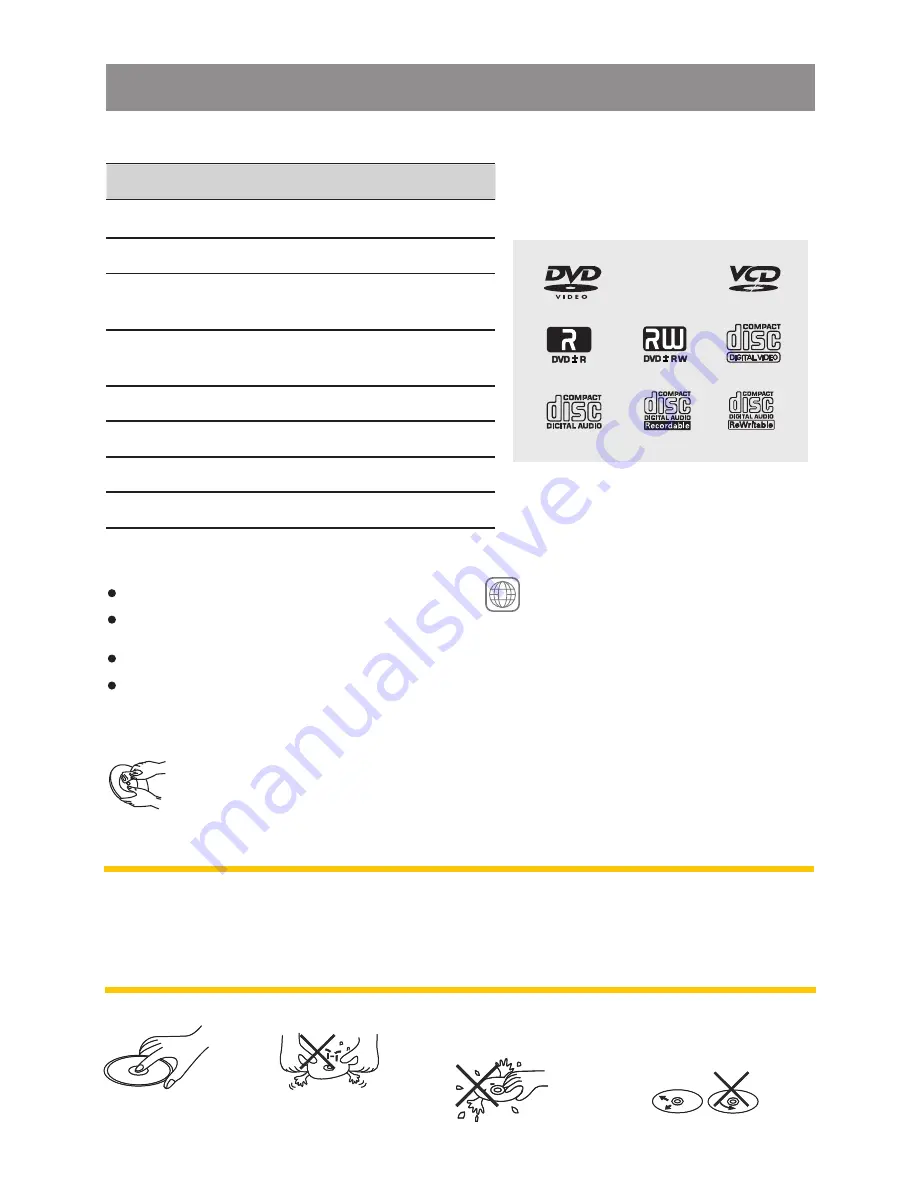
Discs can play with this unit

ALL

8 cm Disc
CDV, CDI, CDG,

LD
DVD RAM

Discs which can not be played

DVD  players  and  DVD 
Video  discs  have  their 
o w n   R e g i o n   C o d e  
numbers.  This  unit  can   
play the disc of all region 
code numbers.

Note on region code

Before playing, wipe the disc using a clean cloth, working 
from the center hole towards the outside edge.Never use 
benzene, thinners, cleaning luids or antistatic liquids or any 
other solvent.

Disc maintenance

Note:

 A  disc  may  become  somewhat  scratched  (although  not 

enough  to  make  it  unusable)  depending  on  you  handle  it  and 
conditions in the usage environment. Note these scratches are 
not an indication of any problem with the player.

Label side Up

Do not bend

Never touch the 
under side of a 
disc

Wipe the disc 

surface from the 

center to the edge.

Disc Can Supports

No. 

Content 

Digital Versatile Discs (DVDs)

Video CDs (VCDs)


Digital Versatile Discs 
Recordable(DVD+/-R)

Digital Versatile Discs 
Rewritable(DVD+/-RW)

Compact Digital Video (VCD)


Compact Discs (Cds)

CD Recordable (CD-R)

CD Rewritable (CD-RW)

Summary of Contents for MCD795

Page 1: ...In Car Navigation Media Player INSTRUCTION MANUAL MODEL NO MCD795 S U B W LOUD 1 2 3 4 5 6 OSD SET UP T R P R D M AS PS L RE MODE B ND A MUTE GPS MODE TA 4x75WATT MCD 795 ...

Page 2: ... accident or render safety devices ineffective Please refer to the instructions provided by the vehicle manufacturer Important Safety Information End user must read this section before operating this unit In all cases all applicable road traffic regulations must be obeyed DESTINATIONS MAY ONLY BE ENTERED WHEN THE VEHICLE IS STATIONARY The navigation system is only an aid Errors may occur in indivi...

Page 3: ...re beginning installation Important notes Before installing this navigation system Do not shorten any leads If you do the protection circuit fuse holder fuse resister or filter etc may fail to work properly Never feed power to other electronic products by cutting the insulation of the power supply lead of the navigation system and tapping into the lead The current capacity of the lead will be exce...

Page 4: ...oving video from Disc or AV In source but Parking Brake IS NOT PROPERLY CONNECTED the video signal will be blocked by the system and the below display will be shown on the unit screen Note The Video Blocking system under Parking Brake NOT ENGAGED only control this unit s display This system will not affect the Video Output thru the rear RCA Video Output Connecting the System About Parking Wire Rem...

Page 5: ...EO 2 OUTPUT RED WHITE YELLOW YELLOW VCR or DVD or GAME CONSOLE SUB WOOFER FUSE VIDEO INPUT GPS AERIAL GPS AERIAL SUB W OUT SUB WOOFER OUTPUT BLUE Connecting the System Wiring Diagram Audio Video Connections Note Please refer to the Installing the GPS Aerial For the proper mounting or installation of this GPS AERIAL ...

Page 6: ...EAR PRE AMPLIFIER LINE OUT ISO CONNECTOR 4 PIN 8 PIN FEMALE WITH MALE TERMINAL 20 PIN AUDIO POWER HARNESS See Figure 1 ISO CONNECTOR See Figure 2 GREY FRONT CHANNEL REAR CHANNEL BLACK Connect to power amplifier If not used Tape bare end of wire POWER AMPLIFIER REMOTE RCA TO RCA CABLES Not supplied WHITE RED WHITE RED 4 2 6 8 1 3 5 7 CONNECTOR B CONNECTOR A 4 2 6 8 1 3 5 7 Figure 2 20 PIN AUDIO POW...

Page 7: ...eanna aerial Make sure the surface is free of moisture dust grime oil etc before affixing the metal sheet Clamps Use clamps to secure the lead where necessary inside the vehicle Note The metal sheet contains a strong adhesive which may leave a mark on the surface if it is removed GPS aerial Metal sheet Clamp 5 pcs Waterproof pad Description Setting Parts Supplied When installing the aerial inside ...

Page 8: ...ellite is blocked Installation on the vehicle roof or boot lid is recommended to optimism reception When installing the GPS antenna aerial inside the vehicle be sure to use the metal sheet provided with your system If this is not used the reception sensitivity will be poor Do not cut the accessory metal sheet This would reduce the sensitivity of the GPS aerial Installing the GPS Antenna Aerial End...

Page 9: ...le wash If it is left on the outside it may be knocked off and scratch the vehicle body Put the GPS aerial in a position as level as possible such as on the roof or boot lid The GPS aerial is fastened with a magnet Clamps Use clamps to secure the lead where necessary inside the vehicle GPS antenna aerial When routing the lead in from the top of the door Make a U shaped loop in the lead on the outs...

Page 10: ... inwards to secure the holder in place 3 Screw Be sure to remove the front panel before installing the unit Use only the parts included with the unit to ensure proper installation The use of unauthorized parts can cause malfunctions or permanent damage to the unit Consult with your nearest dealer if installation requires the drilling of holes or other modifications of the vehicle Install the unit ...

Page 11: ...the desired angle 7 Plain washer No Content 1 Frame 2 Insert fingers into the groove in the front of frame and pull out to remove the frame When re attaching the frame point the side with a groove down wards and attach it 3 Insert the levers supplied with the unit into the grooves at both sides of the unit as shown in figure until they click Pulling the levers makes it possible to remove the unit ...

Page 12: ...tached Din rear mount method B Installation using the screw holes on the sides of the unit Fastening the unit to the factory radio mounting bracket 1 2 3 5 2 4 3 2 5 No Content 1 Select a position where the screw holes of the bracket and the screw holes of the main unit become aligned are fitted and tighten the screws at 2 places on each side 2 Screw 3 Factory radio mounting bracket 4 Dashboard or...

Page 13: ...or subject it to strong shocks When the release button is pressed and the D F P is unlocked the car s vibrations may cause it to fall To prevent damage to the D F P always store it in a protective case after detaching it The rear connector that connects the main unit and the D F Pis an extremely important part Be careful not to damage it by pressing on it with fingernails pens screwdrivers etc Det...

Page 14: ...lly slide up after disc has been reloaded Caution If the ejected disc remains in the slot the Open button will not function so closing the panel by using Open button is prevented unless the disc is removed or reloaded Panel angle Adjustment End user can adjust the panel viewing angle of the display to obtain the optimum viewing angle inside the vehicle There are TWO angles can be adjusted by Long ...

Page 15: ...e SD Card slot on main unit 1 2 Detach the Front Panel 1 2 R S T E E Insert the Memory Card with Label up side into the SD Card slot behind the front panel Overview the Unit After releasing the front panel use a pencil or any non metalic object to press hold the reset button for five seconds to reset the unit Front panel main control SD Card slot for MEDIA PLAYER SD Card slot for DIGITAL MAP or SO...

Page 16: ...y other solvent Disc maintenance Note A disc may become somewhat scratched although not enough to make it unusable depending on you handle it and conditions in the usage environment Note these scratches are not an indication of any problem with the player Label side Up Do not bend Never touch the under side of a disc Wipe the disc surface from the center to the edge Disc Can Supports No Content 1 ...

Page 17: ...emory Card Note of the MPEG4 Formats Can Playback Supported decoding MPEG4 video defined by ISO 14496 2 Standard A Simple Profile SP B Advance Simple Profile ASP Supported file format MP4 and M4A audio only Note of MP3 and WMA Support Maximum 2000 files Maximum 30 characters display Supported Sampling frequencies 32kHz 44 1kHz 48kHz Supported Bit Rates MP3 8 320kbps variable bit rate WMA 32 192kbp...

Page 18: ...ile NO Access File NO Access Numeric 2 Numeric 3 Numeric 4 Left Right Up Down Left Right Up Down Stop Stop Stop Volume Down Fast Forward Fast Forward Fast Backward Fast Backward Fast Backward Memory 2 Memory 3 Memory 4 Short Press Long Press Short Press Long Press Short Press Long Press Short Press Long Press Loud AF Angle Audio Menu System Menu Angle Angle Angle Angle UTE M VOLUME SRC AUDIO GOTO ...

Page 19: ...s File NO Access Track NO Access File NO Access Numeric 6 Numeric 7 Numeric 8 M5 Track NO Access File NO Access Numeric 5 Memory 5 Memory 6 VCD PBC OSD GoTo Subtitle Title DVD Audio Zoom Set Up DVD DVD MENU Repeat Track Repeat Disc Repeat Off Repeat Chapter Repeat Title Repeat Off NAVI Voice Volume NAVI Voice On Off TA DVD Angle Remote Control Operations UTE M VOLUME SRC AUDIO GOTO LOUD NAVI VOICE...

Page 20: ...ious level 2 Encoder Volume Button To increase the volume rotate the volume control knob clockwise To decrease the volume rotate the volume control knob counter clockwise When the volume is adjusted the volume level will be shown on the screen General Operations Tip The navigation voice guidance level is adjustable Please refer to page Navigation Operation_Hightlight Features for more details 3 Ej...

Page 21: ...ess into AV In mode Enter into the Setting menu End user can adjust the panel viewing angle of the display to obtain the optimum viewing angle inside the vehicle There are TWO angles can be adjusted by Long pressing the panel Eject Open button 1 1st long press to get into Angle 1 2 2nd long press to get into Angle 2 3 3rd long press to resume to the normal position Main Menu GPS Tuner Media Player...

Page 22: ... can be adjusted by pressing the NAVI VOICE button and When display on screen there is around 10 seconds time out to adjust the desired sound level by rotating the encoder volume knob This unit will automacitally MUTE the audio output of the Media player when there is announcement from the navigation voice guidance This function can be activated or deactivated by tapping on the screen or NAVI AF F...

Page 23: ...matically store preset scan AS PS Automatically select 6 strongest stations and store them in the current band Long press panel AS PS button for more than 3 seconds the new stations replace stations already stored in that band To Scan the stations already stored in the current band Short press panel AS PS button for less than 3 seconds the unit will pause for 10 seconds at each preset station Pres...

Page 24: ...t TP Traffic program The unit is equipped with the following RDS function RDS Function Tuner operations 8 TA Function Short pressing panel GPS MODE TAbutton less than 3 seconds to switch on TA standby mode The TA icon will light up on the screen In the stand by mode when a traffic announcement broadcast starts the traffic announcement broadcast will be received as top priority regardless of the fu...

Page 25: ...ctivate the searching of this PTY the PTY name will appear on the 6 preset buttons If no station with the selected PTY broadcast can be found for 5 seconds the system then returns to the previous mode POP M ROCK M EASY M LIGHT M CLASSICS OTHER M GROUP 1 NEWS AFFAIRS INFO SPORT EDUCATE DRAMA GROUP 2 SCIENCE WEATHER FINANCE CHILDREN CULTURE VARIED GROUP 3 RELIGION TRAVEL LEISURE DOCUMENT SOCIAL PHON...

Page 26: ...ed to not allow watching moving video while driving Park your car in a safe place and engage the parking brake before watching moving video 2 Aceess to MAIN MENU and tap MEDIA PLAYER Tap the following buttons to start playing the desired media sources Note If watch moving video from Disc or AV In source but Parking Brake IS NOT PROPERLY CONNECTED the video signal will be blocked by the system and ...

Page 27: ...Mode switch or on the touch screen Note This unit only can playback the SD Card which is inserted in the main unit Please refere to the page Overview of the unit for more details of the SD card slot for media player use Tapping touch screen button to access into the DVD video color setting The below Set Up menu will appear Color setting during DVD video disc playback RESET X COLOR BRIGHTNESS CONTR...

Page 28: ...VI VOICE guidance ON or OFF Switch TFT display mode between GPS Map to Media Player End user can switch the TFT display between the playback mode and GPS NAVIGATION MAPscreen by following 1 Short pressing the GPS MODE button on panel 2 Taping on the touch screen button Navigation Voice Guidance on or off under Media Player playback Navigation While Media Player Playback This unit will automacitall...

Page 29: ...on to pause the playback Press PLAY PAUSE again to resume the playback 1 Pause Play Fuction Press the TRACK FILE UP 7 TRACK FILE DOWN 8 button or touch screen 7 8 for less than 1 second to move to the next or previous track on the CD The selected track number will appear on the screen Press and Hold TRACK UP 7 TRACK DOWN 8 button or touch screen 7 8 for more than 1 second to fast forward or fast r...

Page 30: ...ancelled and the unit is now in full stop mode If PLAY button is pressed now it will play from the beginning RESUME function is suitable for discs showing playing time during playback Press STOP twice state changes play resume stop full stop 2 Stop Function 7 8 Fast Forward Fast Reverse Press FAST FORWARD FAST REVERSE button during play back the disc will fast forward or backward in different time...

Page 31: ...e displayed on TV or monitor In PBC list use number button to select a track to play or direction press PLAY button to start to the playback OSD VCD SVCD CD OSD information item Press OSD state change st nd rd 1 OSD 2 OSD 3 OSD OSD off st 1 OSD nd 2 OSD rd 3 OSD 1 OSD st Time Repeat PBC Play Mode L R Stereo Track 2nd OSD Disc Time Current Disc Time Remain Disc Time 3rd OSD Track Time Current Track...

Page 32: ...ermine the attribute you selected File attribute selection Press on remote control or tap touch screen button to move the cursor to folder or file domain By pressing number key to select the song you want to play then press OK button on remote control or tap touch screen key to play the selected song Also you may press PREV 8 or NEXT 7 key to play the previous or the next song while play and pause...

Page 33: ...touch screen button to move the cursor Press OK button on remote control or tap touch screen button to confirm the selection OSD MMN Video OSD information item Press OSD state change st nd rd 1 OSD 2 OSD 3 OSD OSD off st 1 OSD nd 2 OSD rd 3 OSD 1 OSD st File Time Repeat Folder Audio 2nd OSD Subtitle 3rd OSD Title Time Current File Time Remain File Time Frame Size Play mode Media Player ...

Page 34: ...has been shown Press STOP button or tap touch screen button to stop the slide show mode MMN IMAGE View Slide ENTER STOP MMN IMAGE View Rotate By using the the picture or photo can be shown in different angle and press on remote control or tap touch screen key to switch among these angles Rotate angle Rotate function Rotate 0 Rotate 90 Rotate 180 Rotate 270 Media Player ...

Page 35: ...VD Disc Operation Media Player Tip When the DVD Menu or Root or Title is show on the screen end user can use remote control or tap touch screen button to move the cursor and the button as OK button Press PLAY or touch screen to resume normal playback Press PAUSE or touch screen to single step forward to the next picture in the video DVD and VCD only S U B W LOUD 1 2 3 4 5 6 OSD SET UP T R P R D M ...

Page 36: ...s to change from repeat off repeat title 5 DVD Audio Press DVD AUDIO you can choose audio streams if the DVD disc or AVI MPEG4 has multi audio streams Media Player 2 Stop Function Press STOP or touch screen button to stop playback and show the logo screen The player will memorize the last position where playback is stopped Pressing STOP twice or touch screen to resume playback from the beginning o...

Page 37: ...nt song MP3 WMA or current video file AVI MPEG4 MPG DAT from the beginning if the already played time is less than four seconds If already played time is more than four seconds Pressing PREV button will skip a chapter DVD a track VCD SVCD CD a song MP3 WMA a picture JPEG or a video file AVI MPEG4 MPG DAT backwardly 8 PREV Function Number 0 9 On Remote Control By pressing the Number 0 1 2 3 4 5 6 7...

Page 38: ...e disc 9 DVD OSD D Short Press AS PS button twice to display the disc type current chapter DVD or track VCD SVCD Audio CD and total number of chapters or tracks Also displayed for DVD only the current title total number of titles audio language type of channels subtitle language and angle selection Press the SET UP button on the remote control or long press the AS PS button for more than 3 seconds...

Page 39: ... the buttons to change among the available language Press Ok or touch screen to cycle through each possible option or display a list of the available options Language Setting OSD language The OSD language setting provide the end user the selection of preferred language for the OSD menu and messages The following options are available Media Player ...

Page 40: ...age and to change the subtitle language setup Audio The Audio setting allows the user to select a preferred language and to change theAudio language setup Disc The Disc setting allows the user to select a preferred language and to change the Disc menu language setup Media Player ...

Page 41: ...isplay Setting Use the buttons to select the setting Use the buttons to change among the avaitable settings Press Ok or touch screen to cycle through each possible option or display a list of the available options TV Dispaly The Display setting allows the user to select the TV display The following options are available Media Player ...

Page 42: ...TV Type The Display setting allows the user to select the TV type The following options are available Angle Mark The Display setting allows the user to select theAngle mark on off mode Media Player ...

Page 43: ...h screen buttons move to the Audio button The list of Audio optional will appear as follow Audio Setting Use the buttons to select the setting Use the buttons to change among the avaitable settings Press Ok or touch screen to cycle through each possible option or display a list of the available options Media Player ...

Page 44: ...nalog output of this Player Dual Mono The Audio setting allows the user to select the Dual mono and set dual mono 1 1 setup stereo output of this Player Dynamic The Audio setting allows the user to select the Dynamic and set the dynamic sound output high volume outputs are softened Media Player ...

Page 45: ...elect the setting Use the buttons to change among the avaitable settings Press Ok or touch screen to cycle through each possible option or display a list of the available options Change Password This feature is used for Parental Control Enter your four digit password when a hint is displayed on the screen Parental Setting Media Player ...

Page 46: ...sage will appear Wrong Password To re enter the correct password end user need to move to Password again and try again Enter Once entered the correct password press OK or touch screen and the correct password message will appear Media Player ...

Page 47: ...atching the no match message will appear Passwords do End user should try to re enter the password again and press the OK or touch screen to confirm Parental Level This function is to enter the Parental level control setup Media Player ...

Page 48: ...ouch screen to enter the password If the password is not correct the message will appear Wrong Password End user should try to re enter the correct password again and press the OK or touch screen to confirm Media Player ...

Page 49: ...nction will reset all options and your personal settings to the factory defaults and all your personal settings will be erased Press the OK or touch screen to confirm the selection Use the buttons to select the setting Media Player ...

Page 50: ...IN Mode Select the AV mode 2 Aceess to MAIN MENU and tap AV Mode Tap the following buttons to start playing the desired media sources button to start the Navigation mode button to activale the Navigation Voice guide Button to set the color preference Button to quit the player Note If watch moving video from Disc or AV In source but Parking Brake IS NOT PROPERLY CONNECTED the video signal will be b...

Page 51: ...u will appear Tap button on setting menu screen to access into the sound setting menu the below menu will appear for selection Control Left and Right Speaker Balance Front and Rear Speaker Fader Bass Level Setting Treble Level System Setting Operation Sound Setting Setting Settings Balance R 10 Fader F 10 Treble 05 Bass 05 ...

Page 52: ...Tone Sub Woofer Output Setting Tap bar on the sound setting menu screen to turn on or off of these functions Note Tap button to be return to the previous page Tip Tap button to exit the sound setting menu Tap button on the sound setting menu screen to select the level On Off System Setting Operation ...

Page 53: ...ton on the Display Setting menu screen to select the level Date Time Setting Tap bar on the Display Setting menu screen to access into the Date Time menu the below menu will appear Tap button to select the Year Month Day of the Date mode and Hour Min of the Time mode then tap button to change the date time Display Setting System Setting Operation ...

Page 54: ...es to another position tap and hold at the center of the new target Repeat each time to complete the calibration process Once completed tap anywhere on screen to go back to menu screen Note This Calibration is for the display touch screen If found the touch screen buttons sensitive became low the re calibration is necessary System Setting Operation ...

Page 55: ...A Asia LatinAmerica Setting Tap button to change the setting Tuner Setting Radio Local Set the unit to select only strong local stations during automatic tuning Distant Allowing the radio to stop at a broader range of signals Note End user should make sure to select the Tuner FrequencyArea which is correct for his area region Otherwise radio will not perform correctly System Setting Operation ...

Page 56: ...ry card or in the built in internal memory Important To activates run the Digital Map on the SD Card End user must switch off the GPS Navigation Access to GPS Navigation_Main Menu and tap to switch off the GPS Navigation After switched off the GPS Navigation end user then tap This time re entry to GPS Navigation the system is automatic run the Map which stored on SD Card Tap as the confirmation of...

Page 57: ...e This unit is pre loaded with digital map inside the INTERNAL BUILT IN FLASH MEMORY Please refer to page Navigation Operation _ Digital Map for more details Note This unit ONLY CAN ACCEPT RUN those digital map purchased from authorized dealers agents Any non authorized digital map CANNOT BE USED on this unit Note End user can purchase the authorized digital map and store it into SD Memory Card Sy...

Page 58: ...information screen as follow These information may different from unit to unit System Information System Information OS Version v06 01 20 Processor SAMSUNG ARM 920T S3C2443 400MHz MemoryTotal 46752 KB 29988 KB 980 KB v01 03 00 08 07 08 v01 03 03 RAM free Storage free SW Version RadioVersion Serial Num System Setting Operation ...

Page 59: ...h the upgrade files stored before proceeding with the upgrade and then tap on desired upgrade feature button in Upgrade mode Tap button on the upgrade settings screen to access into the Map upgrade menu the below menu will appear Map Upgrade Setting Upgrade Setting Upgrade Settings APP MAP APP MAP System Setting Operation ...

Page 60: ...r end user whenever there is a newest version of digital map released by the authorized dealers agents and End User can upgrade the new digital map to the internal memory as the default map Before making the Map Upgrade please make sure this unit s internal memory size is big enough for loading the new digital map To check the internal memory size for digital map please refertosection NavigationOp...

Page 61: ... upgrade menu the below menu will appear System Upgrade Setting Note System Upgrade should only be performed by approved sevice center or techinal support from authorized dealer End user should never try to System Upgrade the unit by themselves System Setting Operation ...

Page 62: ... card Click 1 Detach the Front Panel 2 Push in till heard a click Remove the Memory Card 3 Removing the SD or MMC card on the main unit After a SD or MMC card was inserted into the main unit card slot Press panel Mode button or tap touch screen to select card mode The unit will starts playing the files contained on the Memory Card Once the unit read the Memory Card successfully the first file on t...

Page 63: ... Caution Before removing the USB stick from the USB connector Please always remember to switch off the unit s power or switch to other mode then unplug the USB Stick Never try to remove the USB Stick while playing music file on the USB stick It may damage the USB Stick and sometimes will caused the unit system to lock up Note About Music Flash Player with USB Interface usually the unit takes longe...

Page 64: ...route The Global Positioning System GPS uses a network of satellites orbiting the Earth Each of the satellites which orbit at a height of 68 900 000 feet 21 000 km continually broadcasts radio signals giving time and position information This ensures that signals from at least three can be picked up from any open area on the earth s surface The accuracy of the GPS information depends on how good t...

Page 65: ...nels or enclosed parking garages Under elevated roads or similar structures Navigation Operation To receive GPS signals successfully You have a clear sight of sky The weather is good enough GPS signal is weaker in bad weather conditions The time needed for establishing a GPS connection ranges from seconds to minutes You are outdoor The GPS antenna is not covered When the positioning by GPS is impo...

Page 66: ...on of the GPS signal the actual position of your vehicle may differ from the position displayed on the map screen If you make a slight turn If there is a parallel road If you take a recently opened road that is not on the map Navigation Operation ConditionsLikelytoCauseNoticeablePositioningErrors ...

Page 67: ...connected hairpin bends If there is a loop or similar road configuration If you take a ferry If you are driving on a long straight road or a gently curving road If you are on a steep mountain road with many height changes Navigation Operation ...

Page 68: ... lar structure If your vehicle s wheels spin such as on a rough track or in snow If you put on chains or change your tyres for ones with a different size If trees or other obstacles block the GPS sig nals for a considerable period If you drive very slowly or in a start and stop manner as in a traffic jam Navigation Operation ...

Page 69: ... after start ing the engine If you turn your navigation system on while driving Some types of vehicles may not output a speed signal while driving at just a few kilometres per hour In such a case the current location of your vehicle may not be displayed correctly while in a traffic jam or in a car park Navigation Operation ...

Page 70: ...Ireland San Marino Spain Sweden Switzerland The Netherlands United Kingdom Yes Yes Note End ser can purchase the authorized digital map and stored it into SD Memory Card This unit ONLY CAN RUN THE AUTHORIZED DIGITAL MAP PURCHASED FROM AUTHORIZEDAGE NT OR DEALER on SD card Tips Please refer to page SETTING _ Run GPS Map for details on how to run the digital map on SD Card Note This unit ONLY CAN AC...

Page 71: ...e below instruction carefully before operating the unit 1 First power on the unit by pressing the POWER MUTE button 2 There are several ways to get into the GPS NAVIGATION MODE When in the Tuner Radio mode end user can press on the button ON THE TOUCH SCREEN to get into the GPS NAVIGATION MODE AF FM1 104 00 FMSELECT 10 30 am Band 87 50 106 00 108 00 90 00 98 00 87 50 When in Media Player mode CD D...

Page 72: ...S NAVIGATION MODE 3 Unit should start to load the GPS NAVIGATION SOFTWARE If the GPS NAVIGATION has not been activated before or the GPS NAVIGATION is not in used and the ATTENTION SCREEN should appear Sometimes the loading of the GPS NAVIGATION SOFTWARE may take a while but this is normal End user should read the ATTENTION CONTENT CAREFULLY before pressing the ACCEPT button When in AV IN Mode end...

Page 73: ...M of this unit Find Go Map Cockpit Settings About Exit No GPS signal 2005 05 27 12 05 5 For the details operation of the GPS NAVIGATION SYSTEM of this unit please refer to the GPS NAVIGATION SYSTEM USER MANUAL provided together with this unit Tips End user can switch to GPS NAVIGATION MODE or GPS MAP SCREEN at any time in any mode by pressing the GPS MODE button on the front panel And pressing thi...

Page 74: ...vigation Voice Guidance Volume level control The sound level of the navigation voice guidance is adjustable by press the NAVI VOICE button and When display on screen there is around 10 seconds time out to adjust the desired sound level by rotating the encoder volume knob Tips This sound level adjustment will not affect the Tuner or Media Player volume level Tips Long pressing NAVI VOICE button can...

Page 75: ...ration S N Ratio 87 5 108 0 MHz 50 kHz Space 15dB at S N 30 dB 25 dB at 1KHz 50 dB Specification Operating Voltage Grounding System Fuse OperatingTemperature Unit MountingAngle DC 11 14 4V Negative Ground 15 Amp MiniATMType 0 C to 50 C 30 AM or MW Frequency Range Usable Sensitivity S N Ratio 522 1620 Khz 9 kHz Space 40dB at S N 20dB 40 dB General TFT Screen Radio ...

Page 76: ...e 1 0 Vp p 0 2 75 ohm Composite 1 0 Vp p 0 2 75 ohm Max Output Power Load Impedance speakers Digital Output Line out level load Line out Impedance 75W x 4 channels 4 ohms 900mV 400mV 10k ohm load 200 ohm Frequency response Input Maximum Voltage Input Impedance 20Hz to 20KHz 3dB 1200 mV 4 7k ohm DVD CD Compatible Disc Format Signal to Noise Ratio Dynamic Range Frequency Response Channel Separation ...

Page 77: ...lume is in minimum Adjust volume to a desired level Wiring is not properly connected Check wiring connection The operation keys do not work No sound The built in microcomputer is not operating properly due to noise Press the RESET button Front panel is not properly fixed into its place Sound skips The installation angle is more than 30 degrees Adjust the installation angle to less than 30 degrees ...

Reviews: