


– 7 –
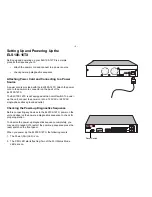
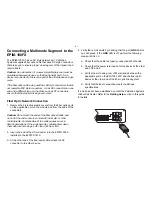
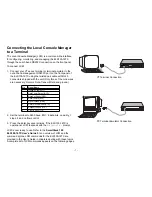
Connecting the Local Console Manager
to a Terminal
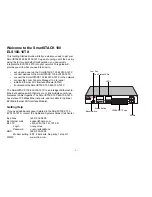
The Local Console Manager (LCM) is a command-line interface
for configuring, monitoring, and managing the ELS100-16TX
through the out-of-band RS232C connection on the front panel.
To connect LCM:
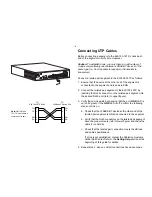
1. Connect your VT series terminal or terminal emulator to the
out-of-band management RS232C port on the front panel of
the ELS100-16TX using the twisted pair cable with RJ45
connectors shipped with the unit. (Only three of the nine wires
are necessary: Receive Data, Transmit Data and ground.)
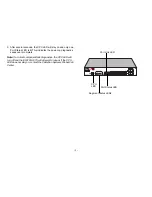
2. Set the terminal to 9600 baud, 8N1: 8 data bits, no parity, 1
stop bit, and no flow control.
3. Press the Enter key several times. If the ELS100-16TX is
operational, LCM responds with the
ELS100-16TX >
prompt.
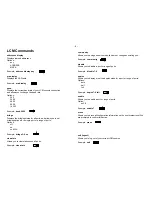
LCM is now ready to use. Refer to the
SmartStack 100
ELS100-16TX User’s Guide
for an overview of LCM and the
command syntax. LCM commands for the ELS100-16TX are
provided in the User’s Guide in chapters dealing with those topics.
A complete list of LCM commands appears on the following pages.
Pin
Signal Name
1
Transmit Data (XMT)
2
Data Carrier Detect (DCD)
3
Data Set Ready (DSR)
4
Receive Data (RCV)
5
Signal Ground (GND)
6
Data Terminal Ready (DTR)
7
Request to Send (RTS)
8
Clear to Send (CTS)
PWR
CPU
RESET
COM
PORT STATUS MODE
TX
ACT
FDX MON
RX COL
100 USR
STATUS
ELS100-16TX
EPIM100
EPIM100
10X 12X 14X 16X
9X 11X 13X 15X
2X 4X 6X 8x
1X 3X 5X 7X
LINK
STATUS
LINK
STATUS
2
4
6
8
10 12 14 16
1
3
5
7
9 11 13 15
PWR
CPU
RESET
COM
PORT STATUS MODE
TX
ACT
FDX MON
RX COL
100 USR
STATUS
ELS100-16TX
EPIM100
EPIM100
10X 12X 14X 16X
9X 11X 13X 15X
2X 4X 6X 8x
1X 3X 5X 7X
LINK
STATUS
LINK
STATUS
2
4
6
8
10 12 14 16
1
3
5
7
9 11 13 15
VT Terminal Connection
PC Terminal Emulator Connection


