background image

24

13) PROGRAMMING

The programming of the various functions of the control unit is carried out using the LCD display on the control unit and setting the desired values in 
the programming menus described below.
The parameters menu allows you to assign a numerical value to a function, in the same way as a regulating trimmer.
The logic menu allows you to activate or deactivate a function, in the same way as setting a dip-switch.

13.1) TO ACCESS PROGRAMMING

1 -Press the <PG> button to enter the first Installation menu “INST”.
2 -Choose with <+> or <-> button the menu you want to select
3 - Press the button <PG>, the display shows the first function available on the menu.
4 - With the <+> or <-> button, select the function you want.
5 - Press the button <PG>, the display shows the value currently set for the function selected.
6 - With the <+> or <-> button, select the value you intend to assign to the function.
7 - Press the button <PG>, the display shows the signal “PRG” which indicates that programming has been completed.

13.2) PROGRAMMING NOTES

Simultaneously pressing <+> and <-> from inside a function menu allows you to return to the previous menu without making any changes. Hold down 
the <+> key or the <-> key to accelerate the increase/decrease of the values.
Hold down the <+> key or the <-> key to accelerate the increase/decrease of the values.
After waiting 120s the control unit quits programming mode and switches off the display.
When the board is switched on, the software version is displayed for around 5 sec  
The pre-set  logic functions and parameters are made taking account of a typical installation. 

14) PARAMETERS, LOGICS AND SPECIAL FUNCTIONS

The following tables describe the functions available on the control unit

14.1) INSTALLATION (

INST

)

MENU

FUNCTION

MIN-MAX-(Default)

MEMO

BOOM

Select the length of the boom installed on the barrier.
Value expressed in meter from 3m to 5m (all RB.400/RB.500 models) or from 7m to 8m (other 
models)
According to the selected boom length, the optimal value of speed will be set.

3/5 -7/8 (7-8)

Pos

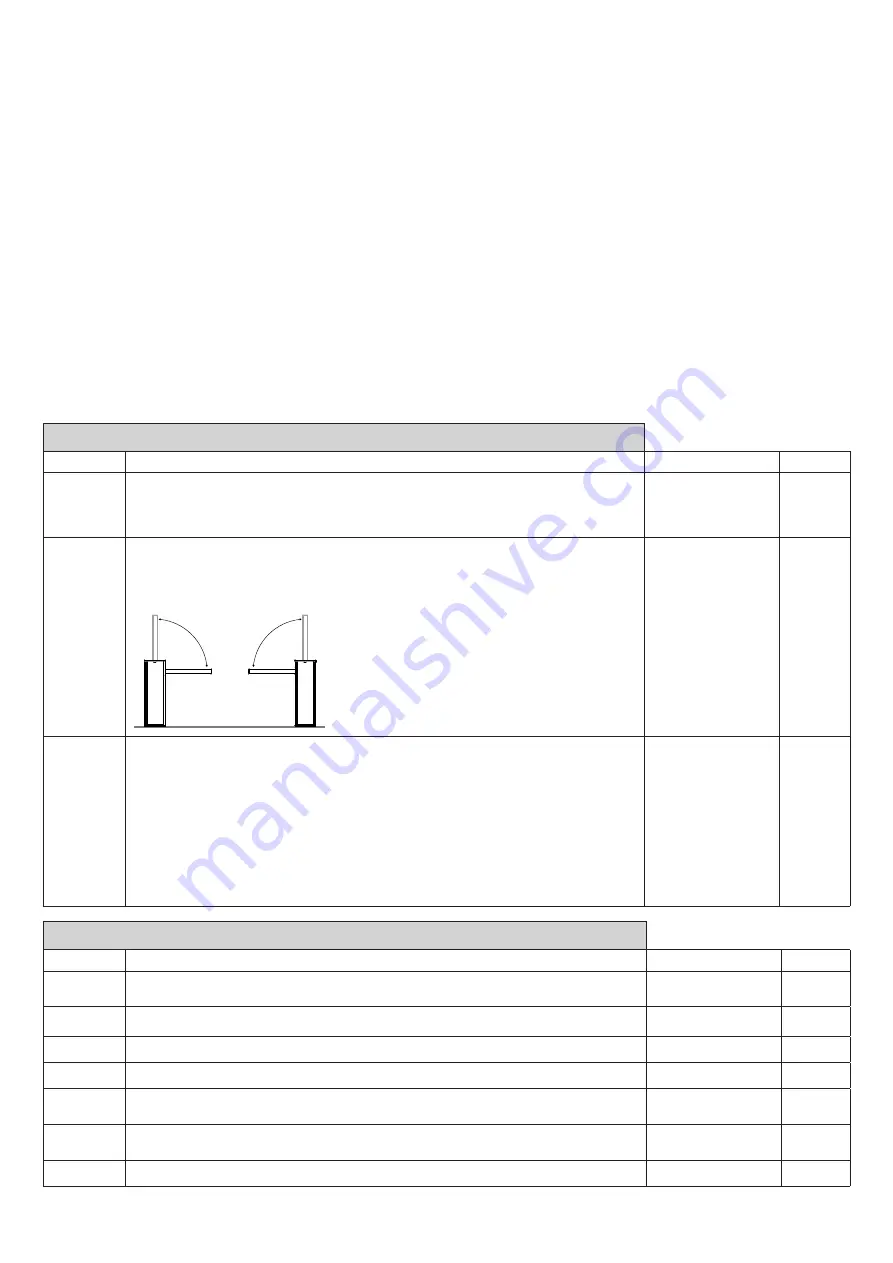
Set the closing direction of the barrier.
The symbol 

0--- 

indicates right barrier (R/RIGHT) DEFAULT

The symbol 

---0 

indicates left barrier (L/LEFT)

Verify the opening direction of the boom and in case reverse it. Every change of this func-
tion automatically implies the starting of a new AUTOSET procedure.

RIGHT

(STANDARD)

            LEFT

0---  

= RIGHT

---0  

= LEFT

( RIGHT )

Mode

Select the use mode of the barrier.

Norm

: Standard operating mode, for barriers used in a residential/industrial environment and 

with normal traffic.

Parc

: Park operating mode, for barriers used in parking systems. In this mode, to promote 

transit of a high number of vehicles, the control unit automatically sets a specific configuration 
which includes:
1) Rapid closure enabled (SCL:ON) with time reduced from 3 to 0 seconds.
2) Automatic closure enabled (TCA:ON) which with rapid closure enabled causes, during the 
opening phase, immediate closure of the barrier as soon as the PHOT input is free.
3) During the closure phase, PHOT entrance activation stops the barrier, as soon as the PHOT 
input is free again, the barrier starts the closure manoeuvre.

Norm - Parc (Norm)

14.2) PARAMETERS (

PAR

)

MENU

FUNCTION

MIN-MAX-(Default)

MEMO

TCA

Automatic closing time. Enabled only with logic “TCA”=ON.
At the end of the set time, the control unit commands a closing maneuver .

1-240-(20s) 

FSTS

Adjusts the opening and closing speed of the barrier (standard speed, before the slowdown phase).

50-99-(99)

sldo

Adjusts the slowdown speed of the barrier during the opening phase* (Fig.9 -slow Open).

20-70-(50)

sldc

Adjusts the slowdown speed of the barrier during the closing phase * (Fig.10 -slow Close).

20-70-(50)

tsmo

Sets the starting point of the slowdown during the opening phase (Fig.9-  beginning of the slow 
Open). The value is expressed in seconds.

1-99-(20)

tsmc

Sets the starting point of the slowdown during the closing phase (Fig.10- beginning of the slow 
Close). The value is expressed in seconds.

1-99-(20)

PMO

Adjusts the motor torque applied to the barrier during the opening phase.*

1-99-(20)

Summary of Contents for RB.400

Page 1: ...L854300148 04 2019 rev 1 RB 400 RB 500 IT EN DE FR ES PL www latam us...

Page 2: ...2 222 40 324 1008 RB 400 MAX 4 0m RB 500 MAX 5 0m RB 400 MIN 2 0m RB 500 MIN 3 5m RB 400 MAX 4 2m RB 500 MAX 5 2m RB 400 MIN 2 2m RB 500 MIN 3 7m 1 2 C B A...

Page 3: ...3 3 320 135 222 200 E D F F A VE PS VE PS Kit VE PS Kit VE PS Kit VE PS Kit VE PS Kit VE PS Kit B C 4 M14x30 V ring V 60A...

Page 4: ...no automatismo Reset automation Reset des Automatismus R initialisation automatisme Reactivaci n del automatismo Przywr cenie dzia ania automatyzmu 5 Barriera destra Right barrier Schranke rechts Barr...

Page 5: ...5 8 G F G F D T 7...

Page 6: ...6 2 3 3x1 2x1 2x1 4 6 7 1 2x1 4x1 2x1 5 230 V 5 8 Mod VE AF VE AFS Optional 11 Slow down Close SLDC Slow down Open SLDo O C O C 9 10...

Page 7: ...ANT CLOSE P P U5 F3 MOT AUX 24V BLINK AUX2 COM SWO SWC STOP PHOT OPEN SHLD ANT CLOSE P P MOT AUX ANT M LAMP 24Vdc 24Vdc 500 mA CP LADY BAR LIGHT 24Vdc L LED 1 LED 2 F1 N SA 24V 100 250 Vac 2xDA BT2 Op...

Page 8: ...5 ok 7 8 ok 0 0 Mode ok Parc Norm PRG PRG PRG PRG PRG PRG PRG PRG PRG PRG PRG PRG PRG PRG PRG PRG tca fsts sldo sldc tsmo pmo pmc pso psc seav sear 20 99 50 50 20 tsmc 20 20 20 20 0 0 TLS 60 saso 0 s...

Page 9: ...isk PG Premere simultaneamente e Press simultaneously keys and Gleichzeitig und dr cken Presser simultan ment et Presionar simult neamente y Naciska jednocze nie i Selezionare il valore desiderato con...

Page 10: ...24Vac 24Vac COM NC NO RX TX 24Vdc COM AUX1 PHOT 24Vdc AUX1 AUX1 0004 tst1 on SCA PHOTOTEST AUX1 0000 AUX1 0003 24Vdc AUX1 SERVICE LIGHT L N 230Vac LAMP 24Vac LAMP Rel 24Vdc MASTER Menu BUS ID 0 SLAVE...

Page 11: ...ssaggio sia esclusivamente veicolare indispensabile prevedere l apposita segnaletica di divieto pedonale 2 DIMENSIONI Nella figura 1 sono indicate i principali ingombri della barriera RB 400 RB 500 Di...

Page 12: ...azione della VE RAST pregiudica l uso della SC RES e viceversa L installazione del kit luci RB400 L non influenza il bilanciamento dell asta 5 POSA DELLA PIASTRA DI FONDAZIONE OPZIONALE VE PS FIG 3 Do...

Page 13: ...ellula trasmettitore FTC 3 Fotocellula ricevente FTC 4 Lampeggianti RB400 L 5 Colonnina fotocellula per barriera RB400 COL 6 Gomma di protezione inferiore superiore RB400 P 7 Costa resistiva SC RES 8...

Page 14: ...tati i valori ottimali di velocit 3 5 7 8 3 5 Pos Impostare il senso di apertura della barriera Il simbolo 0 indica la barriera DESTRA DX RIGHT DEFAULT Il simbolo 0 indica la barriera SINISTRA SX LEFT...

Page 15: ...bilita o disabilita la funzione condominiale On funzione condominiale abilitata L impulso P P o del trasmettitore non ha effetto durante la fase di apertura Off funzione condominiale disabilitata OFF...

Page 16: ...il messaggio Err 2Ch Selezionando questa funzione la ricevente si pone in attesa Push di un codice trasmettitore da assegnare al secondo canale radio Premere il tasto del trasmettitore che si intende...

Page 17: ...e al valore di default 0000 IN CASO DI SMARRIMENTO DEL CODICE NECESSARIO RIVOLGERSI ALL ASSISTENZA TECNICA AUTORIZZATA PER IL RESET TOTALE DELLA CENTRALE 14 10 SINCRONISMO BUS MENU FUNZIONE id Imposta...

Page 18: ...li ingressi N O sono rappresentati dai segmenti orizzontali La modalit di lampeggio dei segmenti SW Open a barriera aperta e SW Close a barriera chiusa 20 MESSAGGI DI ERRORE Di seguito sono elencati a...

Page 19: ...with remote contact opening equal to or higher than 3mm must be provided on the power supply mains Make sure that before wiring an adequate differential switch and an overcurrent protection is provid...

Page 20: ...o carry out the force test as indicated by the European standard EN12445 see the limitations as per the standard EN12453 In case the passage is for vehicular use only it is necessary to foresee approp...

Page 21: ...E RAST interferes with the use of the SC RES and vice versa The installation of the RB400 L lights kit does not influence the balancing of the bar 5 INSTALLATION OF THE OPTIONAL FOUNDATION PLATE VE PS...

Page 22: ...unit CP LADY 2 Transmitting photocell FTC 3 Receiving photocell FTC 4 Blinking lights RB400 L 6 Bottom top rubber protection RB400 P 7 Resistive edge SC RES 8 Mod VE AF VE AFI accessory 12 CP LADY CO...

Page 23: ...odels According to the selected boom length the optimal value of speed will be set 3 5 7 8 7 8 Pos Set the closing direction of the barrier The symbol 0 indicates right barrier R RIGHT DEFAULT The sym...

Page 24: ...transmitter impulse has no effect during the opening phase Off condominium function disabled OFF ibca The multi flat function is enabled or disabled during the TCA counting On the bloc of flat functio...

Page 25: ...to this function If the code is valid it is memorised ad the OK message is displayed If the code is not valid the message Err is displayed ntx By selecting this function the LCD screen shows the numb...

Page 26: ...ck to the 0000 default value IF YOU LOOSE THE CODE PLEASE CONTACT THE AUTHORISED SERVICE CENTER FOR THE TOTAL RESET OF THE CONTROL UNIT 14 10 SYNCHRONIZATION BUS MENU FUNZIONE id Sets the synchronizin...

Page 27: ...es The N O inputs are represented by horizontal lines The flashing mode of the lines SW Open when the barrier is open and SW Close when the barrier is close 20 ERROR MESSAGES Some messages that are di...

Page 28: ...uitos omnipolar con distancia de apertura de los contactos igual o mayor que 3 mm Comprobar que entre el aparato y la red el ctrica general haya un interruptor diferencial y una protecci n contra sobr...

Page 29: ...0m como destacado en la Fig 1 En la barrera est n previstas unas predisposiciones para accesorios opcionales fotoc lulas selectores etc cubiertas con correspondientes tapas suministradas Ref A DATOS...

Page 30: ...de fundaci n haciendo referencia a las cotas indicadas Se suministran unos estribos a cementar Ref A que se fijan a la placa de fundaci nmediante las tuercas B y correspondientes arandelas C Comprobar...

Page 31: ...E AFI 12 CENTRAL DE MANDO CP LADY CONEXIONES EL CTRICAS En el cuadro siguiente se describen las conexiones el ctricas representadas en la Fig 13 SA 24V Bornes Funci n Descripci n L N GND Alimentaci n...

Page 32: ...gurarse desde 3 a 5 m para todos los modelos RB 400 RB 500 o desde 7 a 8 m para otros modelos Los valores ptimos de velocidad se configurar n en funci n de la longitud del poste seleccionado 3 5 7 8 7...

Page 33: ...m tico habilitado Off cierre autom tico deshabilitado ON IbL Habilita o deshabilita la funci n de comunidad On funci n de comunidad habilitada El impulso P P o del transmisor no tiene efecto durante l...

Page 34: ...v lido se almacena y aparece el mensaje Si el c digo no es v lido se muestra el mensaje 2Ch Al seleccionar esta funci n el receptor queda a la espera de un c digo transmisor que se asigna al segundo...

Page 35: ...digo al valor por defecto 0000 SI SE EXTRAV A EL C DIGO ES NECESARIO DIRIGIRSE AL SERVICIO T CNICO AUTORIZADO PARA QUE EFECT E EL RESTABLECIMIENTO TOTAL DE LA CENTRAL 14 10 SINCRONIZACI N BUS MENU FU...

Page 36: ...modalidad de parpadeo de los segmentos SW Open con barrera abierta y SW Close con barrera cerrada 20 MENSAJES DE ERROR A continuaci n se muestran algunos mensajes que se visualizan en la pantalla en c...

Page 37: ...abile contattare il vostro installatore o una ditta specializzata ed abilitata allo scopo Safety rules Do not stand in the movement area of the gate Do not let children play with controls and near the...

Page 38: ...y bezpiecze stwa Stara si nie przebywa w obszarze posuwu skrzyde Niedopu ci aby dzieci bawi y si sterownikami lub w pobli u skrzyde bramy W przypadku niew a ciwego funkcjonowania nie stara si samemu d...

Page 39: ...68 1 6 7 6 3 2 4 5 Ref RB 400 RB 500 Code Note 1 9686110 2 9686112 3 9686111 4 968601407 5 9686109 6 9686555 7 968601408...

Page 40: ...686183 968600647 9 9686248 9686248 10 968600915 968600915 11 9686181 9686181 12 6986184 6986184 13 9686666 9686666 14 9686190 9686190 15 9686191 9686191 16 9686192 9686192 17 9686193 9686193 18 968601...

Reviews:

Related manuals for RB.400