RX-4 User’s Manual -- Version 1.01
B
URK
Technology
22
3.
Now turn your attention to the RX-4 front panel, and the receiver module which is the source for the
E
ú
A
ú
S channel currently being monitored. Locate the adjustment access in the cover plate for that
receiver, a 0.1”-diameter opening labeled “Level,” to the right of the signal indicator (refer to “RX-4
Front Panel,” p. 4, if necessary).
Behind the adjustment opening, inside the module, is a one-turn pot (see “RX-4 Front Panel,” p. 4),
adjustable with a green Xcelite mini-screwdriver. Do not attempt to force a larger screwdriver into
the opening, or damage to the front panel or the pot itself may occur. Insert the screwdriver blade
until it meets the pot, rotate it slightly until it engages, then turn clockwise to increase output level,
counterclockwise to decrease.
4.
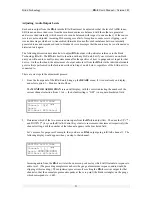
Observe the displayed audio gauge on the E
ú
A
ú
S screen as you turn the pot on the RX-4. Raise or
lower the output level until the gauge has the following appearance, consistently peaking at the zero
point:
MONITOR AUDIO CHAN
Channel: [ 1 ]
56
Level:|
3333333
0
|
ESC=Abort ENT=Select
This completes the adjustment for the selected channel.
5.
Now perform the adjustment in turn for each of the remaining RX-4 receivers connected to the
E
ú
A
ú
S. Use the UP (
5
) and DOWN (
6
) keys to select the proper channel and proceed from Step 3,
above. When you have adjusted the last RX-4 output, go on to Step 6.
6.
Determine which channel, if any, you wish to monitor in-studio. Step to the desired channel number
display (or to “OFF”) using the UP (
5
) and DOWN (
6
) keys. Press the ENT key to accept the
setting and exit to the READY menu. (If you press ESC instead, the monitor channel will revert to
its previously selected value, whatever that may have been.)
The E
ú
A
ú
S will continue to monitor that channel until it is explicitly reassigned, or until reception of
an EAS message (in which case monitoring will return to that channel once the message has been
processed).
One further note: where audio is looped-through, in a hot standby arrangement, and the audio is
squelched in the primary output channel, the level of standby audio coming through the primary channel
will be that of the backup unit.
Monitor Selection and Volume Adjustment
You can also monitor the RX-4 directly, through its own speaker. The Monitor Select switch cycles
through five selections when repeatedly pressed. The first position is OFF, in which no receiver is
monitored; successive pressings of the switch will select each receiver in turn, from #1 through #4, before
returning to OFF again. In the OFF state, none of the Monitor LEDs are activated; when a receiver is
selected, the correspondingly numbered Monitor LED lights to indicate that choice (see “RX-4 Front
Panel,” p. 4, for location of the switch , LEDs, and volume control).
Summary of Contents for RX-4
Page 2: ...RX 4 User s Manual Version 1 01 BURK Technology ...
Page 4: ...RX 4 User s Manual Version 1 01 BURK Technology ii ...
Page 17: ...BURK Technology RX 4 User s Manual Version 1 01 13 ...
Page 28: ...RX 4 User s Manual Version 1 01 BURK Technology 24 APPENDIX RX 4 SCHEMATICS ...
Page 29: ...BURK Technology RX 4 User s Manual Version 1 01 25 ...
Page 31: ......
Page 32: ...RX 4 User s Manual Version 1 01 BURK Technology 4 ...
Page 33: ...BURK Technology RX 4 User s Manual Version 1 01 5 ...
Page 34: ...RX 4 User s Manual Version 1 01 BURK Technology 6 ...

