15
I Englsih
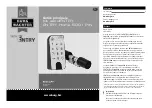
secuENTRY HOME 5000 CYL
QR
ENTRY 7711 Keypad PIN installation
ENTRY 7711 Keypad PIN installation - function test prior to installation
The installation of the
ENTRY 7711 Keypad PIN
is explained below.
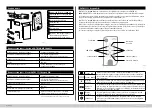
There are two options to choose from for installation. The
ENTRY 7711 Keypad PIN
wall bracket
can either be
screwed
or
adhered
directly to the wall.
Prior to installation, please read the installation instructions carefully.
!
1
2
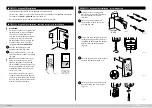
ATTENTION:
The distance between the cylinder and
the keypad can be up to a maximum
of four metres. This distance may
vary, however, depending on external
conditions. In order to ensure that
the keypad functions correctly in the
desired position, we recommend
testing it
fi
rst
before installation.
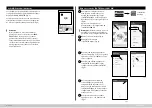
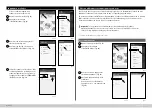
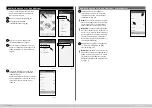
Place the keypad in the desired
installation location (Fig.
105).
Enter your administrator or user code
and check that the cylinder is activated
(
fi
g. 106).
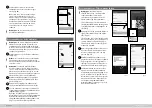
Note:
The administrator code, if you
haven't already changed it, can be
found on the sticker enclosed with
the secuENTRY cylinder (Fig.
107). The
master operating instructions for your
secuENTRY cylinder describe how to
create a user code.
If the cylinder activates, the signal
strength is su
ffi
cient and the keypad
can be installed in the desired location.
If not, try again with a shorter distance
between cylinder and keypad.
Fig.
107:
QR code sticker for
secuENTRY cylinder
Factory-assigned
administrator code
max. 4 m
!
Fig.
105
Fig.
106
ENTRY 7711 Keypad PIN installation - screw mounting
1
3
4
5
2
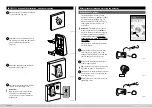
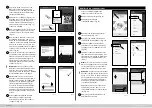
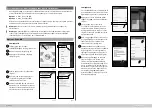
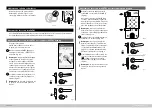
Drill three holes according to the
dimensions shown in the illustration.
Use a 6 mm diameter drill bit
(Fig.
108).
Insert the dowels supplied into
the holes and screw in the screws
provided (Fig.
109).
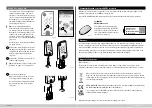
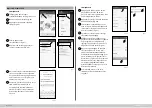
Remove the screw from the bottom of
the keypad using the Tx8 screwdriver
supplied with the keypad and pull the
battery compartment downwards
(Fig.
110).
Place the keypad on the screw heads as
shown in the illustration (Fig.
111).
Insert the battery compartment back
into the housing and screw it tight
(Fig.
112).
61 mm
40 mm
Ø 6 mm
Fig.
108
Fig.
109
Fig.
110
Fig.
111
Fig.
112


