2
N
L
5(2) A
HEATING
COOLING
NC
C
NO
NC
C
NO
110 - 240 V 50/60 Hz
2 W max.
BTICINO SpA
Viale Borri, 231
21100 VARESE
ITALY
4
5
5
6
7
13
8
9
10
11
12
2
3
1
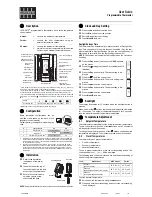
1.
Display touch-screen
2.
Visualizzazione temperatura/umidità
3.
Indicatore funzionamento in modalità
“Boost”
4.
Tasto connessione WiFi
5.
Tasti per impostazione temperatura
6.
Attivazione modalità Boost
7.
Tasto Reset (tenere premuto 10”,
riporta alle condizioni di fabbrica)
8.
Indicatore modalità manuale
9.
Indicatore riscaldamento acceso
10.
Indicatore raffrescamento acceso
11.
Indicatore “Termostato spento”;
temperatura di 7 °C (antigelo) in
funzionamento riscaldamento;
temperatura di 35 °C (protezione
termica) in funzionamento
raffrescamento.
12.
Indicatore connessione Wi-Fi
13.
Morsetti di collegamento (vedi schemi)
1.
Touch screen display
2.
Temperature/humidity display
3.
“Boost” mode indicator
4.
Wi-Fi connection key
5.
Keys for temperature setting
6.
Boost mode activation
7.
Reset key (keep pressed for 10”, it restores
the factory settings)
8.
Manual mode indicator
9.
ON heating indicator
10.
ON cooling indicator
11.
“OFF thermostat” indicator;
7 °C temperature (antifrost) in heating
function; 35 °C temperature (heat
protection) in cooling function.
12.
Wi-Fi connection indicator
13.
Connection clamps (see diagrams)
1.
Écran tactile
2.
Visualisation température/humidité
3.
Indicateur de fonctionnement en
modalité « Boost »
4.
Touche connexion Wi-Fi
5.
Touches de réglages température
6.
Activation modalité Boost
7.
Touche Reset (maintenir enfoncée pendant
10” ; rétablit les réglages par défaut)
8.
Indicateur modalité manuelle
9.
Indicateur chauffage allumé
10.
Indicateur climatisation allumée
11.
Indicateur « Thermostat éteint » ;
température de 7°C (antigel)
en fonctionnement chauffage ;
température de 35°C (protection
thermique) en fonctionnement
climatisation.
12.
Indicateur connexion Wi-Fi
13.
Bornes de branchement (voir schémas)
1.
Display Touchscreen
2.
Anzeige der Temperatur/Feuchtigkeit
3.
Anzeige des Betriebsmodus "Boost"
4.
Taste für die WiFi-Verbindung
5.
Tasten zur Temperatureinstellung
6.
Aktivieren des Boost-Modus
7.
Resettaste (10" gedrückt halten, um auf
die werkseitigen Einstellungen wieder
herzustellen)
8.
Anzeige des manuellen Modus
9.
Anzeige Heizung ON
10.
Anzeige Kühlung ON
11.
Anzeige "Thermostat OFF"; Temperatur
7°C (Frostschutz) wenn auf Heizen;
Temperatur 35°C (Wärmeschutz) wenn
auf Kühlen.
12.
Anzeige WiFi-Verbindung
13.
Anschlussklemmen (siehe Pläne)
1.
Display touchscreen
2.
Weergave temperatuur/vochtigheid
3.
Indicator werking in “boost”-modus
4.
Toets WiFi-verbinding
5.
Toetsen voor temperatuurinstelling
6.
Activering boost-modus
7.
Resettoets (10” ingedrukt houden,
herstelt de fabrieksinstellingen)
8.
Indicator handbediende modus
9.
Indicator verwarming ingeschakeld
10.
Indicator koeling ingeschakeld
11.
Indicator “Thermostaat uit”; temperatuur
van 7 °C (antivriesbeveiliging) bij
verwarming; temperatuur van 35 °C
(thermische beveiliging) bij koeling.
12.
Indicator WiFi-verbinding
13.
Aansluitklemmen (zie schema's)
1.
Displej s dotykovou obrazovkou
2.
Zobrazování teploty/vlhkosti
3.
Indikátor fungování v módu „Boost“
4.
Tlačítko připojení Wifi
5.
Tlačítka pro nastavení teploty
6.
Aktivace módu Boost
7.
Tlačítko Reset (držte stisknuté 10”,
navrátí se na tovární nastavení)
8.
Indikátor ručního módu
9.
Indikátor zapnutého ohřívání
10.
Indikátor zapnutého chlazení
11.
Indikátor „Termostat vypnutý”; teplota
7 °C (proti mrazu) při chodu ohřívání;
teplota 35 °C (tepelná ochrana) při
chodu chlazení.
12.
Indikátor připojení Wi-Fi
13.
Připojovací svorky (viz schémata)
1.
Pantalla táctil
2.
Visualización temperatura/humedad
3.
Indicador de funcionamiento en el
modo "Boost"
4.
Tecla conexión WiFi
5.
Teclas para el ajuste de la temperatura
6.
Activación del modo Boos
7.
Tecla Reset (presionada 10" restablece
las condiciones de la fábrica)
8.
Indicador de modo manual
9.
Indicador de calefacción encendida
10.
Indicador de refrigeración encendida
11.
Indicador de "Termostato apagado";
temperatura de 7 °C (antihielo) en
funcionamiento calefacción;
temperatura de 35 °C (protección
térmica) en funcionamiento
refrigeración.
12.
Indicador de conexión Wi-Fi
13.
Bornes de conexión (véase los
esquemas)


